
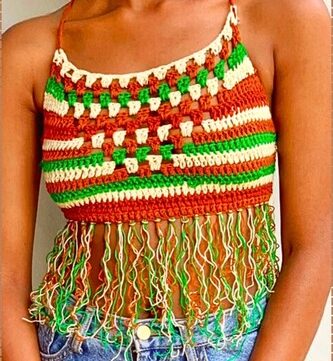
The 3-in-1 Crochet Babydoll Delilah Top is a playful and versatile project perfect for anyone who loves to personalize their wardrobe. With its multifunctional design, you can fashion a look that's uniquely yours while enjoying the process of crocheting a piece that can change with your needs. It's not just a top—it's a statement of your skill and creativity, suitable for a variety of occasions.
3-in-1 Crochet Babydoll Delilah Top

Materials Needed:
- Cotton yarn (breathable for summer)
- Crochet hook (suggested size not specified)
- Measuring tape
- Stitch markers (optional for marking strap placement)
- Elastic thread (for bust support)
Measurements:
Rib Cage:
- Measure around your rib cage, right under your bust. Write this number down.
Bust Height:
- Measure from where you would want a tube top to sit across the fullest part of your bust to get the height for the boob part. Write this down.
Creating the Back Panel (Mesh Pattern):

Start:
- with a slip knot, then chain a length that is half your rib cage measurement (ensure it is a multiple of 2, then add 1 more chain).
Row 1:
- Single crochet across the entire row.
After Row 2:
- Chain 3 (counts as first double crochet), chain 1 more, skip the first single crochet, double crochet into the third stitch. Continue the pattern across (chain 1, skip one, double crochet in the next).
Row 3:
- Chain 1, single crochet into every double crochet and chain space from the previous row.
Repeat:
- The mesh pattern (Rows 2 and 3), ending on a single crochet row until the panel reaches your bust height.
Creating the Bust Sections:

Crochet Version:
Start:
- on the side of the back panel, single crochet into the side of the row to attach.
Conduct single crochets evenly across the side of the back panel:
- Aiming for three single crochets into the side of each double crochet row and one single crochet into the side of each single crochet row.
Continue:
- to build the bust section by working back and forth in single crochets until it measures half of your back panel width.
Knit Version:
- Imagine crocheting two rows as you would for the crochet version to establish a base.
- Transfer stitches to knitting needles and work in stockinette stitch (knit one row, purl one row) until the knit panel matches the half width of your crochet back panel.
Joining and Finishing:

Create a strong, stretchy string:
- Chain a length using elastic thread, long enough to lace through the bust section and tie.
Assembly:
- Loop the string through the open loops at the top of both bust panels, creating a drawstring effect and halter neck tie.
Attaching the Bust to the Lace Bodice:
- Starting at the bottom edge of the bust section, begin crocheting the lace pattern in rounds until you reach the desired length.

Wave Pattern for Hem:
- Add a decorative wave stitch pattern at the hem for a ruffled effect.
Straps:
- After trying on the top, mark where you want the straps. Using a chain stitch, create straps and securely attach them to the top's back.
Elastic Thread:
- For additional support, weave elastic thread through the single crochet row at the top of the bust section, making tight slip stitches all around.

Leave a Reply