
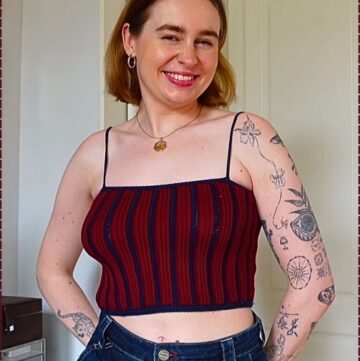
Are you ready to add a touch of bohemian charm to your wardrobe? The crochet backless tank top pattern is the perfect project for those who love to showcase their crochet skills while creating a stylish and breezy summer top. With its intricate crochet design and alluring open back, this pattern promises to turn heads and keep you cool on those hot summer days. Whether you're lounging by the pool or attending a music festival, this tank top will be a standout piece in your collection.
Crochet Backless Tank Top

Materials Required:
- Retreat chunky roving yarn
- 12 mm crochet hook (doubled the hook size recommended for the yarn)
- Yarn needle
Starting Pattern

Front Piece:
- Make a chain that is long enough to wrap around the front of your body, from one side of your waist to the other.
- Chain loosely, ensuring that the single crochets are super loose in order to make it stretchy.
- Put one single crochet into each chain, skipping the first one as it counts as the first single crochet.

Repeat this process for the entire row, ensuring that each stitch is super loose.
- To start the knit stitch, chain one and turn the work.
- Put single crochets into the posts of the stitches, creating a knit-like look.
- Repeat this process for the entire row, making sure to maintain loose stitches.

Continue repeating the knit stitch rows until the front piece reaches the desired length, making sure it’s long enough to come up to the shoulders.
Back Piece:

Make a chain of the same length as the front piece.
- Repeat the knit stitch for several rows, creating the bottom of the back portion.
- Create two side pieces that go over the shoulders by crocheting a specific number of stitches to match the width desired.
- Continue crocheting back and forth to create the side pieces until they reach the same length as the front piece.
Assembly:

Sew the front and back pieces together along the top where the shoulders are. Using a yarn needle and the tail left from crocheting to sew it together.
- Stitch up the sides to create the armholes, ensuring to leave enough space for the armhole (approximately 14 cm at the top).
Finishing:
- Cut the yarn and weave in the ends.
- Try the top on and ensure that it fits as desired.
Leave a Reply