
This beginner-friendly crochet granny square top is a simple yet eye-catching project that combines classic solid granny squares with a decorative swirly wavy border. Designed with straightforward construction, this pattern is perfect for crocheters who want to make a wearable garment without complicated shaping or advanced techniques.
Crochet Top

The top is built using four solid granny squares that are joined together to form the body, making sizing easy to customize by adjusting square size, yarn weight, or hook size. The unique wavy border adds texture, movement, and a modern handmade finish that transforms a basic granny square top into a stylish statement piece. This crochet top works beautifully as a summer top, layering piece, or casual everyday garment.
Materials
- Medium weight yarn size 4 in two colors
- 6 mm crochet hook for the body
- 5.5 mm crochet hook for the border
- Tapestry needle
- Scissors
- Four solid granny squares with five rounds each
Square Measurements and Sizing
- Each square measures approximately 7.5 inches by 7.5 inches for a Medium size
- To make a smaller top, use a smaller hook or fewer rounds per square
- To make a larger top, increase hook size or add extra rounds to each square
- The pattern is easily adjustable by changing square dimensions before assembly
Preparing the Granny Squares
- Make four identical solid granny squares with five rounds each
- Ensure all squares are the same size before joining
- Lightly block the squares if needed so edges are straight and even
- Arrange the squares into two pairs before joining
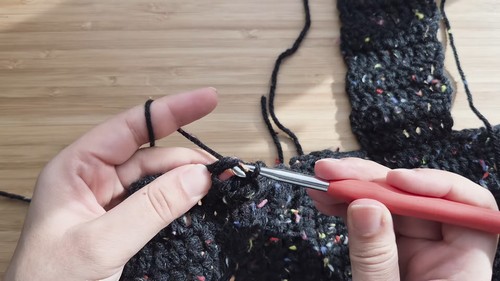
Joining the Front and Back Panels
- Place two granny squares together with right sides facing each other
- Insert the hook through both corner stitches
- Pull up a loop and chain one to secure
- Single crochet through both layers across the entire edge
- Continue working evenly until the two squares are fully joined
- Repeat the same joining process with the remaining two squares
- You now have two panels that will form the front and back of the top
Creating the Body Shape
- Place the two panels together with right sides facing each other
- Join one side edge completely using single crochet
- Join the opposite side edge, leaving the top edges open for armholes and neckline
- Do not join the top edges
- Turn the work right side out once joining is complete
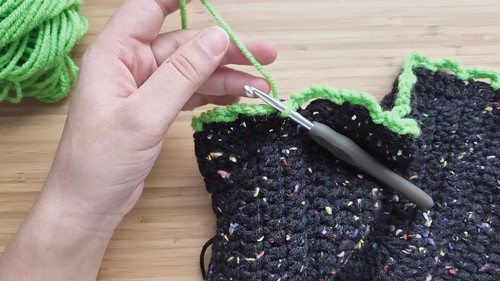
Strap Placement
- Lay the top flat with the front facing you
- On the front panel, count ten stitches inward from the top corner
- Attach yarn at this point for the first strap
- Ensure straps are centered and evenly spaced before continuing
Step 5: Creating the First Strap
- Chain three to count as the first double crochet
- Work one double crochet into each of the next seven stitches
- You will have eight double crochets across
- Chain two and turn the work
- Double crochet into each stitch across
- Repeat this row until the strap measures approximately fourteen inches
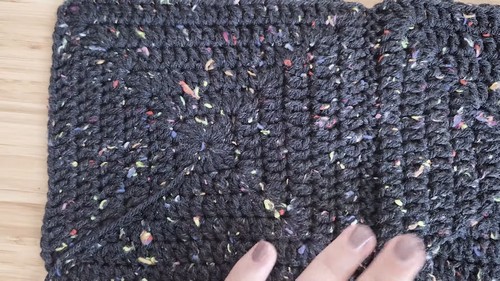
- The strap will be worked in rows and should be sturdy but flexible
Creating the Second Strap
- On the opposite side of the front panel, count eighteen stitches inward from the corner
- Attach yarn at this point
- Repeat the exact same strap instructions
- Make sure both straps are the same length
Attaching the Straps to the Back Panel
- Turn the entire top so the wrong side is facing up
- Align the end of the first strap with the back panel
- Start attaching the strap ten stitches in from the back corner
- Slip stitch through both the strap and the back panel for eight stitches
- Secure the strap firmly but do not pull too tight
- Repeat the same process for the second strap
Preparing for the Border
- Switch to the 5.5 mm crochet hook
- Attach the border color yarn at the bottom edge of the top
- Work evenly around the bottom edge and along the straps
Border Round One
- Chain five
- Skip two stitches
- Slip stitch into the third stitch
- Repeat the chain five, skip two, slip stitch pattern evenly around the entire edge
- Maintain consistent spacing so the loops remain even
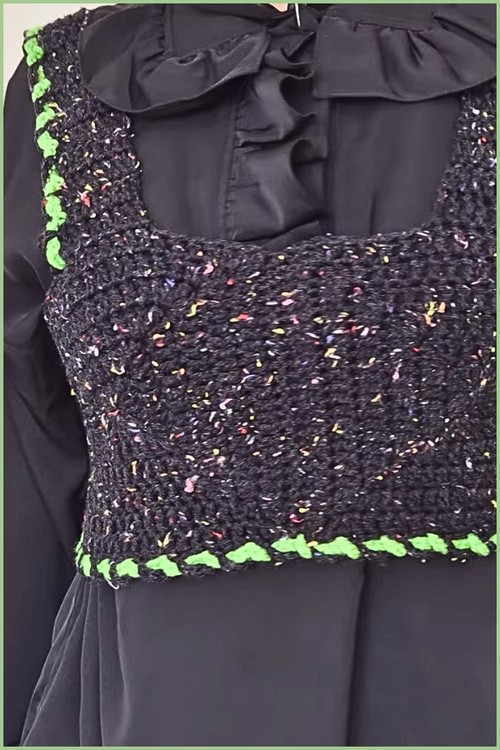
Border Round Two Swirly Effect
- Switch to the second border color or return to the main body color
- Chain five
- Push the loop from the previous round aside to locate the two skipped stitches underneath
- Slip stitch into the first skipped stitch
- Loosen the loop currently on the hook
- Remove the hook carefully
- Reinsert the hook from the front through the large chain five loop from the previous round
- Pull the loose loop through to the front
- Chain five
- Repeat the same steps around to create the interlocked swirly pattern
Finishing
- Fasten off all yarn ends securely
- Weave in all loose ends using a tapestry needle
- Lightly block the top so the squares sit flat
- Shape the wavy border so it lays evenly

Leave a Reply