
This Raglan-style crochet pattern is a beautiful top-down design that gives you full control over shaping, sizing, and length. Whether you want to create a cozy sweater or a flowing dress, this pattern adapts easily to your style.
Crochet Raglan Outfit

It begins with a neat ribbed collar, transitions into a structured raglan yoke, and finishes with customizable sleeves and body length. The step-by-step build makes it easy to adjust the fit, giving you a comfortable and flattering handmade garment you can wear all year round.
Materials
- Yarn of your choice
- Crochet hook size recommended for yarn
- Scissors
- Tapestry needle
- Stitch markers
Starting the Neck or Collar
- Make a slip knot and chain 9 for the collar.
- Work SC in the second chain from the hook and across.
- Chain 1, turn, and work SC in the back loop only.
- Continue repeating until you have 78 rows.
- Slip stitch the two ends together through the back loops and turn inside out.
Starting the Raglan Yoke
- Chain 1 and work 78 SC around the collar edge and slip stitch to join.

Raglan Round Setup
- Chain 3, chain 1, and DC in the same stitch to form the first corner.
- DC in the next 24 stitches for the first front or back panel.
- Work DC, chain 1, DC in the next stitch for the second corner.
- DC in the next 13 stitches for the first sleeve panel.
- Work DC, chain 1, DC in the next stitch for the third corner.
- DC in the next 24 stitches for the second front or back panel.
- Work DC, chain 1, DC in the next stitch for the fourth corner.
- DC in the next 13 stitches for the second sleeve panel.
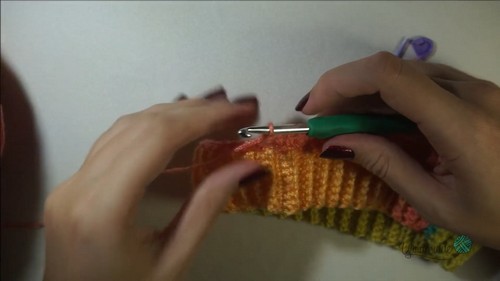
- Slip stitch to the second chain of the starting chain 3 and slip stitch into the corner space.
Raglan Increasing Rounds
- Chain 3, chain 1, and DC in the same corner space.
- Work DC in every stitch across each panel.
- Work DC, chain 1, DC into each corner space as you reach it.
- Continue repeating these rounds until the four corners reach under the armpits when laid flat.
- Stop after about 23 rounds or your preferred yoke depth.
Separating Sleeves From Body
- Chain 2 and DC in the first stitch.
- Chain 8 to create the first armhole bridge.
- Skip all stitches of the first sleeve panel.
- DC into the first stitch of the next body panel.
- Work DC across to the next corner.
- Chain 8 to create the second armhole bridge.
- Skip the entire second sleeve panel.
- DC into the first stitch of the last body panel.
- DC across to finish the round and slip stitch to join.

Creating the Body
- DC in the first stitch and continue DC in every stitch around.
- Work one DC into each chain on the armhole bridges.
- Repeat DC rounds until you reach your desired dress or sweater length.
Finishing the Body
- Work one HDC in the first stitch, then one SC in the next stitch.
- Work SC in every stitch for the rest of the round and slip stitch to join.
Adding the Bottom Ribbon or Border
- Chain 5 for a thin ribbon.
- Work SC in the second chain from hook and across for four SC.
- Slip stitch into the next two stitches on the garment edge.
- Turn and work SC in the back loop only across the ribbon.
- Chain 1, turn, and work SC in the back loop only to go back down.
- Slip stitch into the next two stitches on the garment edge.
- Repeat this around the entire bottom edge.
- Slip stitch the two ribbon ends together through the back loops.

Creating the Sleeves
- Attach yarn to one of the chains under the arm.
- Chain 3 and DC in every stitch around the armhole, including one DC in each chain of the underarm bridge.
- Slip stitch to join the round.
- Chain 1, DC in the same stitch, and continue DC rounds until the sleeve reaches your preferred length.
Finishing the Sleeves
- Work one HDC in the first stitch and then one SC in the next stitch.
- Work SC in all stitches to finish the round.
- Work SC two together all around for the first reduction.
- Work one SC, then SC two together all around for a second reduction, and slip stitch to join.
Sleeve Ribbon or Cuff
- Chain 16 for a thicker cuff.
- Work SC in the second chain from the hook and down.
- Slip stitch into the next two stitches on the cuff edge.
- Repeat the ribbon process by working SC in the back loop only and attaching with slip stitches.
- Continue around the cuff and slip stitch the ends together through back loops.
- Repeat sleeve steps for the second sleeve.



Leave a Reply