
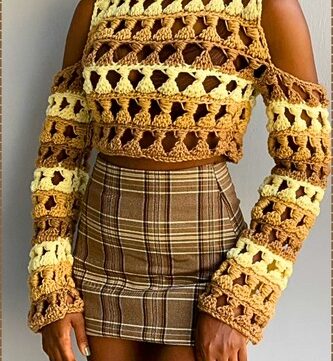
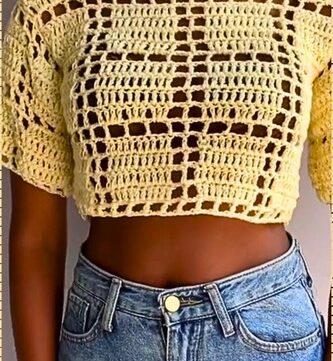
Blusa Inma is a lightweight crochet blouse built from beautiful granny squares, then shaped with simple granny cluster rows for the neckline, shoulders, and sleeves. Because the body is made from modular squares, it’s easy to resize, change the length, or adjust sleeve depth without complicated math.
Crochet Blouse

The square motif has a floral center that turns into a clean square frame, giving the blouse a modern statement look while staying comfortable and breathable. This pattern walks you through making the Inma squares, assembling the front and back panels, shaping the neckline, and finishing with ruffled sleeves and a picot edging.
Key Measurements and Sizing Notes
- Target blocked square size for S/M is about 19 cm
- S/M uses 12 squares total
- Body layout is two panels of 3 squares wide by 2 squares tall
- Larger sizes are made by adding rounds to each square until the square becomes larger
- If you prefer a longer blouse, add more granny cluster rows at the hem area after assembly
Tools and Yarn Notes
- Use a 5.5 mm hook for the squares and main body construction
- Use a 4.5 mm hook for the sleeve ruffle section if you want it denser
- Choose a cotton yarn that normally recommends a 3 to 4 mm hook, the larger hook creates better drape
- Block each square to the same size before joining for the cleanest fit
Stitch Abbreviations
- ch chain
- sl st slip stitch
- sc single crochet
- dc double crochet
- tc treble crochet
- sp space
- granny cluster 3 dc in the same space
- picot 3 sc, ch 3, sl st into first chain
Inma Granny Square Make 12 for Size S/M

Center Ring
- Make a magic ring
- Ch 4 to count as 1 dc plus ch 1
- Work the following into the ring 11 times
- Dc, ch 1
- You should have 12 dc total with a ch 1 space between each
- Pull ring tight
- Sl st into the 3rd chain of the starting ch 4 to close
Build the Circle
- Ch 3 to count as first dc
- In the first ch 1 space work 2 dc
- Work 1 dc in each dc from previous round
- In every ch 1 space work 2 dc
- Continue around keeping the increases consistent in each chain space
- Sl st to the top of starting ch 3 to close
Petal Cluster Round
- Ch 4 to count as first tc
- In the next stitch work 2 tc unfinished, keep loops on hook
- In the third stitch work 1 tc
- Yarn over and pull through all loops on hook to close the cluster
- Ch 3
- Repeat the same cluster formation around the entire circle
- Sl st to close at the end of the round
Squaring Round
- Work into the tops of the petal clusters to create corners and sides
- Corner section work 1 sc, ch 5, 1 sc in the same petal top
- Side section work ch 4, 1 sc in next petal top
- Continue side section ch 4, 1 sc in next petal top, ch 4
- Repeat corner and side pattern all the way around
- You should form 4 corners and 4 sides
- Sl st to close at the end
Granny Frame Round
- Sl st to move into the corner ch 5 space
- Corner work 3 dc, ch 2, 3 dc in the corner space
- Side work ch 1, in next ch 4 space work 3 dc
- Continue ch 1, 3 dc in each ch 4 space across that side
- At next corner work 3 dc, ch 2, 3 dc
- Repeat around
- Sl st to close
Optional Extra Rounds for Bigger Sizes
- If you need bigger square size for M/L/XL add more rounds using the same logic as Round 5
- Each new round should use
- Corners 3 dc, ch 2, 3 dc
- Between corner clusters work ch 1 and 3 dc in each space across
- Stop when your blocked square gives the bust width you want
Blocking Notes
- Wet block or steam block each square
- Pin to the same measurements for every square
- Let dry fully before joining
Layout for Body Panels
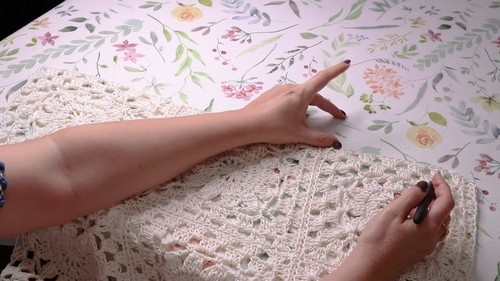
Front Panel 3 by 2
- Arrange 6 squares as 3 squares across and 2 squares down
- Decide which side you want as the right side of fabric
- Keep all squares facing the same direction so motifs match visually
Back Panel 3 by 2
- Arrange the remaining 6 squares in the same layout
- Confirm both panels measure the same before sewing
Joining Method Seam that Stays Flexible
- Place two squares with right sides facing inward
- Thread a tapestry needle with yarn
- Sew through back loops only of both squares along the edge
- Keep stitches even and not too tight
- Repeat until you have two complete panels
Join Each Panel Into One Rectangle
- Join the three squares across for the top row
- Join the three squares across for the bottom row
- Join the two rows together to form a 3 by 2 panel
- Repeat for second panel
Join Front and Back at Sides
- Place panels right sides together
- Sew the side edges from the bottom upward
- Stop early to leave an armhole opening on each side
- Repeat for both sides
- Try on or measure to confirm armhole depth feels comfortable
Neckline and Shoulder Construction
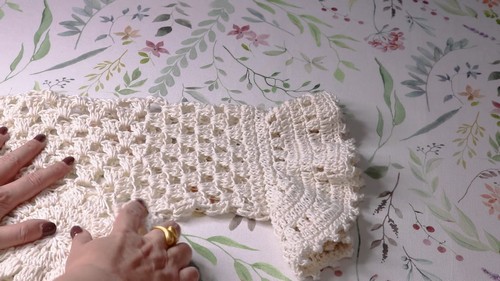
Identify Top Edge
- Choose the top edge of each panel
- The top edge is where neckline shaping and shoulder joining will happen
Front Neckline Shaping with Granny Cluster Rows
- Attach yarn at the top corner of the front panel
- Work across the top edge using granny clusters
- Make clusters in available spaces along the top edge
- To shape the neckline decrease at the neckline edge each row
- Work 4 to 5 rows total
- Each new row should be slightly shorter at the neck edge
- Continue until the front neckline dip looks right for you
Back Neckline Rows
- Attach yarn at the top of the back panel
- Work 5 full rows of granny clusters straight across the top edge
- Keep the back neckline higher than the front
Join Shoulders
- Place front and back right sides together
- Sew the top edges at each shoulder
- Leave a center opening for the head
- Target opening is about 19 cm for S/M
- Adjust opening if you want a wider neckline
Sleeves

Sleeve Base Granny Cluster Rounds
- With blouse right side out attach yarn at underarm of armhole
- Work granny clusters evenly around the armhole opening
- Work 6 rounds total
- Keep stitch placement consistent so sleeve hangs evenly
- Sl st to close each round
Sleeve Ruffle Change Hook
- Switch to a 4.5 mm hook to tighten the fabric if desired
- Work 2 rounds of dc evenly around the sleeve edge
- Sl st to close each round
Ruffle Increase Round
- Work the following around
- 2 dc, ch 1, skip 1 stitch
- Repeat all the way around
- Sl st to close
Ruffle Flare Round
- Work 1 dc in each dc
- Work 2 dc in each ch 1 space
- Repeat around
- Sl st to close
- Add an extra flare round if you want a bigger ruffle
Neckline and Sleeve Edging Picot
- Attach yarn at neckline edge
- Work edging around using the following repeat
- 3 sc
- Ch 3
- Sl st into the first chain to form picot
- Continue around evenly
- Repeat the same edging on sleeve edges if you want matching finish
Finishing
- Weave in all ends securely
- Check seams and reinforce any stress points at underarm
- Block the blouse lightly to settle stitches
- Let dry flat
Customization Options
- For a cropped blouse reduce the number of sleeve rounds or skip ruffle
- For longer sleeves add more granny cluster rounds before the ruffle
- For a longer body add a granny cluster hem after side seams are complete
- For a wider neckline leave a larger head opening and reduce back rows
- For a tighter fit make smaller squares or use fewer extra rounds
Leave a Reply