
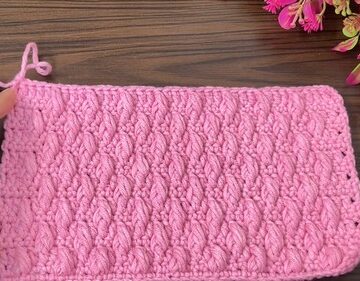
The Ripple Stitch is a timeless and visually striking crochet pattern that mimics the calming flow of ocean waves. Whether you're creating a cozy blanket, a chic scarf, or a decorative throw, the ripple stitch offers endless customization options through color changes and sizing.
Crochet Ripple Stitch

The repetition makes it meditative and relaxing, while the sculpted texture ensures a stunning finish every time. With just a few basic materials and a little practice, you’ll master the rhythmic rise and fall that gives the ripple its signature look.
Materials You'll Need:
- Worsted weight yarn
- 5 mm crochet hook
- Stitch markers (optional for larger projects)
- Scissors
- Tapestry needle (for weaving in ends)
Getting Started:
Slip Knot:
- Create a slip knot on your hook.
Foundation Chain:
- Chain a multiple of 18
- Add 3 extra chains (e.g., 36 + 3 = 39 for the demo)
Row 1:

Skip First Chains:
- Skip the first 3 chains
Double Crochet (DC):
- Make 2 DCs in the 4th chain from the hook
Next 6 Chains:
- Make 1 DC in each of the next 6 chains

Bottom Ripple (Decrease Section):
- DC2Tog:
- Yarn over, insert into next stitch, yarn over and pull through
- Yarn over, pull through two loops
- Repeat in next stitch
- Yarn over, pull through all 3 loops on hook
- Repeat DC2Tog one more time
Next 6 Chains:
- Make 1 DC in each chain
Top Ripple (Increase Section):
- Make 2 DCs in the next chain
- Make 2 DCs in the following chain
Repeat Pattern:
- Continue with the following sequence:
- 6 DCs
- 2 sets of DC2Tog
- 6 DCs
- 2 DCs in each of next 2 chains
End of Row:
- Make 2 DCs in the last stitch
Row 2 and Beyond:

Start Row:
- Chain 3 (counts as first DC), turn your work
Repeat Pattern from Row 1:
- 1 DC in next stitch
- 6 DCs
- 2 sets of DC2Tog
- 6 DCs
- 2 DCs in each of next 2 stitches
- Continue the sequence to the end

Row End:
- 2 DCs in top of the turning chain from previous row
Finishing:
- Repeat Row 2 for desired length
- Cut the yarn
- Weave in all ends using a tapestry needle


Leave a Reply