
This lightweight Crochet mesh top pattern is perfect for beginners and seasoned crocheters alike. Designed using simple stitches and a breathable openwork design, it’s the ultimate go-to for layering in any season. The pattern includes easy-to-follow steps to create a custom-fitted top with a flattering neckline and comfy sleeves.
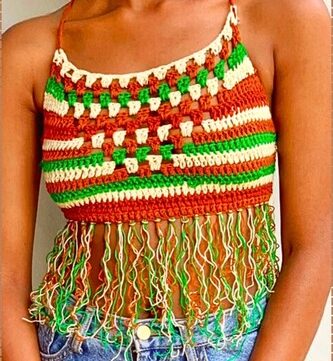
Crochet Mesh Top

Whether you want a casual summer look or a stylish handmade gift, this versatile mesh top offers plenty of room for customization—from yarn choices to sizing. It’s modern, fun, and effortlessly wearable.
Materials Needed
- Yarn: Sugar Will Cotton Sparkle
- Crochet Hook: 6.0 mm
Foundation Chain
- Make a slip knot.
- Chain 58 (or any even number).
- Your chain should measure half of your chest size plus 1 inch for ease.

Row 1: Single Crochet Foundation
- Single crochet in the second chain from the hook.
- Work into the back bump of each chain across.
- You should end with 57 single crochets.
Row 2: Start Mesh Pattern
- Chain 4 and turn.
- Skip 1 stitch, DC into next stitch.
- Chain 1, skip 1, DC into the next stitch.
- Repeat the * pattern across the row.
For Row 3: Continue Mesh Pattern
- Chain 4 and turn.
- DC into the first stitch.
- Chain 1, DC into the next stitch.
- Repeat across.
- At the end, chain 1 and DC into the third chain.

Additional Rows
- Repeat Row 3 for the desired length.
- For reference, 10 mesh rows were used (excluding the first single crochet row).
Creating the Shoulder
- Mark the sixth mesh space on both ends using stitch markers.
Neckline and Back Panel
- Chain 4 and turn.
- DC into the first space, then follow the mesh pattern (chain 1, DC) for six spaces.
- You should have 31 stitches total.
- Chain 31 to form the neck opening.
- DC into the stitch with the opposite side’s stitch marker.
- Continue the mesh pattern to the end of the row.
- Chain 4 and turn to begin the back panel.
- Follow the mesh pattern again, including across the chained neck section.
- Make 10 rows to match the front panel.

Finishing the Main Body
- Chain 1 and turn.
- Single crochet into the first stitch.
- Continue single crocheting into each chain 1 space and each DC across.
- End with a single crochet into the last space and the third chain.
Attaching the Sides
- Fold the mesh top right sides together.
- Working on the wrong side, crochet the side seams together.
- Leave one space open on each side to create armholes.
Creating the Sleeves
- Switch to a smaller hook if needed.
- Attach yarn at the armhole.
- Chain 1, then chain 4.
- DC into next stitch, chain 1.
- Continue around the armhole.
- End the round by chaining 1 and slip stitching into the third chain.
- For each new row: Chain 4, turn, and repeat the mesh pattern.
- Make 27 rounds.
- Add 1 round of single crochet at the end (28 total rounds).

Sleeve Edge Finishing
- Chain 1 and turn.
- Single crochet around, working into each chain 1 space and each DC.
- Slip stitch into the first single crochet.
- Chain 1, cut the yarn, and weave in the ends on the wrong side.
Repeat for the Other Sleeve
- Attach yarn and repeat the sleeve steps on the opposite side.
- Change back to a 6 mm hook if needed.

Final Touches
- Turn the mesh top inside out so the right side is showing.
- Weave in all remaining ends securely.


Leave a Reply