
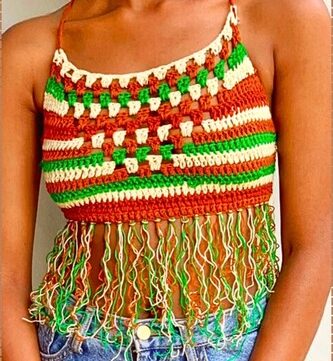
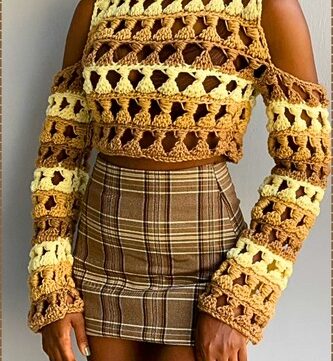
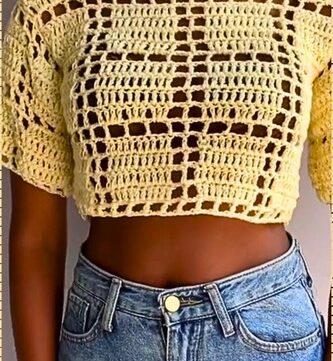
Looking forward to adding a piece of unique clothing to your collection? Our tutorial is here to guide you through creating a charming lace top or shrug sweater that suits all sizes. Perfect for those just starting out with crochet or seasoned artisans looking for a new project, this tutorial offers clear instructions to help you piece together a lovely, versatile garment.
Crochet Lace Top / Shrug Sweater Tutorial All Sizes

From selecting your yarn to finishing the final stitch, this guide covers everything you need to contrive a beautiful addition to your wardrobe or a heartful present for someone special. Let’s get started on stitching a piece that’s as enjoyable to make as it is to wear.
Materials Needed:
- Tape measure
- Scissors
- Hook: 3.5 millimeter (mm)
- Yarn: DK yarn size, 50 grams, 133 meters each skein, acrylic (recommendation is 3.5 to 4.5 hook size, but using 3.5 for this project)
Gauge:
Not specified in the text, always important to create a swatch to match the pattern gauge for sizing correctness.
Pattern Overview:
The top is created starting from the back panel, working in multiple of 13 chains. It involves creating a mesh pattern with double and half-double crochets and repeating the pattern for uniformity across the garment. This same approach is repeated for the front panel and sleeves, maintaining consistency in the pattern throughout.
Back Panel:

Foundation Row: Chain a multiple of 13 (e.g., 78 chains for extra small size). Add four inches to your shoulder-to-shoulder measurement to determine the length of your chain.
- Row 1: Chain two more, yarn over, skip first two chains, and half double crochet in the third chain. Continue half double crochet to the end of the row.
Pattern Setup Row: Chain three, turn your work, skip next two stitches, and work a double crochet into the third. Continue the pattern as follows -
- Chain three, make a double crochet, skip one (for a mesh-like pattern), and double crochet in the next, repeating across the row.
- End the row with a double crochet in the last stitch to match the beginning.
Repeat Pattern: Follow the established pattern, alternating rows of chain spaces and half double crochets to achieve the desired length.
Front Panel:

Repeat steps from the back panel to create an identical piece.
Joining Panels:
- Place panels with the wrong sides facing each other.
- Stitch the shoulders together, leaving an 11-inch gap for the neckline.

Sleeves:
- Foundation: Chain 65 or to fit your arm circumference plus four inches, join to work in the round.
- Setup Round: Half double crochets around.
- Pattern Round: Alternate between chain spaces and double crochets to match the body pattern, decreasing stitches for the cuff.
- Cuff: Switch to front post and back post double crochet stitches to create ribbing at the wrist.
- Attach sleeves to the body at the armholes.
Finishing Touches:
- You may choose to add single crochet edging around the neckline for a finished look.
- Weave in all ends.


Leave a Reply