
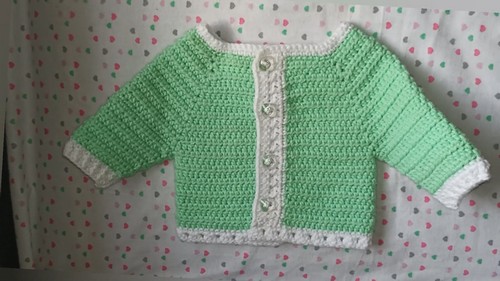
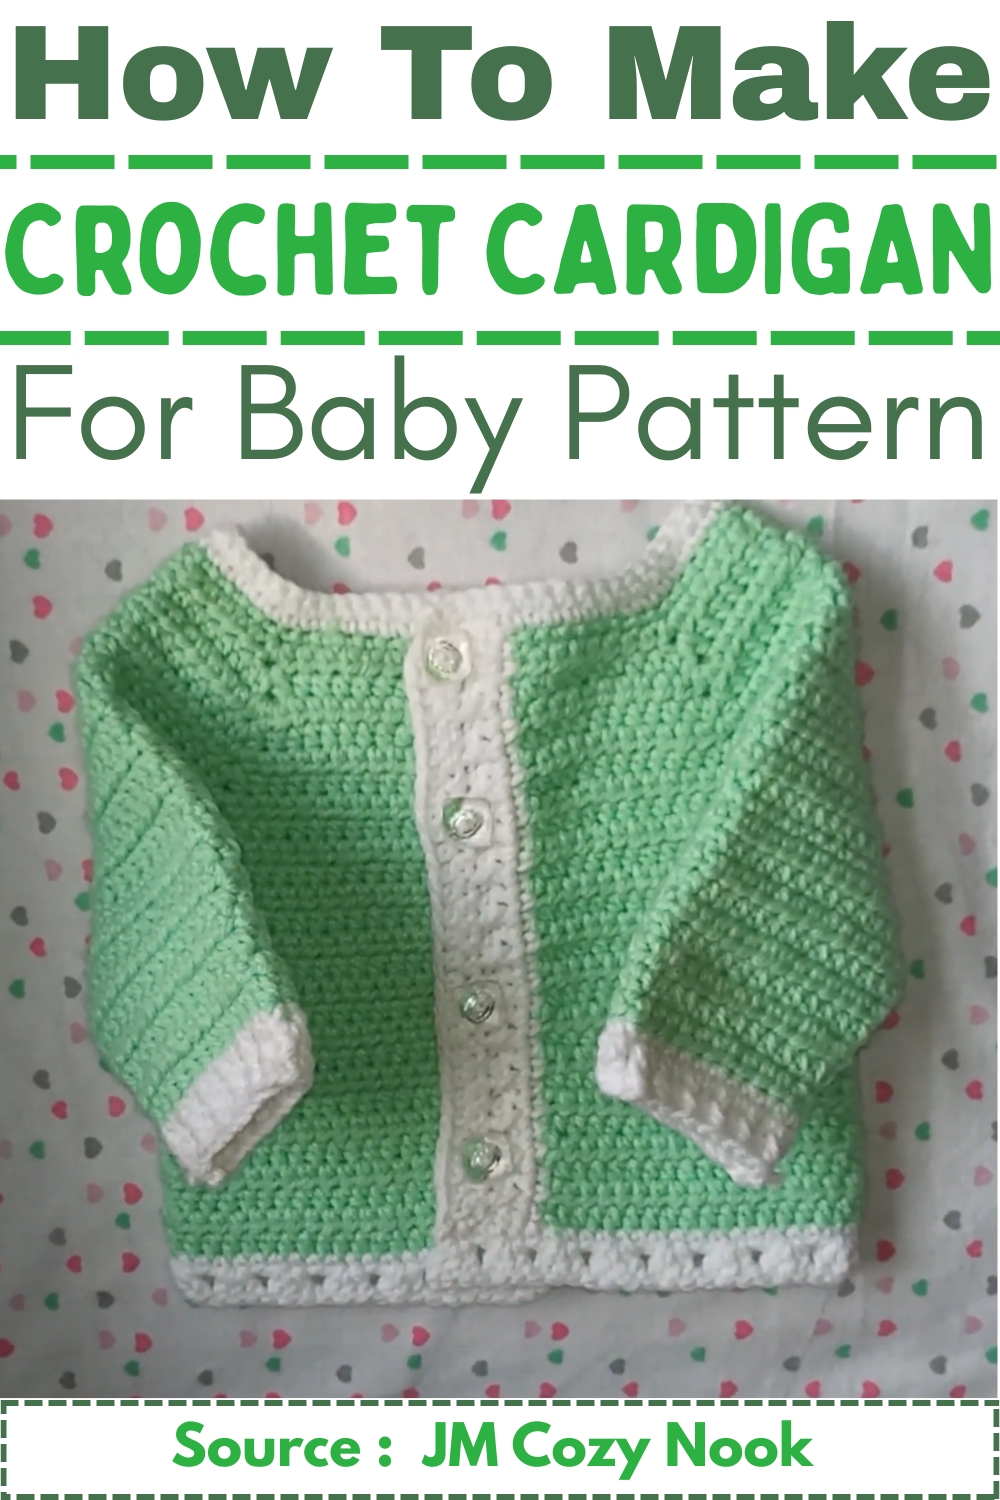
The Crochet Top-Down Cardigan Pattern is a game-changer for crochet enthusiasts seeking both style and comfort. This pattern allows you to effortlessly create a cozy, custom-fit cardigan, starting from the neckline and working your way down for a seamless, beautiful finish.
Crochet Top Down Cardigan
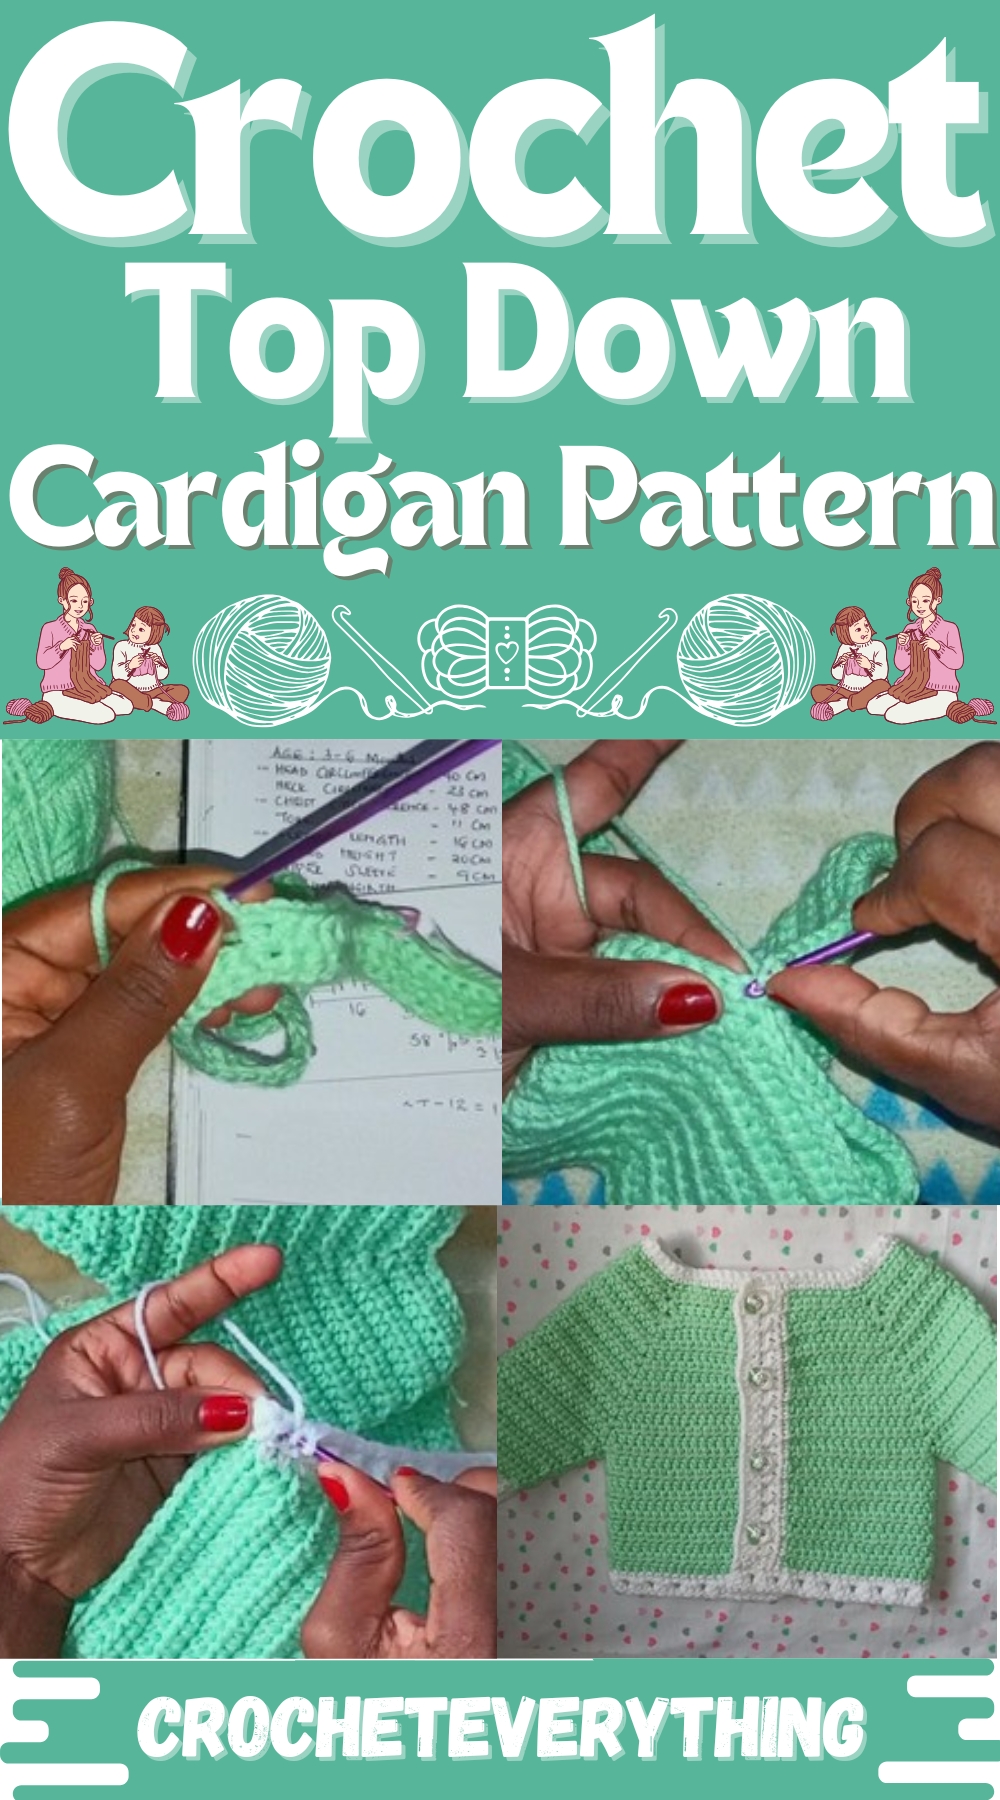
This design offers endless possibilities to experiment with colors, textures, and embellishments. Whether you're crafting a lightweight layer for summer or a warm, chunky sweater for winter, this versatile pattern is a must-try for anyone looking to add a personal touch to their wardrobe. Get ready to crochet a timeless piece that’s as enjoyable to make as it is to wear!
Materials Needed:
- Yarn: 100% acrylic, over 100g.
- Crochet Hook: 4.0 mm.
- Tape Measure, Stitch Marker, Needle.
Pattern Steps:
Foundation Chain:
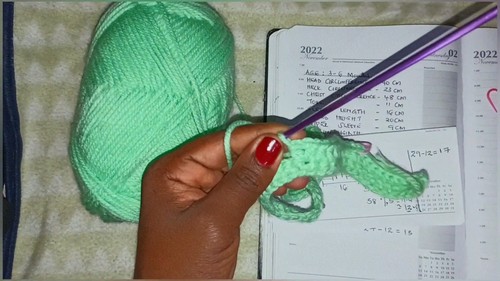
- Measure head circumference to guide the starting chain length.
- Make a slip knot and crochet a chain until it measures approximately 40 cm with a 4.0 mm hook, aiming for 62 chains.
Row 1 (Setup Row):
- Chain 1, skip the first chain, then start single crochet into the second chain from the hook.
- Continue single crocheting along the chain for a total of 62 single crochets.
- Mark your four corners (8 stitches for the front, 12 for the shoulder, 18 for the back, another 12 for the second shoulder, and 8 for the other front part), adjusting the counts by subtracting the corners and dividing the remaining stitches.
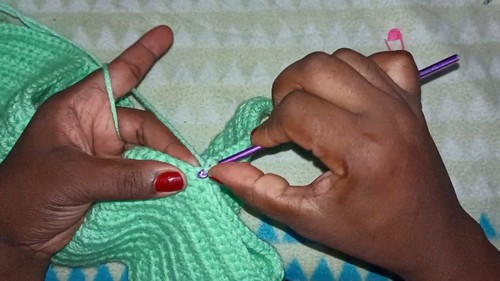
Row 2 (Half Double Crochet Establishing Row):
- Begin with eight half double crochets up to the first marked corner.
- At the corner stitch, do 2 half double crochets, chain 1, and another 2 half double crochets into the same stitch.
- Repeat this pattern across the row, following the corner markers, and finishing each section (front, shoulder, back, shoulder, front) as established.
Subsequent Rows (Increase Row):
- Turn your work, chain 1. Start each row by working up to the marked corners.
- In each corner space (created by the chain 1 in the previous row), do 2 half double crochets, chain 1, and 2 more half double crochets to increase.
- Continue with half double crochet in each stitch between the corners.
- Repeat these rows, continuing the increases at each corner until the yoke measures approximately 11 cm deep, adjusted as necessary for sizing.
Sleeves and Body Separation:
- Once the yoke is complete, separate the sleeves from the body.
- Crochet around the body stitches, leaving spaces for the sleeves.
- Use stitch markers to indicate sleeve spaces.
Sleeve:
- Join yarn at the base of a sleeve opening with a slip stitch.
- Crochet in rounds, decreasing as necessary to fit the sleeve opening.
- Continue until the sleeve reaches the desired length, typically around 16 cm, with ribbing accounted for.
Body:
- Continue crocheting the body in rounds or rows until reaching the desired length, typically between 24 and 26 cm.
- Add ribbing at the end for a finished look.
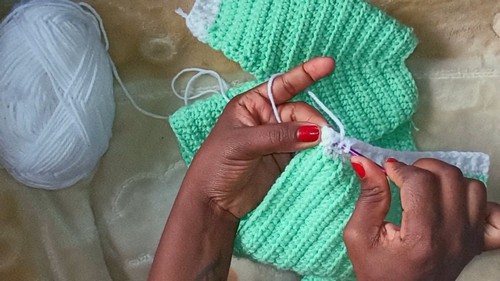
Ribbing (Sleeve and Waist):
- For each sleeve and the bottom of the cardigan, switch to a ribbing pattern by alternating front post and back post half double crochet, or a simple single crochet ribbing based on preference.
Finishing Touches:
- Add buttonholes in the front ribbing by chaining and skipping stitches as needed based on the size of the buttons.
- Sew on buttons opposite the buttonholes.
- Weave in all ends.


Leave a Reply