
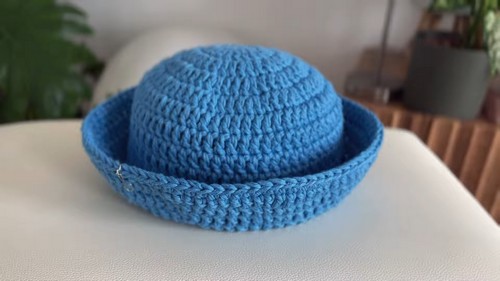
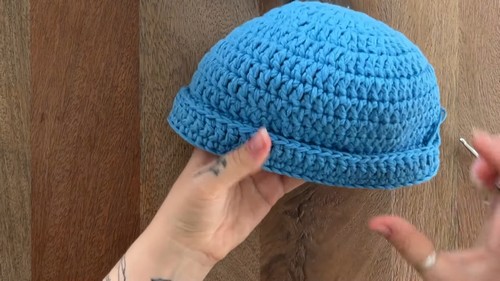
Set sail in style with this Crochet Vintage-Inspired Sailor Hat Pattern as a charming and timeless design perfect for adding a nostalgic twist to your wardrobe! With clean nautical lines, a soft structured brim, and classic shaping, this hat blends old-school sailor vibes with modern crochet flair.
Crochet Vintage-Inspired Sailor Hat

Whether you're dressing up a beach outfit, capturing a cottagecore aesthetic, or simply looking for a unique handmade accessory, this easy-to-follow pattern is perfect for confident beginners and experienced crocheters alike. Make it in your favorite color combo and top it off with a cute charm for a truly one-of-a-kind vintage statement piece!
Materials
- Thick cotton yarn (use two strands together for sturdiness)
- 4.5 mm crochet hook
- Scissors
- Measuring tape
- Stitch marker
- Threading needle
Head Measurement (To Determine Hat Size)
- Measure the circumference of your head.
- Divide your head measurement by Pi (3.14).
- Subtract 1 to 1.5 cm from the result for a snug fit — this gives you the target diameter for the top of the hat.
Example: For a 55 cm head, 55 ÷ 3.14 = 17.5 cm, then 17.5 - 1.5 = 16 cm.
Pattern Instructions
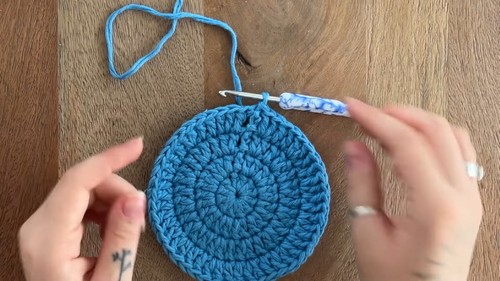
Starting the Top
Magic Circle
- Make a magic circle with the yarn held double.
- Ensure the tail stays on the left so you can tighten the circle later.
Round 1 – Top of the Hat
- Chain 3 (counts as first DC).
- Work 11 double crochet (DC) into the magic circle.
- Pull the loose end to close the center hole.
- Slip stitch into the third chain of the beginning chain-3 to close the round.
Total stitches: 12
Round 2 – Increases
- Chain 3.
- Work 1 DC in the same stitch as the chain (increase).
- Work 2 DC into each remaining stitch around.
- Slip stitch to close the round.
Total stitches: 24
Round 3 – Increases
- Chain 3.
- Pattern: 1 DC in next stitch, 2 DC in following stitch.
- Repeat the pattern all the way around.
- Slip stitch to join.
Total stitches: 36
Round 4 – Increases
- Chain 3.
- Pattern: 1 DC in each of the next 2 stitches, 2 DC in the third.
- Repeat all the way around.
- Slip stitch to join.
Total stitches: 48
Round 5 – Increases
- Chain 3.
- Pattern: 1 DC in each of the next 3 stitches, 2 DC in the fourth.
- Repeat around the circle.
- Slip stitch to join.
Total stitches: 60
Check your top diameter here. It should be approximately 16 cm. Add another round of increases if needed, increasing every fifth stitch.
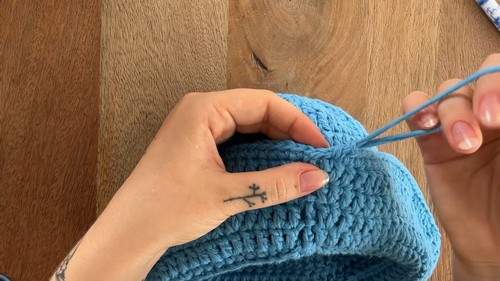
Rounds 6–11 – Sides of the Hat
- Chain 3.
- Work 1 DC in each stitch around (no increases).
- Slip stitch to join the round.
- Repeat for a total of 6 rounds of no increases.
- You should now have 11 rounds in total for the crown and side wall.
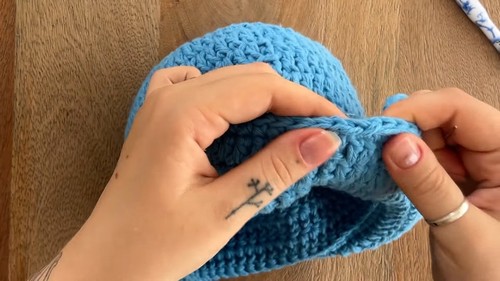
Brim of the Hat
Round 12 – Begin Brim
- Turn your work.
- Chain 1.
- Work 1 single crochet (SC) in back loops only of each stitch around.
- Slip stitch to close the round.
Round 13 – Brim Round (No Increase)
- Chain 3.
- Work 1 DC into every stitch around.
- Slip stitch to close the round.
Total stitches: 60
Brim Increases (Rounds 14–16)
Round 14 – Increase Every 6th Stitch
- Chain 3.
- Pattern: 1 DC in next 5 stitches, 2 DC in the sixth.
- Repeat around.
- Slip stitch to join.
Round 15 – Increase Every 7th Stitch
- Chain 3.
- Pattern: 1 DC in next 6 stitches, 2 DC in the seventh.
- Repeat around.
- Slip stitch to join.
For Round 16 – Increase Every 8th Stitch
- Chain 3.
- Pattern: 1 DC in next 7 stitches, 2 DC in the eighth.
- Repeat around.
- Slip stitch to join.
- You can switch to a contrast color yarn for a decorative brim.
Round 17 – Finishing Edge
- Chain 1.
- Work 1 single crochet in each stitch around the brim.
- Slip stitch to join.
Finishing Touches
Fasten Off & Weave in Ends
- Cut the yarn, leaving a 10 cm tail.
- Pull the loop completely through.
- Thread the tail onto a needle.
- Insert the needle under both loops of the second stitch from the end.
- Pull tight, then insert needle back into the same loop where the yarn emerged, going under the front loop only.
- Pull to create a seamless finish.
- Weave in the rest of the ends securely, including the starting magic circle tail.
Optional: Add a Pendant
- Use a small charm or pendant and a jump ring.
- Open the jump ring using two pliers.
- Insert the pendant and close the ring securely.
- Attach the pendant to the front-right edge of the brim by threading it through both loops.


Leave a Reply