
This Easy Crochet Hexagon Cardigan is the perfect project for both beginners and experienced crocheters. Made from two identical granny hexagons, it’s not only a stylish piece to add to your wardrobe, but also a versatile design that can be customized for any season. The use of double crochet stitches and granny clusters gives it a beautiful texture and structure, while the simple construction process makes it easy to follow along.
Crochet Hexagon Cardigan
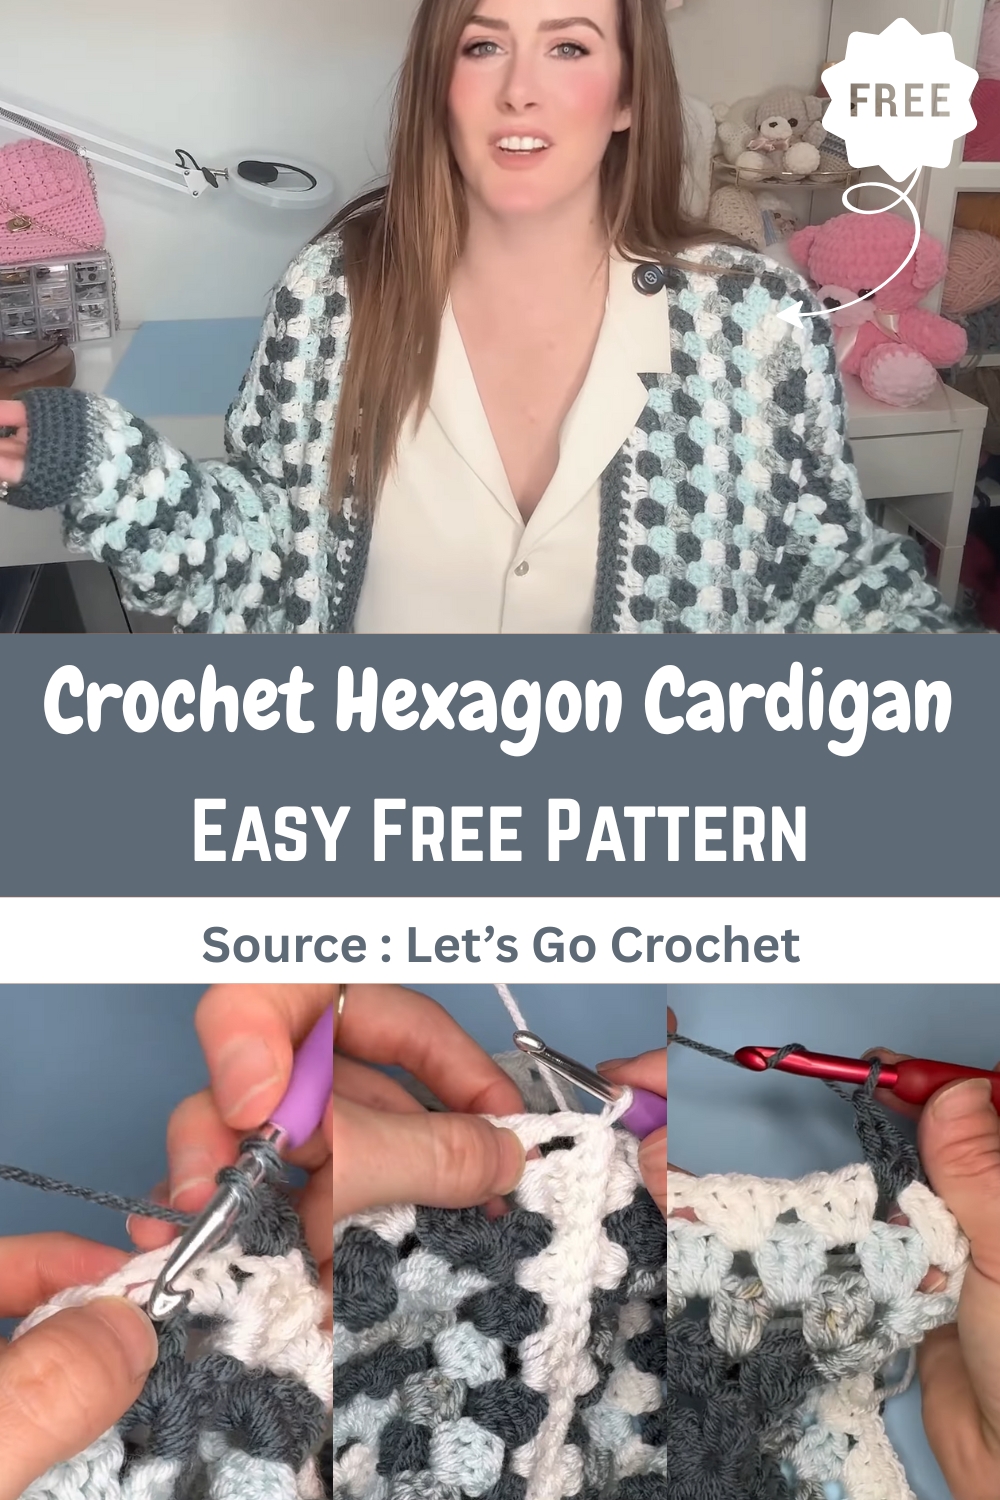
Whether you're looking for a cozy cardigan to wear during the colder months or a trendy piece to complete your look, this crochet pattern offers endless possibilities for customization. Plus, you can tweak the sleeve length and body fit to match your personal style and sizing preferences.
Materials
- Yarn: Worsted Weight (e.g., I Love This Yarn from Hobby Lobby)
- Hook 1: 6.5 mm (for the main cardigan)
- Hook 2: 4.5 mm (for finishing touches)
- Notions: Small scissors, darning needle
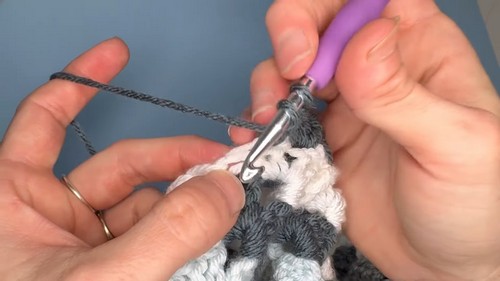
Row 1 (Foundation)
- Make a Magic Loop.
- Chain 2 (counts as the first DC).
- Work 2 DC into the magic loop (completes the first cluster).
- Chain 2 (forms the first corner).
- Work a granny cluster (3 DC) into the loop.
- Repeat the sequence of
Chain 2, 3 DCfive more times to create a total of six corners and six clusters. - Chain 2. Tighten the loop and slip stitch (SL ST) into the top of the initial chain-2 to join.
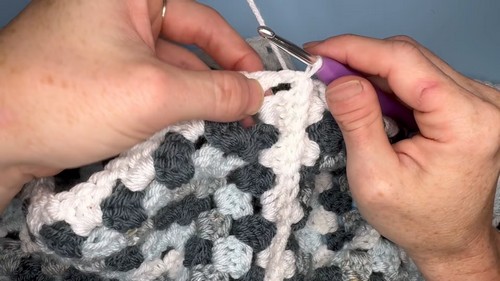
Row 2 (First Increase)
- SL ST into the nearest Chain-2 corner space.
- Chain 2 (first DC), work 2 DC in the same corner space.
- Chain 2, work 3 DC in the same space (this is the first completed corner: 3 DC, Chain 2, 3 DC).
- Work a complete corner (3 DC, Chain 2, 3 DC) into each of the remaining five Chain-2 spaces.
- SL ST into the top of the initial Chain-2 to join.
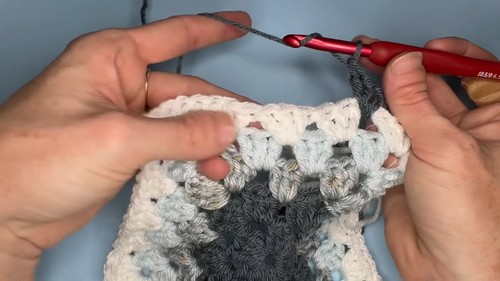
Rows 3–5 (Continuing Growth)
- Start by joining your yarn at a corner space. Chain 2, work 2 DC, Chain 2, and 3 DC in the same space (a corner).
- Work a granny cluster (3 DC) in the space between the clusters from the previous row.
- Work a corner in the corner spaces.
- SL ST to join at the end of the row.
- Note: The number of granny clusters between each corner increases by one in each row (Row 3 has 1 cluster, Row 4 has 2, Row 5 has 3).
Shaping the Sleeve (Decreases)
Sizing
- Continue adding rounds until the hexagon's width from a corner to the center of the opposite side is half of your shoulder-to-shoulder measurement.
- The example video used 23 total rounds for a size large.
Row 6 (First Decrease)
- Work the first corner normally.
- Work a normal granny cluster in the next space.
- Perform a Decrease (DC 2 Together or DC2TOG) over the next two spaces.
- (Yarn over, insert hook into next space, pull up a loop, yarn over, pull through 2 loops) twice (one time for each of the two spaces). (3 loops remain on hook).
- Yarn over, pull through all 3 loops.
- Continue with normal granny clusters and corners for the remainder of the row.
- Subsequent Rows: Alternate between a normal row and a decrease row until the sleeve width is as desired.
- Repeat all steps to create a second identical hexagon.
Assembly (Seaming)
- Lay the two hexagons together with the wrong sides facing out.
- Starting at the bottom of the cardigan, seam the bottom and the back up to the neck opening using the slip stitch in the back loops only (BLOSLST) method.
- Once you reach the armpit corner, continue the BLOSLST seam down the inner edge of the sleeve opening until the end of the tapered section.
- Fasten off and repeat for the other side of the cardigan's back/bottom seam, if needed.
Finishing Touches

Adding Sleeve Length (Optional)
- Join yarn at the sleeve opening.
- Work normal granny rounds, but perform a decrease (DC2TOG) over the point where the sleeve seam is to clean up the look.
- Continue with normal rounds until the sleeve reaches your wrist.
- For the last few rounds before the cuff, add extra decreases: work two rounds of 5 granny clusters, then 1 DC2TOG decrease, repeated all the way around.
Sleeve Cuffs (Half Double Crochet)
- Row 1: Chain 1. Work a Half Double Crochet (HDC) in every stitch around. SL ST to join.
- Row 2 (Decrease): Chain 1. Work 5 HDC, then 1 HDC 2 Together (HDC2TOG) decrease, repeated around. SL ST to join.
- Row 3 (Normal): Chain 1. Work HDC in every stitch around (no decreases). SL ST to join.
- Row 4 (Decrease): Chain 1. Work 5 HDC, then 1 HDC2TOG decrease, repeated around. SL ST to join.
- Row 5 (Normal): Chain 1. Work HDC in every stitch around. Fasten off.
Bottom Length and Front Trim
- Bottom Length: Join yarn at the bottom edge. Work granny clusters across, performing a DC2TOG decrease over the center inseam to make it lay flat. Continue until the desired length is reached.
- Front Trim (Double Crochet): Join yarn at the bottom corner. Work Double Crochet (DC) evenly all the way around the entire front opening and bottom edge.
- In the bottom front corners, work 3 DC.
- In the awkward neckline corner, work 4 DC.
- At the center back neckline seam, work 3 DC on either side of the seam to close the space. SL ST to join.
- Final Trim (Half Double Crochet): Chain 1 and turn your work to the right side. Work HDC in every stitch around. SL ST to join and fasten off.


Leave a Reply