
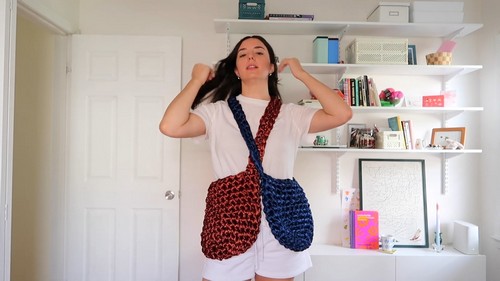
This delightful crochet bag tutorial is a perfect project for anyone looking to create a stylish, practical accessory. Using a simple crochet technique paired with double-faced satin ribbon, this bag offers a chic way to carry your essentials. It’s versatile enough to customize in size and strap length, making it suitable for different occasions and personal preferences.
Crochet Ribbon Bag

Whether you’re a beginner or an experienced crocheter, this project is an easy way to craft a unique accessory that complements your style. Enjoy the satisfaction of creating something special while learning valuable crochet techniques.
Materials You'll Need:
- 2-inch double-faced satin ribbon
- Crochet hook (11-15 mm)
- Scissors
- Lighter (to seal ribbon ends)
- Stitch marker
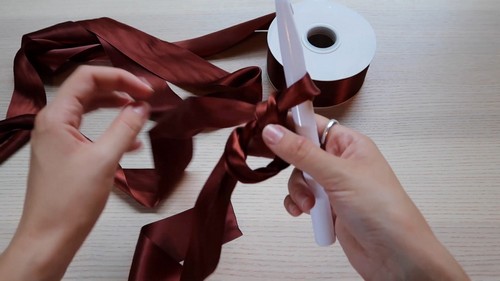
Getting Started:
- Create a magic circle.
- Chain one.
- Make six single crochets into the loop, marking the first stitch.
- Pull the tail to close the center.
Creating the Base:
- Row 2: Two single crochets in each stitch (12 total).
- Row 3: Alternate one and two single crochets (18 total).
- Row 4: One single crochet, then increase every two stitches.
- Row 5: Increase every three stitches.
The base should now have 30 stitches.
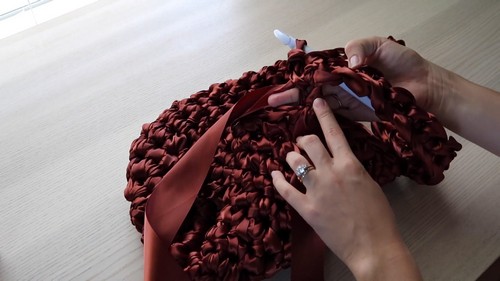
Forming the Bag Body:
- Continue in rounds without increasing, doing 30 stitches per round.
- Repeat this for eight rows.

Making the Strap:
- Chain the desired length for your strap.
- The creator used 31 chains.
- Slip stitch to connect the strap to the bag, ensuring it's even.
- Slip stitch into the stitch above to even out the pressure.
Single crochet back across the chain.

Connect the strap at another point for sturdiness.
- Flip the bag inside out to work on the other side of the strap.
- Loosen the loop and slip stitch to the opposite side.
- Single crochet across the chain to finish the strap.
Connect the strap to the next stitch to ensure it's seamless.
Finishing:
- Cut and tie off the ribbon.
- Weave in any loose ends to secure them.


Leave a Reply