
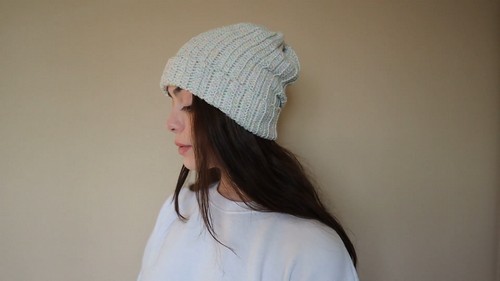
This ribbed crochet beanie pattern is perfect for anyone looking to create a cozy, stylish winter accessory. Using the double crochet in the back loop only (DC BLO) technique, this pattern creates a beautifully textured, ribbed fabric that offers both warmth and style.
Crochet Ribbed Beanie

The beanie is customizable in size, so you can easily adjust the pattern to fit any head size. Whether you're a crochet beginner or an experienced crafter, this project is a fantastic way to add a personal touch to your winter wardrobe. Plus, the pattern is easy to follow, making it perfect for creating a handmade gift!
Materials
- Yarn: 2 skeins of worsted weight cotton yarn (e.g., "I Love This Cotton Yarn," 153 yards per skein)
- Hook: 4mm crochet hook
- Tools: Scissors, Yarn needle (for weaving ends)
Step 1: Foundation (Chain 62)
- Create a slip knot.
- Chain 62 (The video notes that 60 chains are the actual length/stitches, and the final 2 chains are a working-up chain).
Beanie Body (Ribbing)

Step 2: Row 1 (Double Crochet)
- Skip the first two chains from the hook (this acts as the first DC).
- Work one Double Crochet (DC) into the third chain from the hook.
- Continue with one DC in each chain across the row.
- You should finish with 60 DC.
Step 3: Rows 2-40 (Double Crochet in Back Loop Only)
- Chain 2.
- Turn your work.
- Work one Double Crochet in the Back Loop Only (DC BLO) into the first stitch (the third stitch down, skipping the chain 2).
- Continue with one DC BLO into each stitch across the row.
- Repeat this process (Chain 2, Turn, DC BLO across) until you have a total of 40 rows.
- This technique creates the tiered/ribbed effect.
Finishing
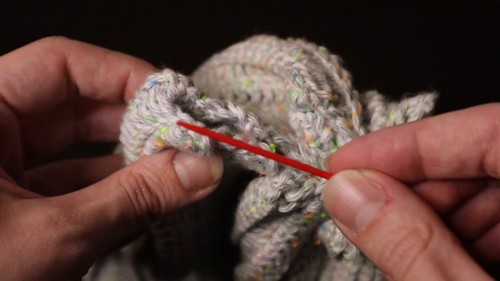
Step 4: Seaming the Sides
- Fold the piece in half, bringing the two ends together.
Slip Stitch (SL ST) the two sides together: insert your hook through the top stitch of the front piece and the corresponding stitch on the back piece.
- Yarn over and pull through both stitches and the loop on the hook.
- Continue slip stitching until the entire side is seamed shut, forming a large tube.
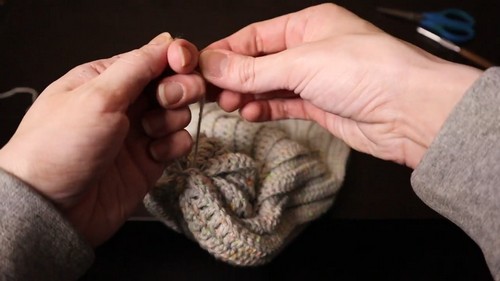
Step 5: Cinching and Weaving Ends
- Cut a long yarn tail and fasten off the yarn by pulling it through the last loop and pulling tightly.
- Thread the long tail onto a yarn needle.
- Working along the raw top edge of the tube, use the yarn needle to weave the yarn in and out of the top stitches, gathering the fabric inwards like petals to close the top of the hat.
- Pull the yarn tight to cinch the top closed.
- Insert the needle through the center of the cinched part to the inside of the hat.
Turn the hat inside out.
- Double knot the working tail with the original starting tail for security.
- Weave in all remaining loose strands to complete your beanie.


Leave a Reply