
Crochet hair scrunchies are an easy yet trendy way to add a handmade touch to your hair accessories. This tutorial guides you through creating your very own scrunchie using the double crochet stitch, a versatile and beginner-friendly technique.
Crochet Hair Scrunchie

Whether you’re looking for a fun way to update your style or simply enjoy crafting, this crochet scrunchie is the perfect project. The best part? You can easily customize the size, fullness, and color of your scrunchie to match your personal style or to create a unique gift for a friend. With simple materials and clear instructions, you’ll have a fashionable accessory ready in no time!
Starting the Base
- Make a slip knot.
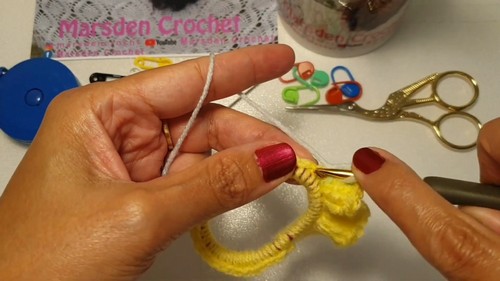
- Insert your crochet hook into the elastic hair tie.
- Pull the yarn through the elastic to create a loop on your hook.
- Chain one to secure the yarn to the elastic.
- Work 35 single crochet stitches around the elastic band.
First Round of Double Crochet
- Chain three (this counts as the first double crochet stitch).
- In the very first single crochet stitch from the previous round, work two more double crochet stitches.
- Continue working three double crochet stitches into each subsequent single crochet stitch around the entire elastic band.
- At the end of the round, slip stitch to join and finish if you prefer a smaller scrunchie.
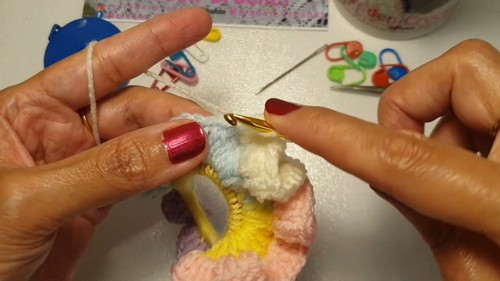
Adding More Volume (Optional)
- Chain three again.
- Continue working three double crochet stitches into each double crochet stitch from the previous round.
- Repeat this process for as many rounds as needed to achieve the desired fullness.
Finishing
- Once the desired size is reached, cut the yarn, leaving a tail.
- Pull the tail through the loop on your hook to secure it.
- Thread the yarn tail onto a tapestry needle.
- Weave in the loose end through the stitches to hide it and secure the work.


Leave a Reply