
Crochet a corset top is a rewarding and trendy project that lets you design a custom piece perfect for any wardrobe. This detailed step-by-step pattern walks you through every stage, from starting the base with a simple chain to finishing off with elegant lacing. The beauty of this pattern lies in its versatility—you can modify the fit, choose your favorite colors, and even add optional straps for an extra touch of style.
Crochet Corset Top

Whether you're a beginner or seasoned crocheter, this corset top pattern will empower you to create a unique garment that feels as good as it looks. It's the perfect combination of comfort, fashion, and creativity!
Starting the Base (Back Panel)
- Initial Chain: Begin by making a slip knot and chain an odd number of stitches.
- First Row: Skip the first chain stitch.
- In the second stitch from the hook, work a single crochet (SC).
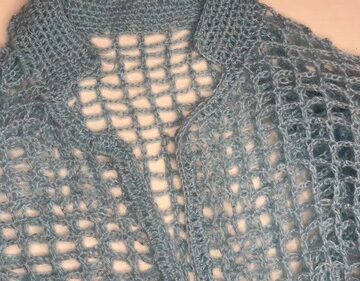
- Alternate between SC and double crochet (DC) until the end of the row.
- Subsequent Rows (Back Panel): Chain 1 and turn your work.
- Skip the chain 1.
- Start from the second stitch and alternate: SC over previous DC, DC over previous SC.
- Length of Back Panel: Continue without increases or decreases until you reach the desired length.

Shaping the Front (Increases)
- Transition to Increases: Start making increases at both the top and bottom of each row.
- First Increase Row: Chain 1 and turn.
- In the first stitch, work three stitches (SC, DC, SC).
- Continue alternating SC/DC across the row.
- In the last stitch, work two stitches.
- Second Increase Row: Chain 1 and turn.
- Continue across the row without increases.
- Continue Increases: Repeat the two-row sequence (one with increases, one without) until you reach the highest point of the top.

By Shaping the Front (Top Section without Top Increases)
- Stopping Top Increases: Stop making increases at the top.
- Continue to make one increase at the bottom of each row (in the last stitch).
Shaping the Front (Two Bottom Increases)
- Increasing Bottom Increases: Make two increases at the bottom of each row instead of one.
Middle Section (No Increases or Decreases)
- Straight Section: Work rows without any increases or decreases.

Shaping the Front (Decreases)
- Transition to Decreases: Start decreasing to mirror the increases.
- First Decrease Row: Work until three stitches remain.
- Decrease these three stitches together by inserting the hook, yarning over, and pulling through for each stitch (SC, DC, SC), then yarn over and pull through all loops.
- Second Decrease Row: Chain 1 and turn. Work across the row without decreases.
Final Shaping (Two Decreases at Top and One at Bottom)
- Simultaneous Decreases: Make decreases at both the top and bottom (two decreases at the top and one at the bottom).
Edging (Border)
- Starting the Border: Work single crochet stitches for the entire border.
- First Side (Back Panel Edge): Work single crochets evenly along the side edge.
- Corner (Top Edge): When you reach the corner, chain 2.
- Top Edge (Lacing Holes): After the chain 2, skip two stitches and work 5 single crochets.
Repeat this until the next corner.

- Bottom Edge: Work single crochets evenly along the bottom edge.
- Second Side (Front Panel Edge): Work single crochets evenly along the second side edge.
- Joining: At the end of the border, skip two stitches and make a slip stitch into the next stitch to join.
- Chain 1 and fasten off.
Lacing
- Threading: Thread the cord through the chain-2 spaces from the bottom to create the lacing effect.
Straps (Optional)
- Starting the Strap: Find the corner with the chain-2 space for the top edge.
- Insert your hook into the stitch above the single crochet next to the chain-2 space.
- First Row of Strap: Work single crochet across the desired width of the strap.
- Subsequent Rows of Strap: Chain 1 and turn.
- Work single crochets across the row.
- Length of Strap: Continue until the strap reaches the desired length.
Leave a long tail for sewing.

- Second Strap: Start crocheting the second strap in the same way.
- Attaching Straps: Place the strap on the back panel.
- Insert your hook into a stitch on the back panel, then into a stitch on the strap.
- Yarn over and pull through all loops to create a slip stitch.
- Continue to join the strap to the back panel.


Leave a Reply