
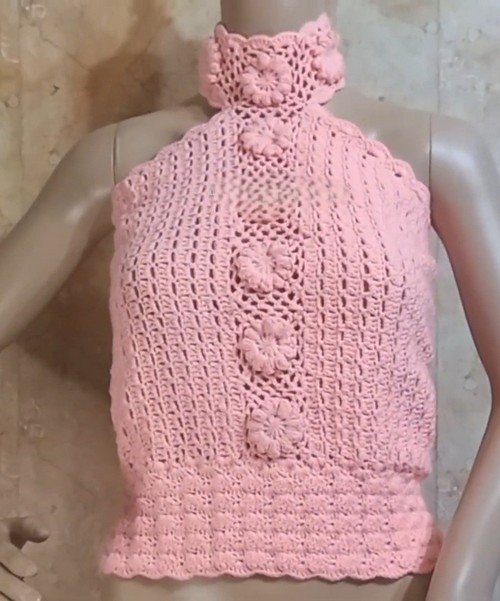
If you're looking to add a fresh and stylish piece to your handmade wardrobe, this floral motif crochet top is the perfect project. Featuring delicate flower motifs squared off and joined together, this pattern creates a visually stunning top with a flattering fit.
Prettiest Crochet Top

Ideal for spring and summer wear, the top uses lightweight 4-ply cotton yarn and includes beautiful puff stitches and picots for added texture. Whether you're dressing it up for brunch or keeping it casual, this crochet top offers versatility, customization options, and an elegant handmade touch. Plus, it's a great project for intermediate crocheters looking to elevate their skills!
Materials
- 4-ply cotton yarn
- 2.5 mm crochet hook
Measurements
- Width: 85 cm
- Length: 42 cm
- Bottom circumference: 80 cm
Creating the Flower Motifs
- Make a magic ring.
- Chain 4, work 1 double crochet and chain 1, repeat this 11 times.
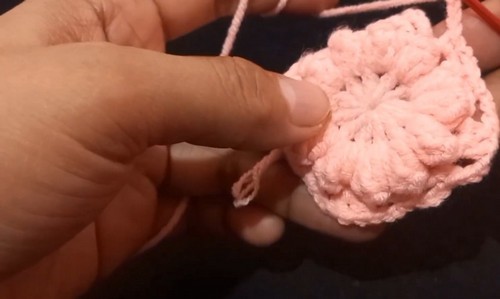
- Slip stitch into the 3rd chain to close the round.
- For Petal 1: Chain 3, 4 double crochets, 1 puff stitch.
- For Petal 2 onward: Chain 3, 5 double crochets, 1 puff stitch.
- Repeat the petal pattern (ch 3, 5 dc, puff stitch) a total of 12 times.
- Slip stitch to secure the flower.

Squaring the Flower Motif
- Chain 4, work 1 double crochet (Corner 1).
- Chain 3, 1 single crochet, chain 3 (Side 1).
- Work 1 double crochet, chain 1, 1 double crochet (Corner 2).
- Chain 3, 1 single crochet, chain 3 (Side 2).
- Work 1 double crochet, chain 1, 1 double crochet (Corner 3).
- Chain 3, 1 single crochet, chain 3 (Side 3).
- Work 1 double crochet, chain 1, 1 double crochet (Corner 4).
- Chain 3, 1 single crochet, chain 3 (Side 4).
- Slip stitch into 3rd chain to complete the square.
- Chain 6 (counts as dc + ch 3).
- Work 1 picot, 1 double crochet.
- Repeat the picot and dc pattern for all sides.
- At corners: Work 1 dc, 1 picot, 1 dc.
- Finish with a slip stitch, chain 2, and cut the yarn.
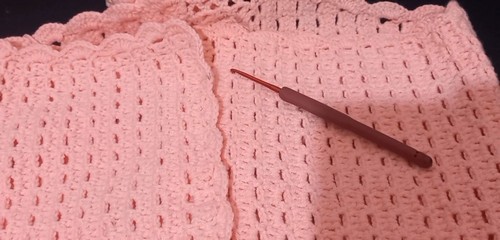
Assembling the Motifs
- Create multiple motifs (minimum of 8).
- Join motifs using slip stitch and chain 1 at each connecting side.
- Continue joining 5 more motifs for the front.
- Join 2 motifs on each side to create back and underarm sections.
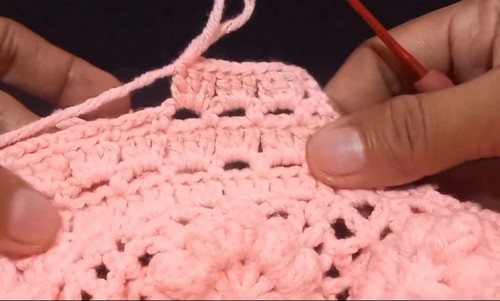
Building the Top's Body
- Work a decreasing pattern for 12 rows—only the top narrows; the bottom remains straight.
- After the decrease section, crochet 12 straight rows.
- Repeat the process for the opposite side to match.
- For the top edge, make single crochets between 2 spaces.
- Decrease to 5 double crochets in each space for one row.
- Do the same on the opposite edge.
- Next row: Work 7 double crochets in each space.
- Crochet 3 slip stitches to move to the next section.
- Chain 1, work 1 single crochet.
- Work 5 double crochets in the next section.
- Continue repeating the pattern: 1 sc, 5 dc or 7 dc.
- Repeat this alternating pattern for texture and shaping.
- Continue the decreasing pattern (5 dc rows) for 11 more rows on both edges.
Finishing Touches
- Attach buttons on the front edge to complete the closure.


Leave a Reply