
This crochet flower bag pattern offers an exciting project that combines creativity with functionality. Perfect for beginners and seasoned crocheters alike, this step-by-step guide walks you through the process of creating a beautiful flower design and seamlessly assembling it into a chic, customizable bag.
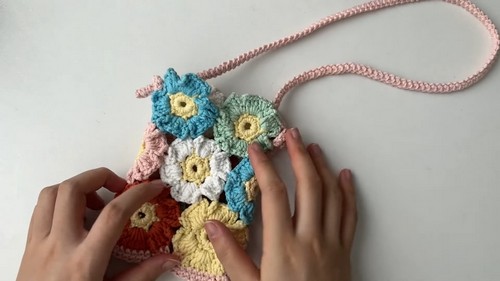
Crochet Floral Bag

The floral design adds a touch of femininity and charm, making this bag an ideal accessory for any occasion. With clear instructions for connecting flowers horizontally and vertically, you'll have a stylish, one-of-a-kind bag in no time. Plus, you can play with different color combinations for a unique and personalized look.
Crocheting the Flower Pattern

Round 1: Creating the Center
- Start with a slip knot.
- Chain 5 (ch 5).
- Join with a slip stitch (sl st) to form a ring.
- Round 1 is now finished.
Round 2: Building the Base
- Chain 1 (ch 1) to start Round 2.
- Make 12 single crochet (sc) stitches into the ring.
- Join with a slip stitch (sl st).
- Round 2 is now finished.

For Round 3: Preparing for Petals
- Chain 2 (ch 2).
- Skip 1 stitch.
- Make 1 single crochet (sc).
- Repeat the sequence of 2 chain (ch 2) and 1 single crochet (sc) around the circle.
- Join with 2 chain (ch 2) and 1 single crochet (sc) to complete Round 3.
- Switch colors for the petals.
Round 4: Crocheting the Petals
- Chain 4 (ch 4).
- Make 5 double crochet (dc) stitches in the chain space.
- Chain 4 (ch 4).
- Make 1 single crochet (sc) in the next chain space to join.
- This completes one petal.
- Repeat this process for a total of 6 identical petals.
- For the last petal, use a slip stitch (sl st) to join it to the first petal.
- Chain 1 (ch 1) before snipping the yarn.
- Fix the end into the cloth.
Connecting the Flowers to Make a Bag

Horizontal Connection
- When making the second flower, connect it to the first flower at the 5th double crochet (dc) of the second petal.
- Continue crocheting the second flower's petals, connecting the 1st double crochet (dc) of the third petal to the corresponding position on the first flower.
- Repeat this process for as many flowers as needed to achieve the desired width for your project.
- There are 2 joints between each two horizontally connected flowers. The connection points are the last double crochet (dc) of the second petal and the first double crochet (dc) of the third petal.
- Connect the last flower in the row with the first one to form a continuous loop.
Vertical Connection
- For vertical connections, you will need to connect 3 flowers when making a new one.
- Connect the new flower to the neighboring pieces at their corresponding points.
- Every flower needs to connect with all neighboring pieces.
Finishing the Bag Body

Sealing the Bottom
- Make 1 chain (ch 1).
- Make 1 half double crochet (hdc) in the top of the 4 chain (ch 4) space.
- Make 1 single crochet (sc) in each double crochet (dc) stitch.
- Make 1 half double crochet (hdc) in the 4 chain (ch 4) space.
- For a tidy bottom line, make only 2 double crochet (dc) stitches.
- Skip 4 chain (ch 4) stitches.
- Make 2 double crochet (dc) stitches accordingly.
- Make 1 half double crochet (hdc), 1 single crochet (sc) 5 times, and then 1 half double crochet (hdc).
- Slip stitch (sl st) to join the round.
- Make 1 chain (ch 1).
- Make 1 single crochet (sc) in each stitch.
- Slip stitch (sl st) to join this round.
- Sew to close up the bottom.
- Sew the end into the cloth.
Creating the Strap
- Start with a slip knot.
- Chain 2 (ch 2).
- Make 1 single crochet (sc).
- Turn slightly.
- Make 1 single crochet (sc).
- Keep going like this to get a proper length.
- Chain 1 (ch 1) to finish.
- Snip the yarn.
- Sew the end into the cloth.
- Attach the strap to the bag.


Leave a Reply