
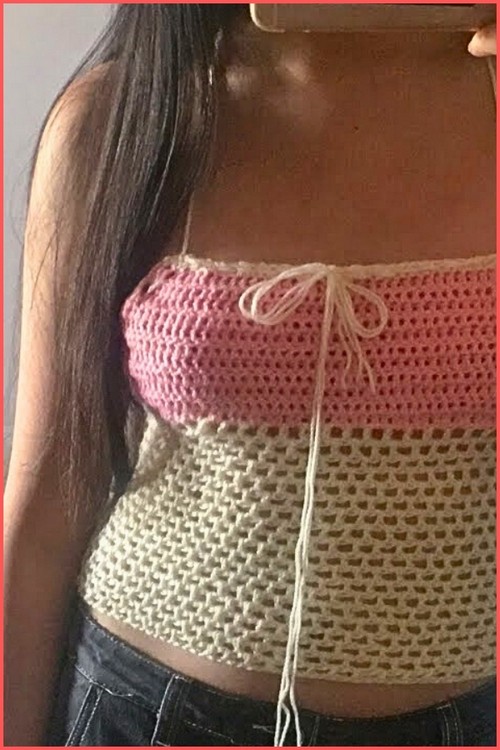
This tie front milkmaid crochet cami top pattern is designed to give you that classic milkmaid silhouette with a modern, wearable fit. You begin at the waist with an airy mesh band that stretches comfortably and helps the top stay light and breathable, then you transition into a solid bust section that is shaped with simple decreases for a flattering taper.
Crochet Tie Front Milkmaid Top
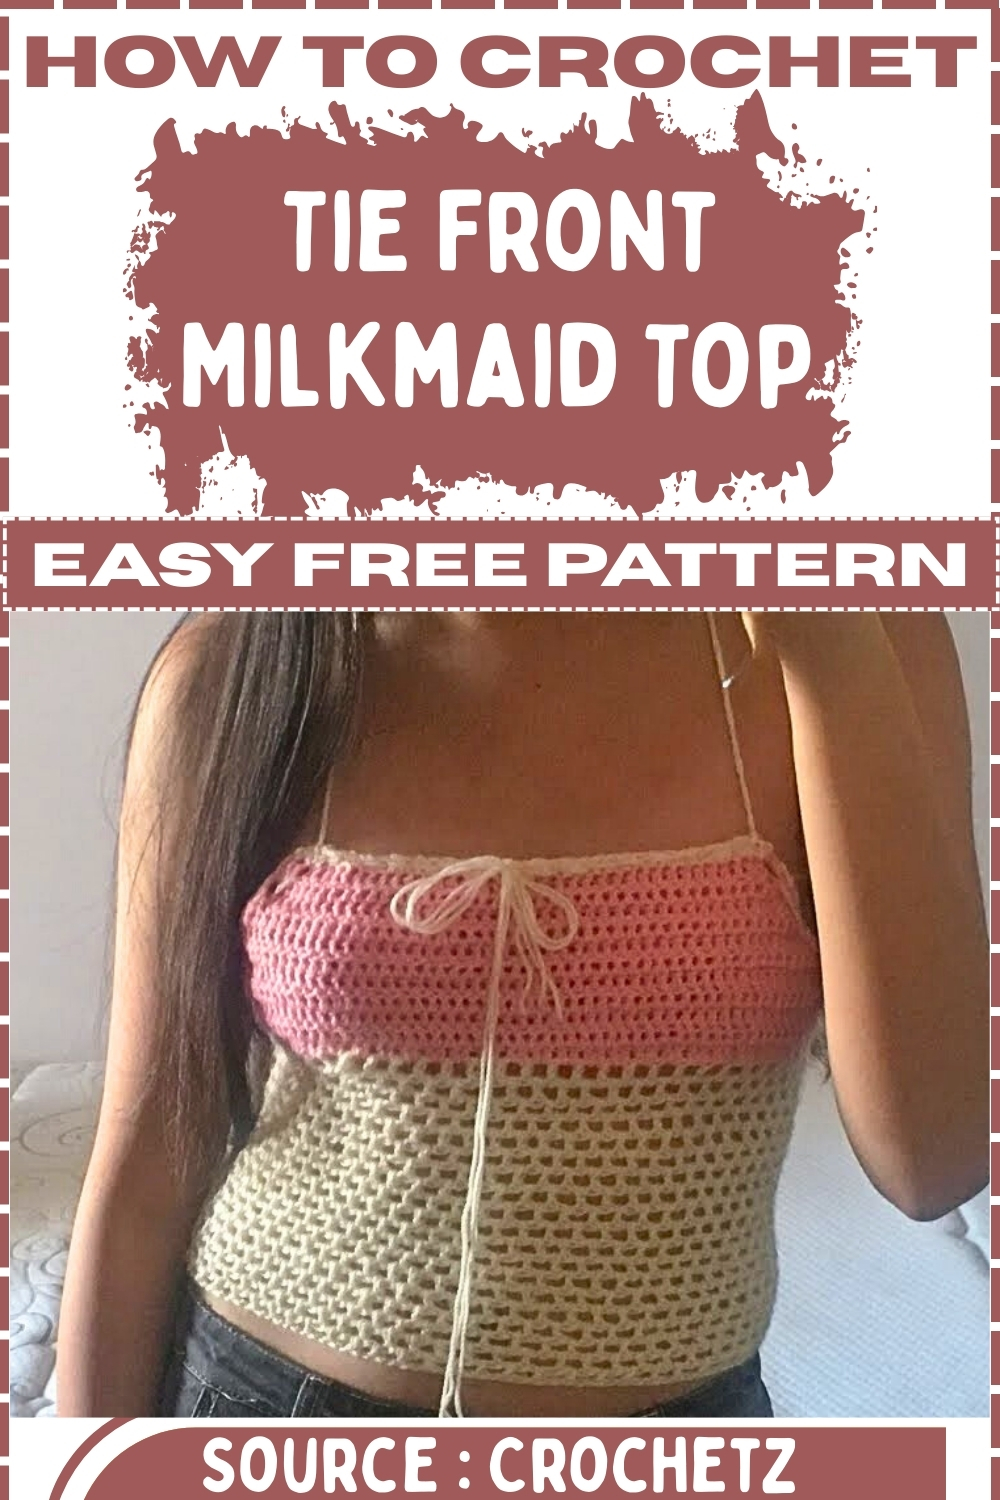
The long straps let you criss cross and lace through the mesh for extra security, while the ruched center creates the signature gathered milkmaid look and lets you adjust cleavage and coverage. The construction is easy to customize for length, bust width, strap style, and color placement, so you can make it fitted, relaxed, cropped, or slightly longer depending on your style.
Materials
- 8 ply polyester yarn in two colors
- 4 mm or 5 mm crochet hook
- Scissors
- Stitch markers or bobby pins
- Measuring tape
- Yarn needle for weaving ends
Abbreviations
- ch chain
- sl st slip stitch
- sc single crochet
- hdc half double crochet
- dc double crochet
- sk skip
- sp space
Notes Before You Start
- This top is worked from the waist up
- The waist section is worked in the round in a spiral
- The bust section is worked flat in rows across the front only
- Bust shaping is created by decreasing at the edges
- You will use markers to separate front and back so the bust panel stays centered
- For a tighter fabric and more coverage, use the smaller hook size
- For a softer drape and more stretch, use the larger hook size
Sizing and Fit Setup
- Measure around your waist where you want the mesh band to sit
- Subtract a small amount for negative ease because polyester stretches
- Make a foundation chain that fits snugly without stretching the chain too hard
- Place the chain around your waist to confirm fit before joining
- Adjust the chain length until it sits slightly snug and comfortable
Waist Band Mesh Section
- Make a slip knot
- Chain until the chain fits snugly around your waist
- Join the chain into a loop with a slip stitch
- Check that the loop is not twisted before you join
- Chain 3 to count as the first dc
- Work dc into the next stitch
- Chain 1
- Skip one stitch
- Work dc into the next stitch
- Repeat the mesh pattern around the loop
- Join to the top of the starting chain 3 with a slip stitch if you prefer joined rounds
- Continue in a spiral by working into the chain spaces if you prefer continuous rounds
- Work dc into the next chain space
- Chain 1
- Work dc into the next chain space
- Repeat around
- Continue until the mesh reaches just under your bust
Marking the Front Bust Area
- Put the mesh tube on your body or a dress form
- Decide how wide you want the bust panel to be across the front
- Mark the left edge and right edge of the front panel with stitch markers
- Keep the marked section centered on the front
- Count the number of mesh spaces between the markers so you can keep the panel even
- Adjust marker placement if you want more or less coverage
Transition Row Into Solid Bust
- Attach the second color yarn at the first marker
- Work across the marked front section only
- For each mesh gap, add enough dc stitches to create a solid fabric
- Work 2 dc into a gap if it is narrow
- Work 3 dc into a gap if it is wide
- Continue adding stitches gap by gap until you reach the second marker
- Turn your work so you can begin working flat rows
Bust Section Main Rows
- Chain 3 and turn
- Work dc in each stitch across the row
- Chain 3 and turn
- Work dc in each stitch across the row
- Repeat these dc rows until the bust starts reaching the lower bust area
- Try the piece on occasionally to confirm height and coverage
For Bust Shaping Method A Gentle Taper
- Chain 2 and turn
- Work hdc in the first stitch
- Work dc in each stitch across until one stitch remains
- Work hdc in the last stitch
- Chain 3 and turn
- Skip the first stitch
- Work dc in each stitch across the row
- Chain 3 and turn
- Work dc in each stitch across
- Repeat the shaping sequence to taper the panel smoothly upward
- Stop tapering when the top edge is the width you want across your chest
Bust Shaping Method B Stronger Taper If Needed
- Chain 3 and turn
- Skip the first stitch
- Work dc across
- Chain 3 and turn
- Work dc across
- Chain 2 and turn
- Work hdc first stitch
- Dc across
- Hdc last stitch
- Repeat until the top edge is narrow enough for the milkmaid look
Side Borders for Clean Edges
- Attach the original color yarn at the bottom of one side edge of the bust panel
- Work sc evenly up the side edge
- Add ch 1 spaces occasionally to keep the edge from pulling in
- Keep the border neat and flat as you go
- Continue to the top corner of the bust panel
Long Strap on First Side
- At the top corner, chain a long strap
- Aim for a very long length so it can criss cross and lace through the waist mesh
- If you want an estimate, chain until the strap is about 180 cm long
- Fasten off or keep yarn attached depending on how you prefer finishing
- Repeat the side border and strap on the other side edge
Top Border to Join and Strengthen
- Attach yarn at one top corner if needed
- Work hdc across the entire top edge of the bust panel
- Crochet into each stitch across
- Make sure the strap corners are secured into the top border
- Work one more top row if you want extra firmness
Ruched Center Front Milkmaid Look
- Cut three strands of yarn about 1 meter each
- Thread the strands onto a yarn needle
- Weave the strands through the top border posts
- Go in and out every two stitches to create even gathers
- Continue weaving toward the center
- When you reach the center, pull both ends evenly to scrunch the top edge
- Adjust the gathers until they look balanced
- Tie the strands in the center into a bow
- Secure the bow tightly so the ruching stays in place
Optional Tie Front Enhancement
- If you want a more defined tie front, add a short tie at the center
- Attach yarn at the center front bottom of the bust panel
- Chain a short tie length
- Fasten off
- Repeat on the other side of the center
- Tie into a bow at the front for the milkmaid style
Finishing the Waist Edge Optional
- If the waist edge feels loose, add a stabilizing round
- Attach yarn at any point on the waist mesh
- Work sc into each mesh gap around
- Join with sl st
- Fasten off and weave ends
Assembly and Wearing
- Put the top on and bring the straps to your back
- Cross the straps in the back for support
- Thread the strap ends through the mesh holes around the waist
- Lace them down a few holes like a corset if you want extra hold
- Tie securely at the back or side
- Adjust the center ruching bow to control coverage
- Adjust strap tension so the bust sits comfortably and evenly
Customization Options
- Add more rows to the mesh section for a longer top
- Make fewer rows for a cropped look
- Increase the front panel width for more coverage
- Decrease the front panel width for a lighter look
- Add an extra top border row for firmness
- Add a lining or wear with bra cups if you want full coverage
- Use cotton yarn for more structure and less stretch
- Use a smaller hook size if you want less gapping in the fabric
Troubleshooting Notes
- If the mesh waistband feels too loose, shorten the foundation chain slightly
- If the mesh pulls upward, add one more round to increase height before the bust
- If the bust panel flares out, reduce how many dc you place into each mesh gap on the transition row
- If the bust panel is too tight, add one extra dc into each mesh gap on the transition row
- If the top edge is wavy, use fewer stitches or switch to hdc for the final rows
- If the straps stretch too much, add a slip stitch row back along the strap chains for firmness


Leave a Reply