
Tote your style wherever you go with this fun and fabulous Crochet Shoulder Tote Bag Pattern! Bursting with personality and texture, this bag is made from classic granny squares and stitched together to create a roomy, eye-catching accessory.
Crochet Shoulder Tote Bag
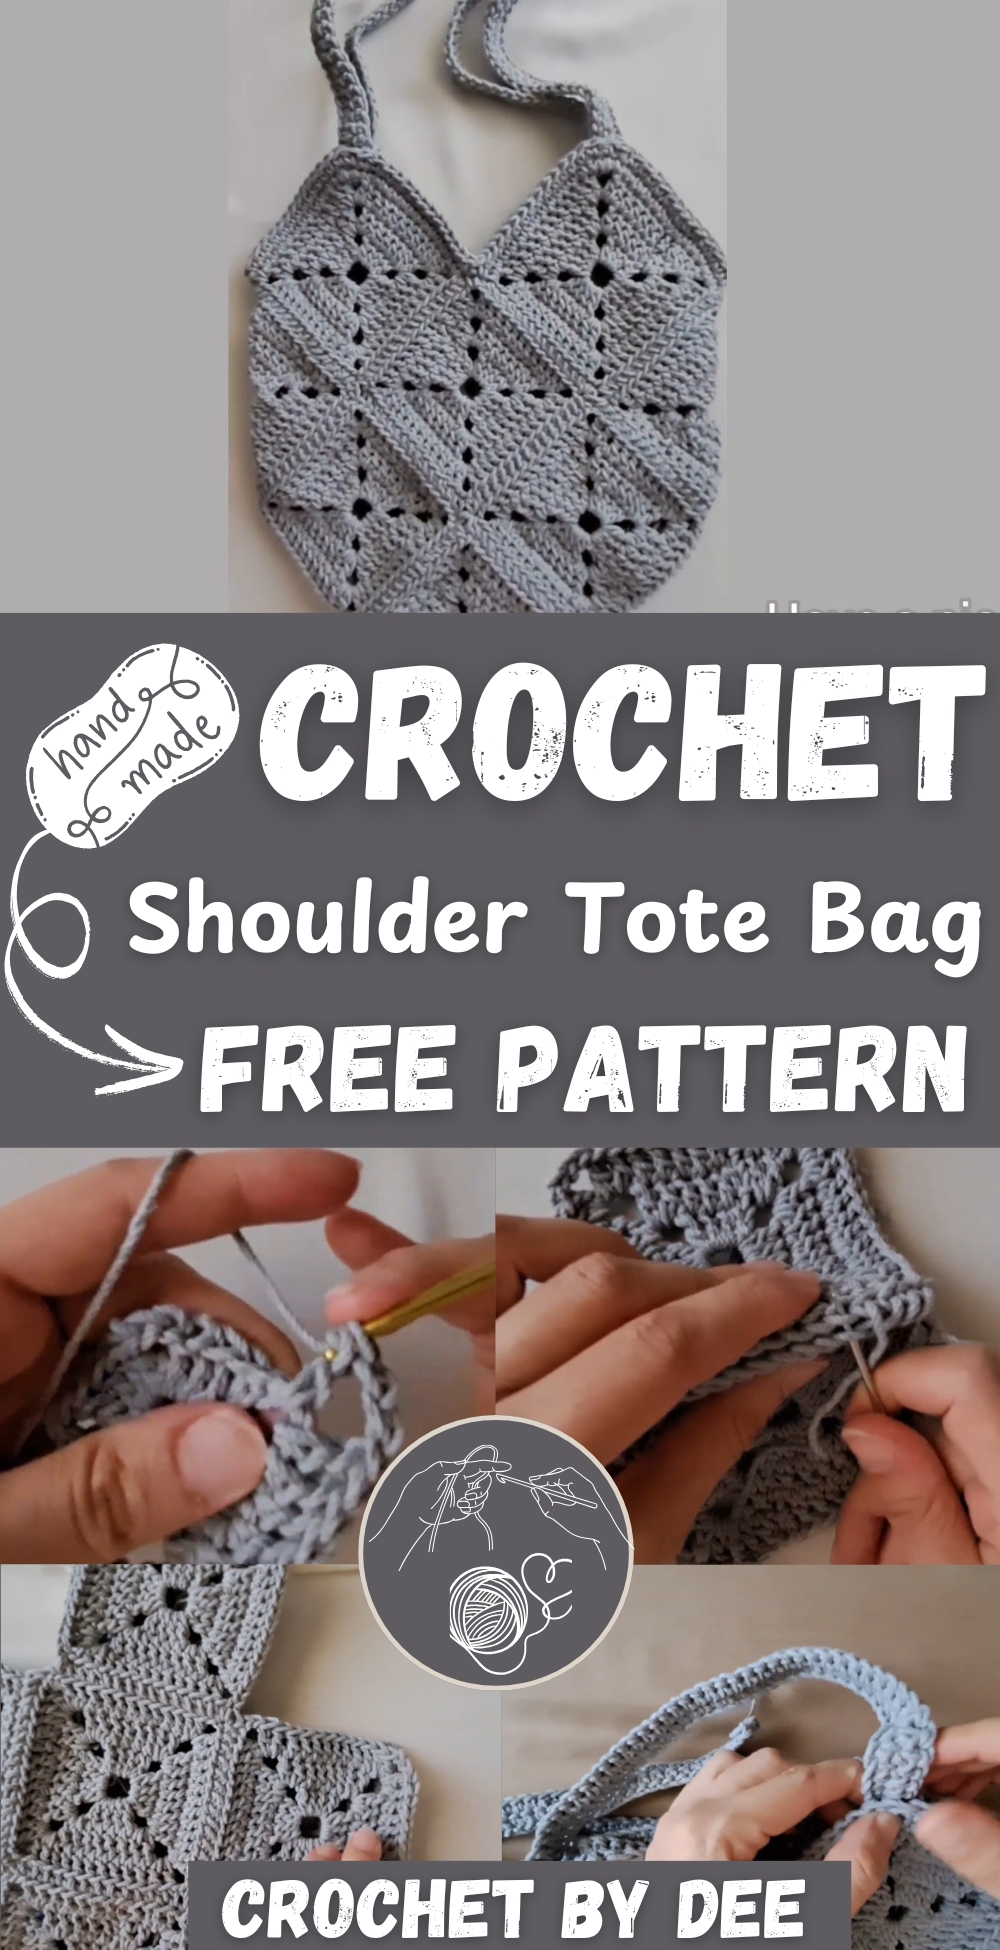
Whether you're filling it with books, beach essentials, or your latest crochet, this tote is your new go-to. The best part? You get to show off your creativity every time you wear it. It’s not just a bag it’s a statement piece with flair, made by you!
Materials
- Grey yarn (medium weight recommended)
- Matching crochet hook (as per yarn label)
- Yarn needle
- Scissors
- Stitch markers
Making the Granny Squares
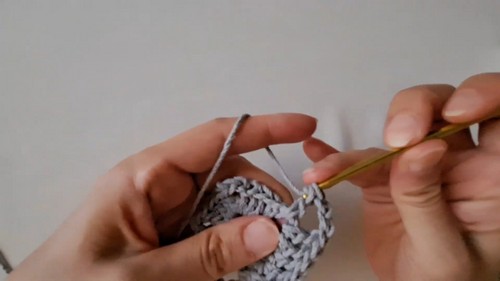
Round 1
- Begin with a magic ring.
- Chain 3 (counts as first double crochet).
- Work 3 double crochets into the ring.
- Chain 3, then work 4 double crochets into the ring — repeat this sequence three times total.
- Join with a slip stitch into the top of the beginning chain 3 to close the round.
For Round 2
- Chain 3, work 1 double crochet in each stitch until the corner space.
- In each corner space, work: 2 double crochets, chain 3, 2 double crochets.
- Continue working around with 1 double crochet in each stitch and the corner pattern in each chain space.
- Join with a slip stitch to finish the round.
Round 3
- Repeat the same process as Round 2.
- After completing the round, make a slip stitch into the third chain of the starting chain-3.
- Chain 1 and cut the yarn.
Quantity
- Make a total of 13 granny squares using the above 3-round pattern.
Assembling the Bag
Layout
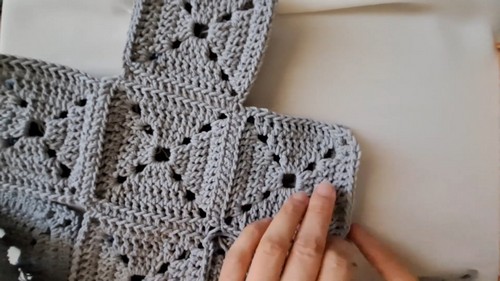
Arrange the 13 granny squares into a cross shape:
- 5 squares vertically
- 5 squares horizontally
- 1 center square where the rows intersect
- This forms the base and sides of the tote.
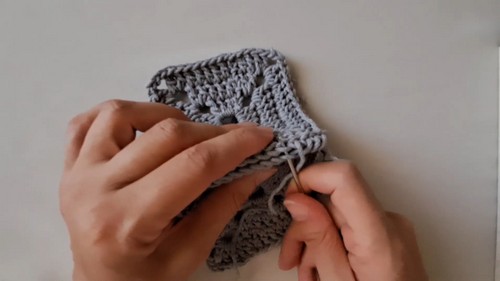
Joining Squares
- Use a yarn needle and matching yarn to sew squares together one by one.
- Begin by joining two squares and continue adding until the entire shape is formed.
- Use stitch markers to secure squares before sewing for alignment.
- Fold side squares up and stitch along the edges to form the sides and base of the bag.
Crocheting the Top Edge
- Join yarn at the top edge of the assembled bag.
- Chain 1, then work 1 single crochet into each stitch around the entire top edge.
- Optionally, add a second round of single crochets to reinforce and neaten the edge.
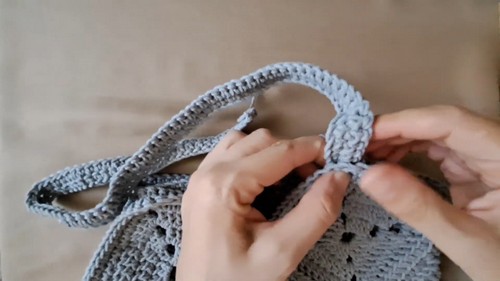
Making the Strap
First Strap
- Chain 85 to create a base for the strap (approximately 63 cm in length).
- Chain 1 and turn.
- Work 1 single crochet into each chain across.
Second Strap
- Repeat the same steps to make a second identical strap.
- For a thicker strap, add one or two more rows of single crochet.
Attaching the Strap
- Use a yarn needle and matching yarn to sew the ends of the straps to the top corners of the bag.
- Make sure the straps are securely and symmetrically attached.


Leave a Reply