
This heart-themed hooded sweater crochet pattern is perfect for adding a little love to your wardrobe! It’s a fun and cozy DIY project that’s as stylish as it is heartwarming. With a beautiful heart design on the front, alternating pink and red colors, this sweater offers a personalized touch that makes it truly unique.
Crochet Heart Hoodie

Whether you're crafting it for yourself or as a gift, it’s an ideal pattern for crochet enthusiasts at any level. From the basic double crochet stitches to the intricate heart integration, the pattern allows for creativity and customization. Plus, the hood adds a perfect, warm finish to this adorable sweater.
Materials
- Yarn: Main color (e.g., white or off-white) and two contrasting colors (e.g., pink and red)
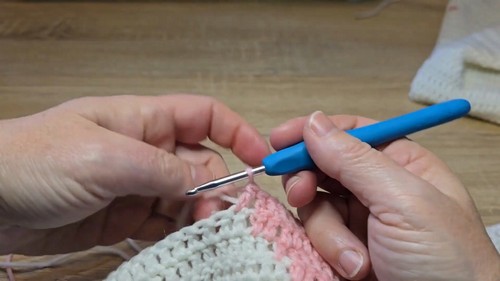
- Crochet Hook: 4 mm
- Tools: Scissors, tapestry needle, and stitch markers
Back of the Sweater
Starting Chain
- Create a chain of 94 stitches.
First Row
- Chain 3 (counts as the first double crochet).
- Work the first double crochet into the 5th chain from the hook.
- Continue working double crochets across the row for a total of 94 double crochets.
Subsequent Rows
- Continue working in double crochet rows until the piece measures approximately 64 cm in height (about 62 rows).
Finishing
- Fasten off the yarn and weave in all loose ends.
Front of the Sweater (with Heart Design)
Starting
- Begin with 94 stitches and 94 double crochets per row, just like the back.
Initial Rows
- Work 10 rows in the main color.
Heart Integration (from Row 11)
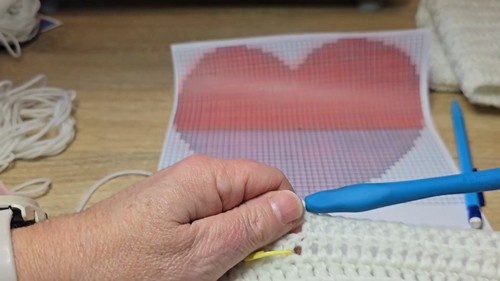
- Refer to the provided diagram for the heart design.
- The heart is worked in two colors: pink for the bottom 20 rows and red for the top 20 rows.
- Mark the exact middle of your 94-stitch row. The heart begins with 4 stitches in pink, centered on the piece.
Color Changes
- Work in the main color until the heart begins. Attach the contrasting color (pink) and work the specified number of double crochets for the heart.
- Attach a new skein of the main color and continue to the end of the row.
- Carry the unused yarn along the back of your work.
Following the Diagram
- Follow the diagram for increasing the heart's width.
Pink Section
- Work 20 rows of the heart in pink.
Red Section
- After 20 rows of pink, cut the pink yarn and attach the red yarn.
- Continue following the diagram for the next 20 rows in red.
Heart Separation
- When the diagram shows the heart splitting, work each half separately, incorporating two white stitches in the middle.
Top Section (Above Heart)
- Continue working in the main color until the front piece reaches the desired height for the neckline.
Neckline Shaping
- At row 57 from the bottom (or 7 rows above the heart), stop working the middle 32 stitches.
- Work each side of the neckline separately (31 stitches on each side) until the piece reaches a total of 61 rows from the bottom.
Finishing
- Fasten off yarn and weave in ends.
Assembly
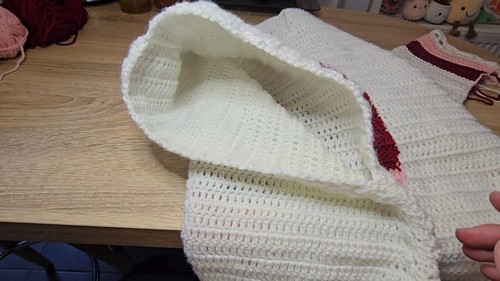
Preparation
- Lay the front piece over the back piece, aligning them.
- Use stitch markers to secure the shoulders and the bottom edges, leaving approximately 29-30 cm for the armholes.
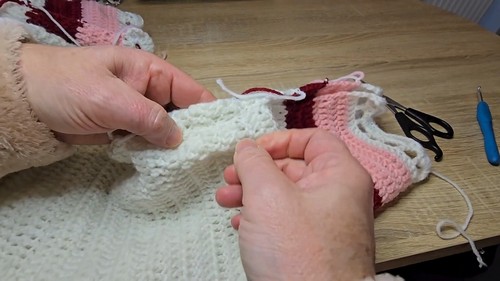
Sewing
- Using a tapestry needle and white yarn, sew the sides and shoulders together using a bord-à-bord (edge-to-edge) stitch on the right side of the fabric.
Sleeves
Picking Up Stitches
- Attach white yarn under the armhole.
- Pick up 40 stitches on each side of the armhole for a total of 80 stitches.
Working the Sleeve
- Work in double crochet rows (back and forth) without joining.
- Work 7 rows of double crochet.
Decrease Row (Row 8)
- Work 4 double crochets, then make a decrease (crochet 2 double crochets together).
- Repeat this pattern around.
Repeat Sequence
- Repeat the sequence of 7 plain double crochet rows followed by 1 decrease row, three times in total.
- Continue working 7 more plain double crochet rows.
Colored Bands
- Cut the white yarn. Attach red yarn and work 4 rows of double crochet.
- Cut the red yarn. Attach pink yarn and work 4 rows of double crochet.
White Border
- Cut the pink yarn. Attach white yarn and work 1 row of double crochet.
Lace Border (Row 1)
- Chain 6, skip 2 stitches, work 1 double crochet in the 3rd stitch. Repeat around.
Lace Border (Row 2)
- Chain 1, work 1 single crochet in the first chain-3 space.
- Work 6 double crochets in the next chain-3 space.
- Work 1 single crochet in the next chain-3 space. Repeat around.
Finishing
- Fasten off the yarn. Sew the underside of the sleeve together using the bord-à-bord stitch.
- Weave in all loose ends.
- Repeat for the second sleeve.
Hood
Picking Up Stitches
- Attach pink yarn at the front neckline, leaving 4 stitches unworked at the beginning and end.
- Work 2 double crochets, then make an increase (2 double crochets in the same stitch).
- Repeat around the neckline to create a wider opening for the hood. The video creator picked up 93 stitches in total.
Working the Hood
- Work in double crochet rows (back and forth) without joining.
- Create alternating bands of 4 rows of pink and 4 rows of red.
- Make 4 full sets of these bands. For the last set, work 4 rows of pink and only 2 rows of red.
Sewing the Hood
- Fold the hood in half and sew the top seam together using the bord-à-bord stitch.
- Weave in all loose ends.
Hood Border
- Attach white yarn at the front edge of the hood.
- Pick up approximately 63 stitches around the entire edge.
- Work 1 row of double crochet.
Lace Border (Row 1)
- Chain 6, skip 2 stitches, 1 double crochet in the 3rd stitch. Repeat around.
Lace Border (Row 2)
- Chain 1, 1 single crochet in the first chain-3 space.
- Work 6 double crochets in the next chain-3 space.
- Work 1 single crochet in the next chain-3 space. Repeat around.
Finishing
- Fasten off the yarn. Sew the small gap at the front bottom of the hood border to close it.
- Weave in all loose ends.
Bottom Border of the Sweater
Lace Border (Row 1)
- Attach white yarn to the bottom edge of the sweater.
- Chain 6, skip 2 stitches, 1 double crochet in the 3rd stitch. Repeat around the entire bottom edge.
- Join with a slip stitch.
Lace Border (Row 2)
- Chain 1, 1 single crochet in the first chain-3 space.
- Work 6 double crochets in the next chain-3 space.
- Work 1 single crochet in the next chain-3 space. Repeat around.
- Join with a slip stitch.
Finishing
- Fasten off the yarn and weave in all remaining loose ends.


Leave a Reply