
Bring joy and charm to your handmade collection with this delightful crochet clown head pattern! This step-by-step guide walks you through creating a vibrant clown face complete with a colorful hat, expressive eyes, a bold red nose, and playful yarn fringe hair.
Crochet Clown Head
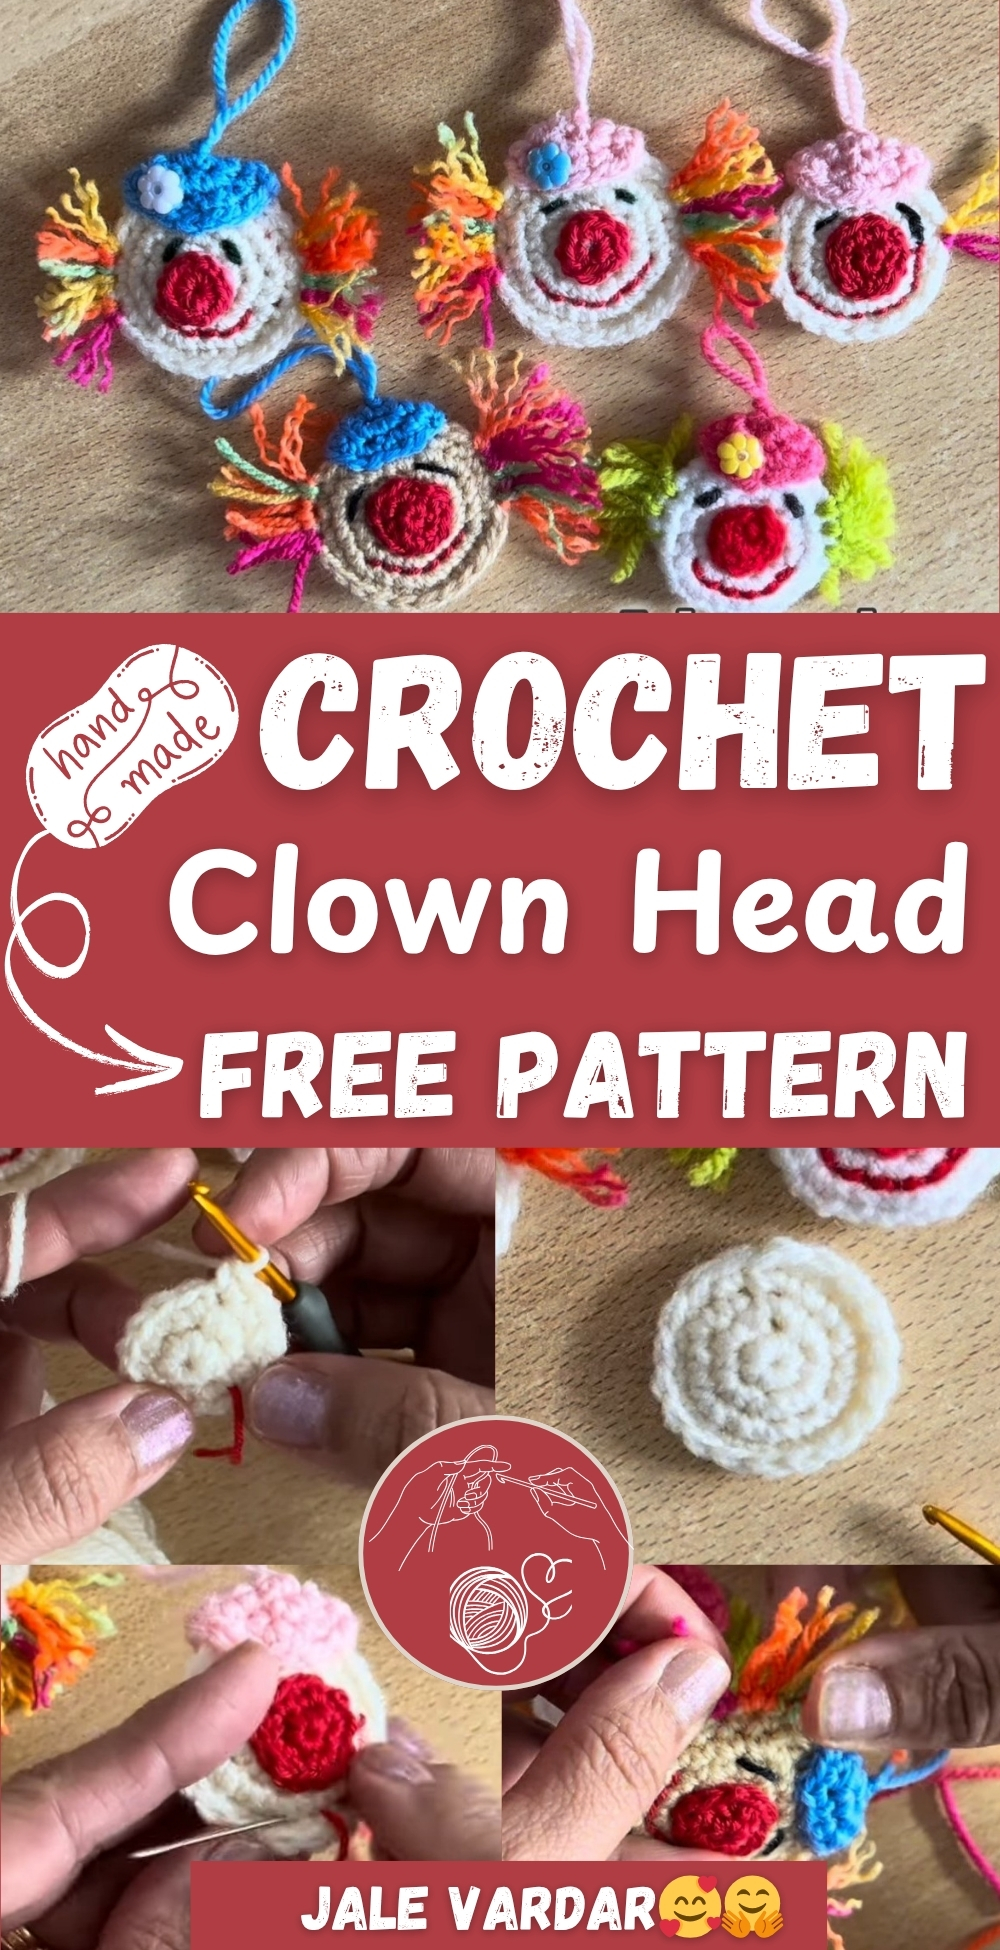
Perfect as a standalone keychain, a whimsical decor piece, or an attachment to a full amigurumi body, this project offers endless customization. Using simple stitches and easily accessible materials, it’s an enjoyable make for both beginners and seasoned crocheters. Add beads, fray the fringe, or switch up the colors to personalize your own cheerful clown creation.
Materials Needed
Yarn:
- Cream or white yarn (for the face)
- Colorful wool yarn (for the hat and fringe)
- Plain colored yarn (optional contrast)
- Red yarn (cotton or wool for nose)
- Small scraps for embellishments
- Two cotton yarns for embroidering eyes
Tools:
- 2 mm crochet hook (for cotton yarn nose)
- 3 mm crochet hook (for the face and hat)
- Thin crochet hook (for weaving ends)
- Stitch markers
- Scissors
- Sewing needle
- Hot glue gun (optional for beads)
- Ruler
- Decorative beads (optional)
Crocheting the Head (Face)
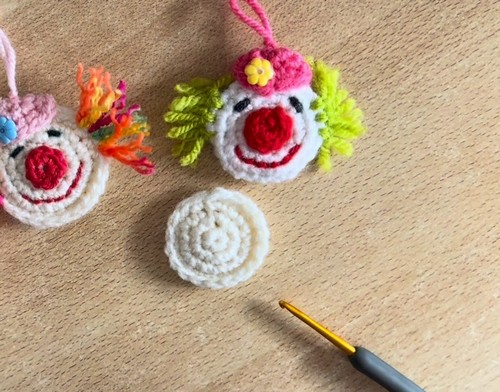
Make Two Identical Pieces:
- Use cream yarn and a 3 mm hook
- Make a magic ring
- Round 1: 6 sc into the ring
- Round 2: 2 sc in each stitch (12 stitches)
- Round 3: 1 sc, inc repeat around (18 stitches)
- For the first piece, fasten off
- For the second piece, do not fasten off
Joining the Head Pieces
- Place both pieces together
- Single crochet around the entire edge, joining the two
- Slip stitch to close
- Cut and pull the yarn through
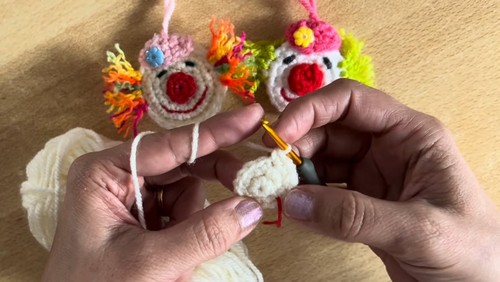
Crocheting the Hat
- Use colorful yarn and 3 mm hook
- Make a magic ring
- Round 1: 6 sc
- Round 2: 2 sc in each stitch (12 stitches)
- Round 3: 1 sc, inc repeat around (18 stitches)
- Slip stitch to close, leave a long tail for sewing
Crocheting the Nose
Use red yarn and 2 mm hook
- Make a magic ring
- Round 1: 6 sc
- Round 2: 2 sc in each stitch (12 stitches)
- Fasten off first nose piece
- Make second piece and leave a long tail for sewing and embroidering the mouth
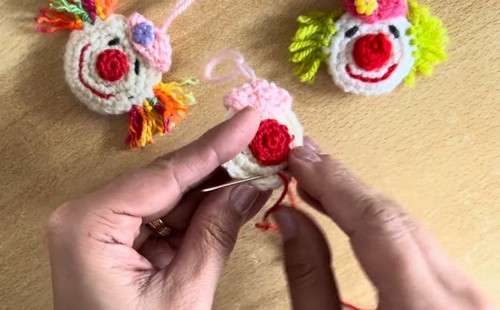
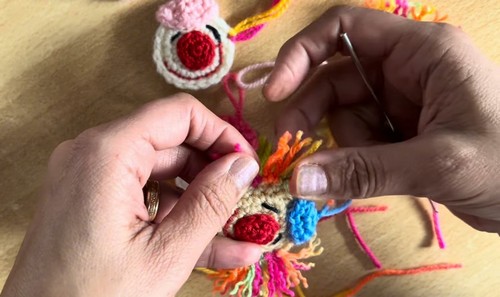
Assembling the Clown Head
- Attach the hat using small stitches
- Create a hanging loop at the top of the hat
- Sew the nose pieces together and then onto the face
- Embroider the mouth in a curved smile
- Embroider the eyes with slight slants for expression
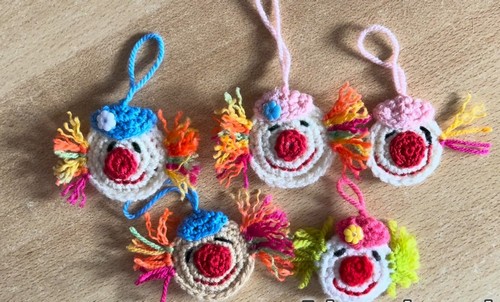
Adding the Fringe Hair
- Cut strands of colorful yarn (~13 cm)
- Fold in half and pull loop through stitch
- Pull yarn ends through the loop to knot
- Fray the yarn (optional) and trim to shape
Optional: Adding Decorative Beads
- Use a hot glue gun to add small beads onto the hat for a festive, decorative look


Leave a Reply