
This crochet slipper pattern is the perfect project for anyone looking to create cozy and stylish footwear from scratch. The step-by-step guide takes you through everything—from forming the toe area to finishing with a cute bow tie.
Cozy Crochet Slippers
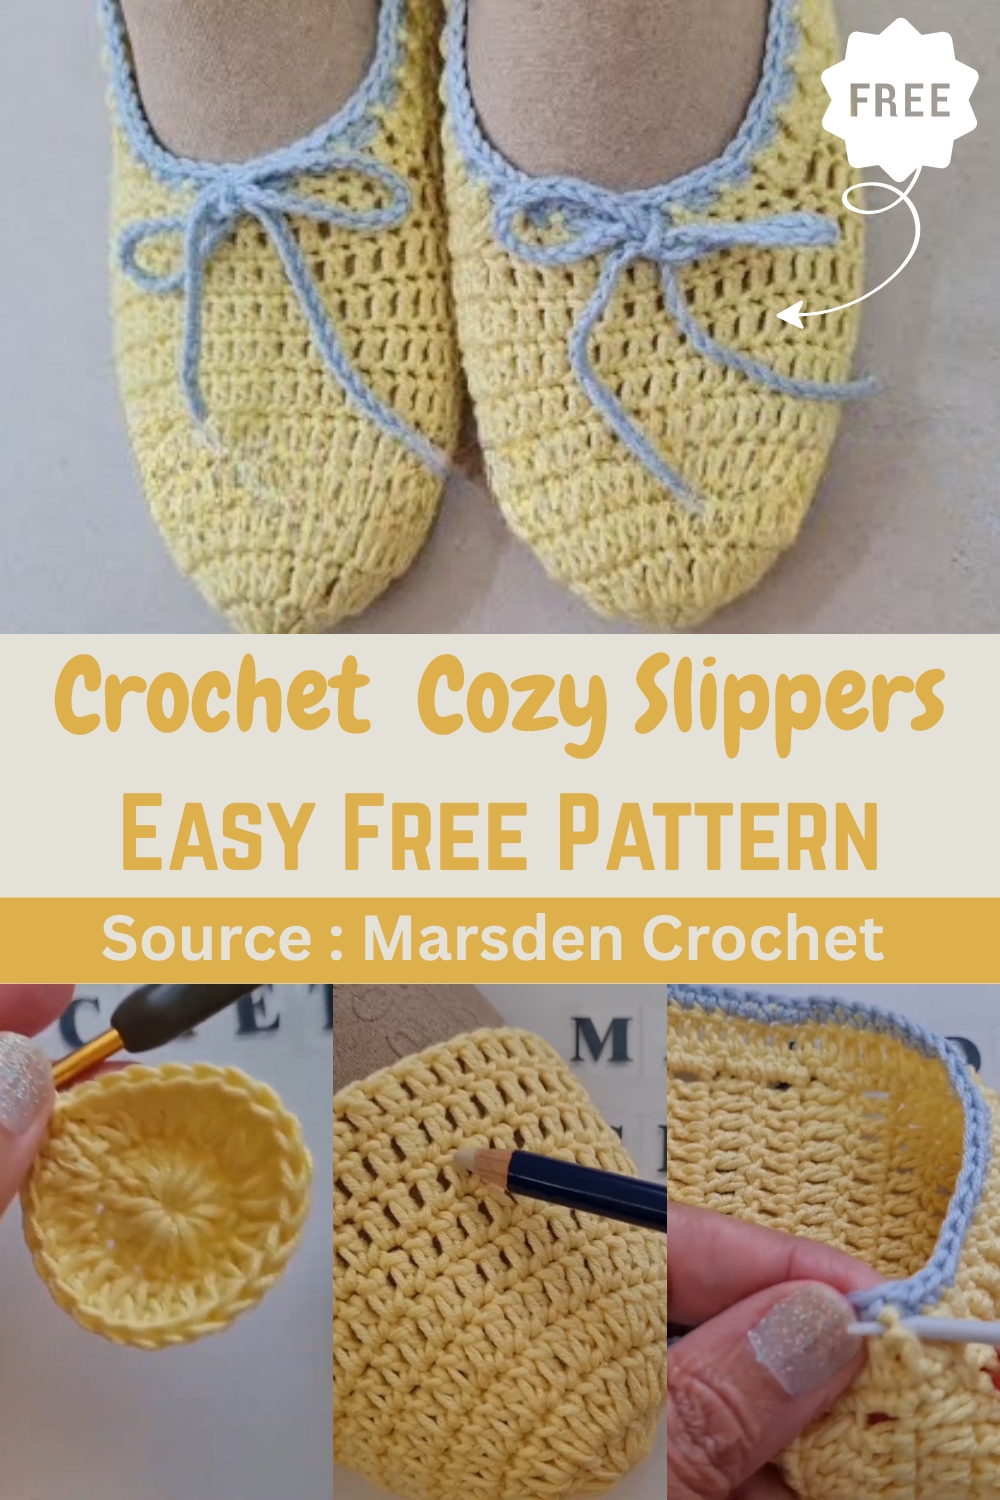
Whether you're a beginner or have some experience, this pattern offers a straightforward way to craft your own comfy slippers. Plus, you can easily customize them with different yarn colors or add fun embellishments for a personal touch. The final product is not only practical but also a great way to show off your crochet skills!
Starting the Slipper (Toe Area):
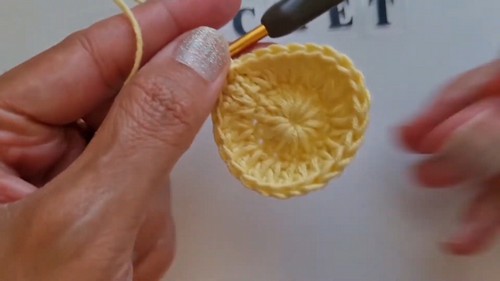
Foundation Chain:
- Make a slip knot and chain 4 stitches.
Forming a Circle:
- Join the last chain to the first chain with a slip stitch to form a circle.
Row 1 (Increasing):
- Chain 2 (these do not count as a stitch).
- Work 12 double crochet stitches into the circle.
- Close the row with a slip stitch into the first double crochet.
Row 2 (Increasing):
- Chain 2 (these do not count as a stitch).
- Work 2 double crochet stitches into each stitch from the previous row to create an increase in every stitch.
- Close the row with a slip stitch into the first double crochet.
For Row 3 (Increasing):
- Chain 2 (these do not count as a stitch).
- The increase pattern for this row is:
- 1 double crochet in the first stitch.
- 2 double crochet in the next stitch.
Repeat this pattern around (1 double crochet, 2 double crochet, etc.). - Close the row with a slip stitch into the first double crochet.
Body of the Slipper (No Increase):
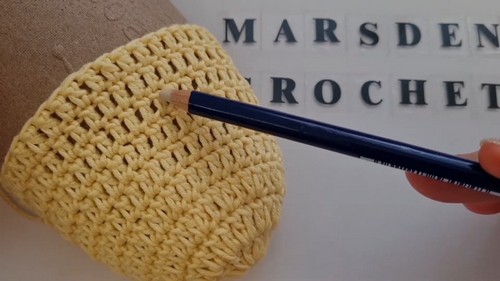
Rows 4-9 (No Increase):
- Chain 2 (these do not count as a stitch).
- Work 1 double crochet into each stitch from the previous row (no increasing).
Repeat this for a total of 6 rows (Row 4 through Row 9).
Shaping the Slipper Opening:
Row 10 (Partial Row):
- Chain 2 (these do not count as a stitch).
- Work double crochet stitches into each stitch, but leave the last 10 stitches unworked.
Turning and Continuing Rows:
- Chain 2 (these do not count as a stitch).
- Turn your work.
- Work 1 double crochet into each stitch across the row.
- Continue working rows in this manner (1 double crochet in each stitch, turning at the end of each row) until you have a total of 14 rows from where you started the partial rows.
Finishing the Slipper:
Seaming the Back:
- Fold the slipper with the wrong side out.
- Join the back edges together using a slip stitch through the front loop of one side and the back loop of the other side.
- Alternatively, you can use a sewing needle to seam the back.
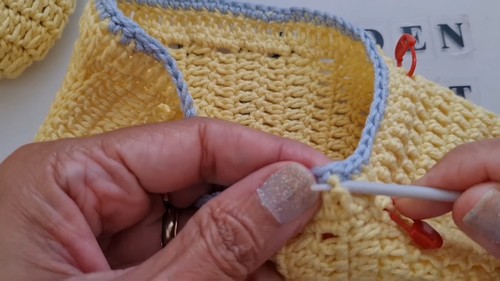
Edging with Single Crochet:
- Turn the slipper right side out.
- Work single crochet stitches around the entire opening of the slipper.
Edging with Double Crochet and Single Crochet:
- Work double crochet stitches along the sides of the slipper opening.
- When you reach the front 10 stitches (the unworked section from Row 10), work single crochet stitches over them.
- Continue with double crochet stitches on the other side.
Final Edging with Different Color (Single Crochet):
- Attach a different color yarn.
- Work single crochet stitches around the entire edge of the slipper.
Creating the Tie:
- Using the darker or different colored yarn, chain 150 stitches.
Weaving the Tie:
- Thread the chain through the double crochet stitches around the opening of the slipper, specifically under the single crochet edging.
- Skip two stitches between the ends of the tie at the front.
- Tie the ends of the tie securely and trim any excess yarn.
- Tie the tie into a bow if desired.


Leave a Reply