
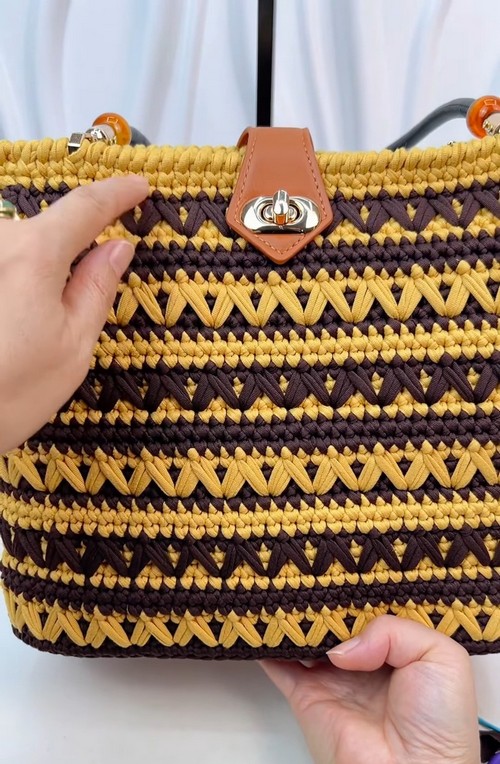
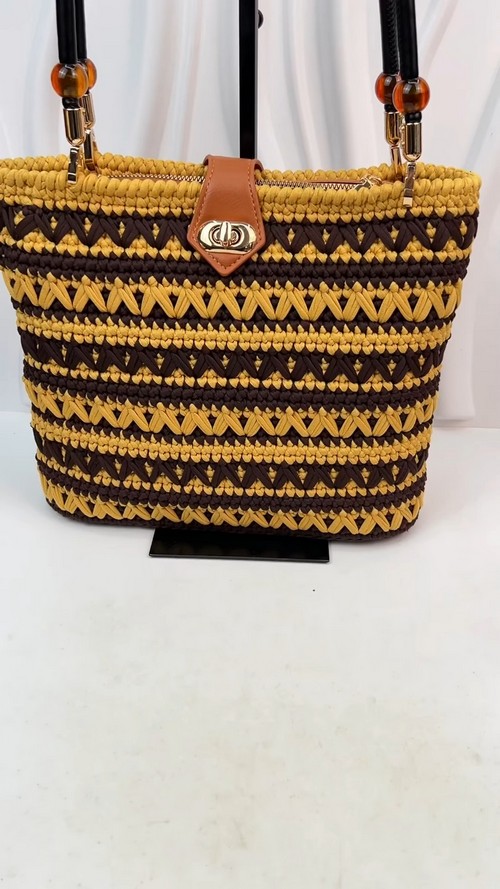
If you're looking for a chic, functional, and creative crochet project, this flower-patterned crochet bag is a must-try. Using fabric ribbon yarn and a clever combination of textured stitches, this pattern walks you through crafting a stylish bag from the base up, including a beautifully integrated floral design that adds a touch of sophistication.
Crochet Mother's Day Bag
Ideal for everyday use or as a thoughtful handmade gift, this bag is highly customizable in terms of color, size, and finish. The structured base and seamless transitions ensure a clean, polished result even for beginners who are ready to level up their crochet skills. Whether you want to explore new techniques or just make something stunning, this pattern has it all.
Materials
- Thin crochet hook
- 4.0 mm crochet hook
- Fabric ribbon yarn in multiple colors
- Scissors
- Yarn needle
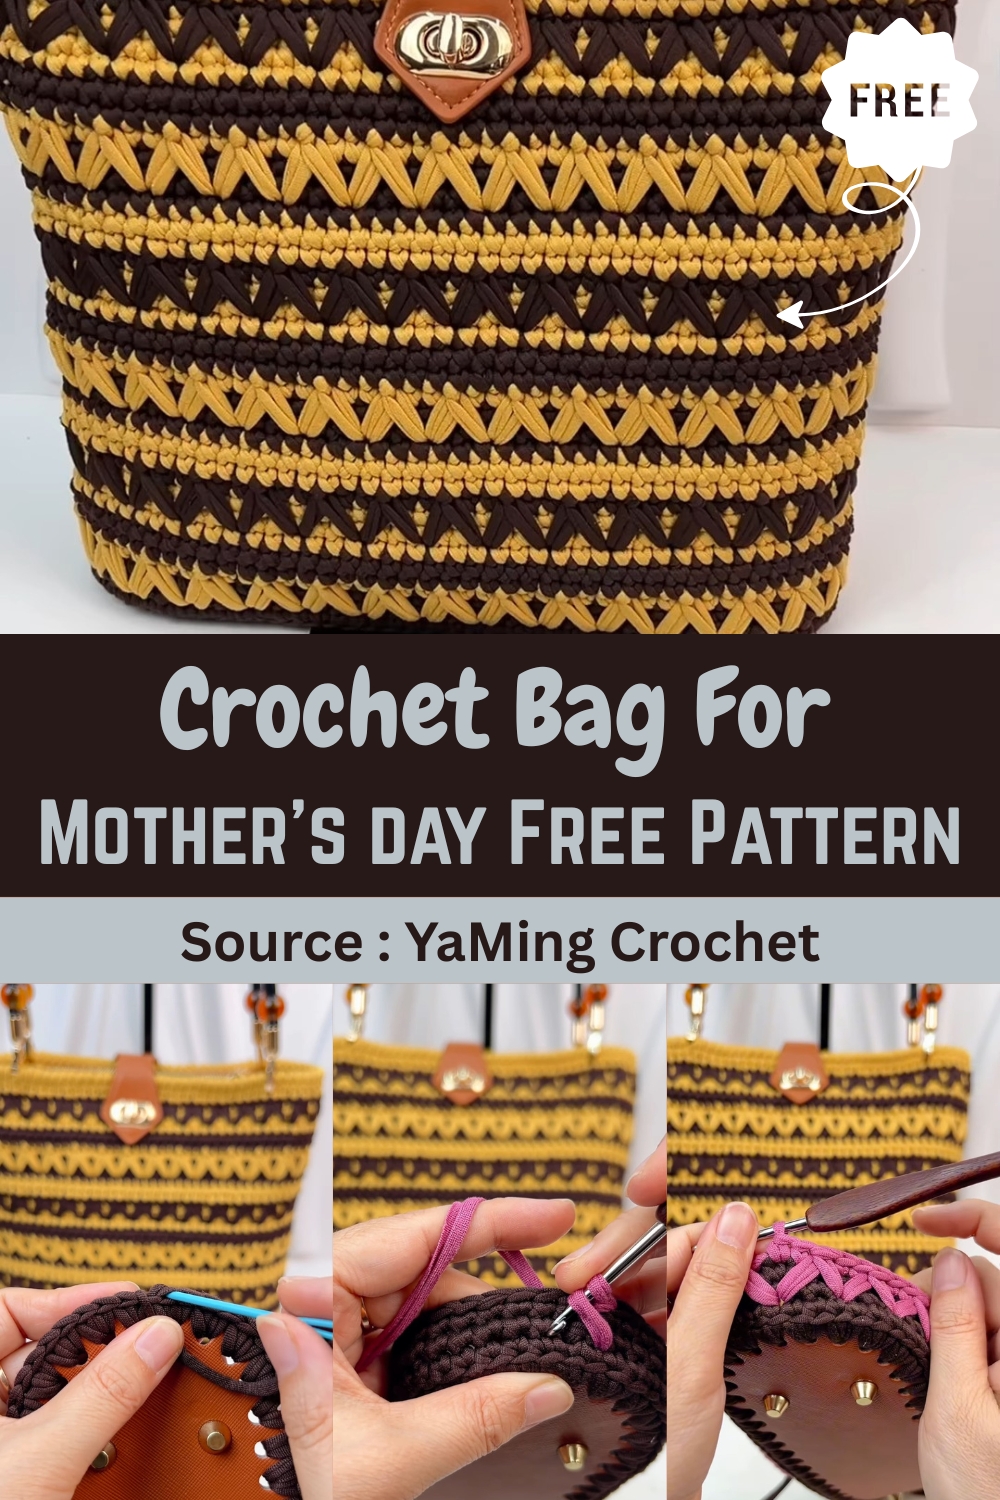
Crocheting the Bag Base
- Insert the hook into the center hole of the bottom base and make a slip stitch.
- In the same hole, crochet 1 single crochet.
- Continue crocheting into the second and third holes.
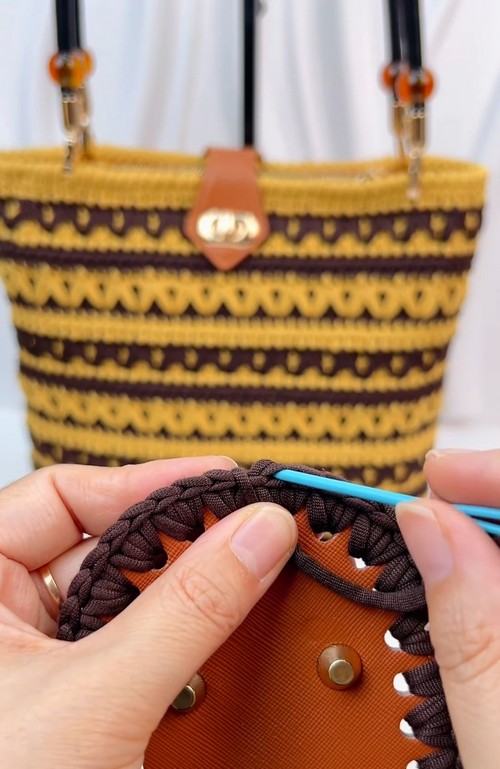
- Make 5 consecutive stitches in this manner.
- Add 10 stitches to each end (20 total).
- For the remaining 17 stitches (9 on one side, 8 on the other), add one stitch every other stitch.
- After adding the 9 stitches, crochet 10 more rounds.
- The base should have 37 stitches in total.
- Before finishing the last stitch, switch yarn color by pulling the new yarn through.
- To join seamlessly, insert the hook under the first braid and pull yarn through.
- Insert the hook into the middle of the last braid, pull yarn through again, then hide and trim the yarn end.
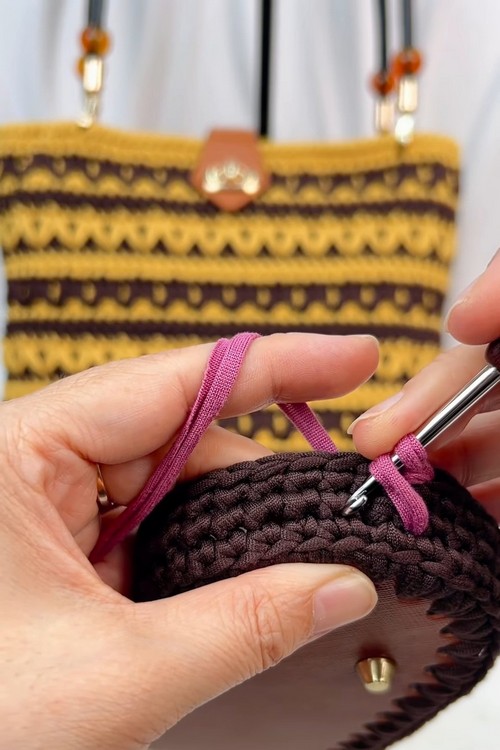
For Crocheting the Bag Body
- The base will have 56 holes, resulting in 93 stitches.
- Use a 4.0 mm hook.
- Start with a chain stitch from the center of any braid.
- Insert hook into the middle of the second braid to begin single crochets.
- Crochet one single crochet into each stitch, going through the horizontal bar to keep it dense.
- Join with a slip stitch by finding the center of the first braid.
- Crochet a chain stitch as a turning chain (do not count as a stitch).
- In the same spot, crochet the first single crochet of the next round.
- In the next braid, insert the hook under the braid and crochet a single crochet.
- Keep stitches tight.
- After completing each round, join with a slip stitch.
- Crochet a total of 3 rounds.
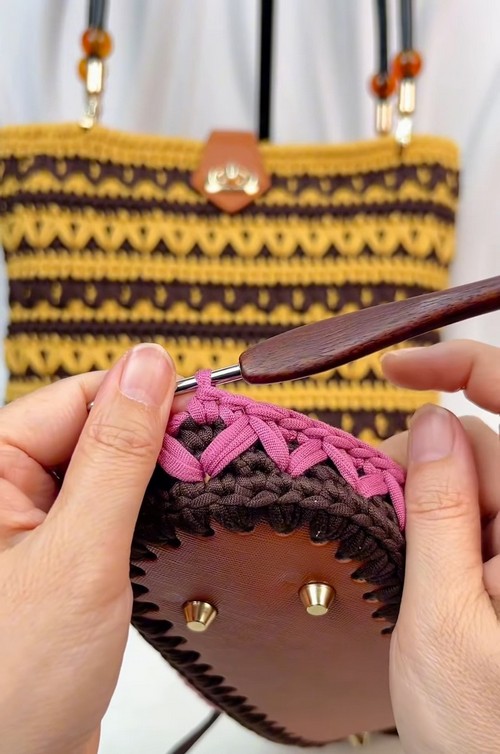
Crocheting the Flower Pattern
- Before finishing the third round’s last stitch, change yarn color by pulling the new yarn through.
- Join with a slip stitch into the first braid, then crochet a standing chain stitch.
- Tighten yarn ends but don’t cut the main yarn.
- Insert hook into the last stitch of the previous two rows and pull up a long loop.
- For the second stitch, insert into the root of the third stitch and pull a loop.
- With 3 loops on the hook, crochet together to form one flower stitch.
- Mark the first stitch.
- Continue by making a single crochet behind the long loop, then another in the same spot to complete a set.
- Repeat: Long loop → Single crochet → Single crochet in same spot.
- Always work into the roots of the previous two rows of single crochets.
- Complete the round with 31 flower patterns.
- Final stitch: insert into the same place on both sides and make one single crochet.
- Change yarn before finishing the last stitch and tighten.
Continuing the Body with Color Progression
- Join with a slip stitch in the first braid.
- Crochet a standing stitch and 1 single crochet in the same stitch.
- Crochet 1 single crochet under each braid.
- Keep stitches slightly tight.
- After the third round of the flower pattern, the bag shape becomes visible.
- Crochet 2 rounds using brown yarn.
- Follow with 3 rounds using red yarn.
- Use coffee-colored yarn to crochet the flower pattern.
- Continue to desired height.
Final Touches
- Add a few more rounds of single crochet at the top.
- Choose from slip stitch, reverse single crochet, or reverse single crochet for the edge.
- Sew on the bag cover and attach the zipper.
- Feel free to experiment with yarn color changes throughout.


Leave a Reply