
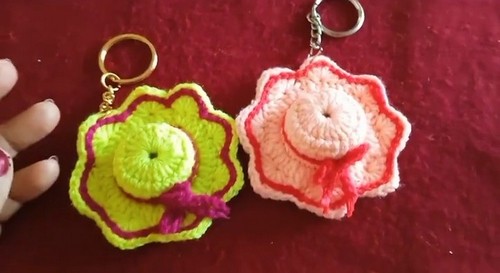
If you love small, charming projects with practical flair, this miniature crochet hat keychain pattern is for you! Designed using soft cotton yarn and simple stitches, this pattern creates a whimsical accessory that can double as a bag charm, a cute gift, or even a hair accessory. It's beginner-friendly, quick to finish, and offers customization through color choices and decorative touches like a contrast border or bow.
Crochet Mini Hat Keychain
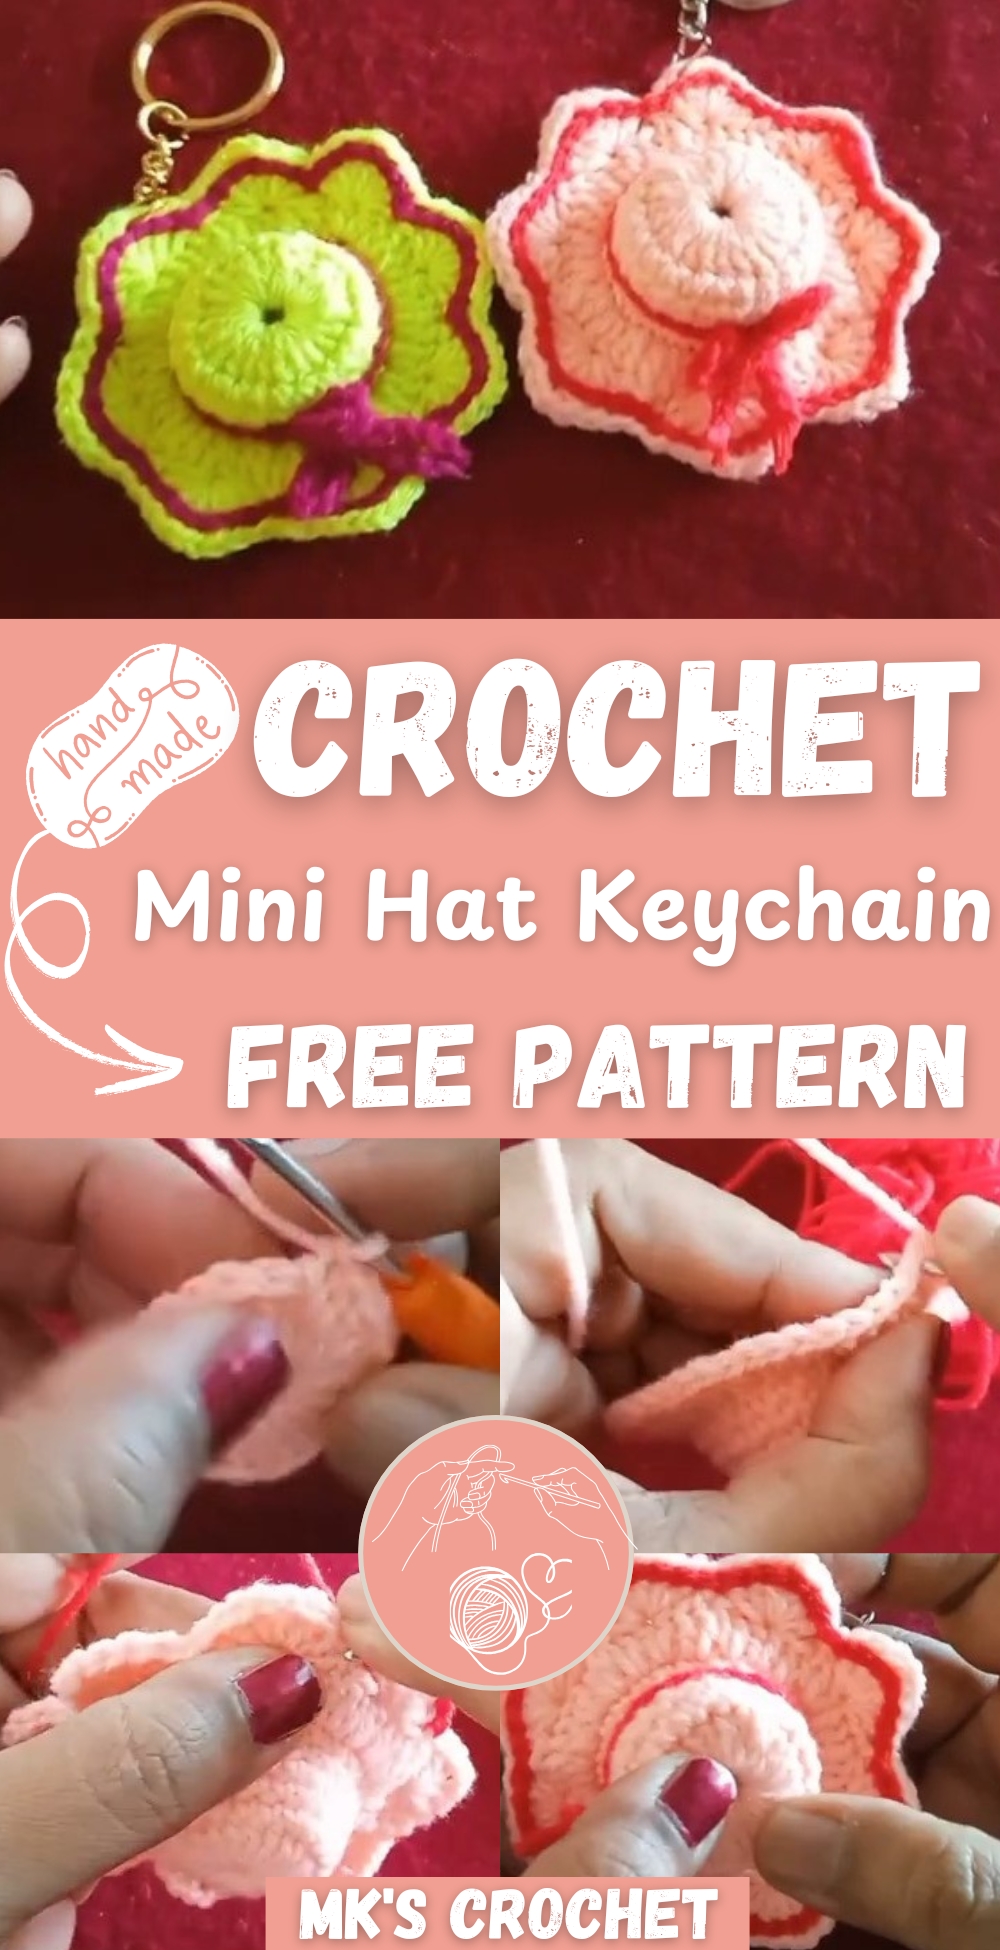
You can even firm it up with a hidden bottle cap or repurpose it into a fun hair clip—versatility at its best. Whether you’re gifting or crafting for yourself, this adorable piece adds charm to any keyring or style.
Materials Needed:
- Cotton yarn (main color and contrast color)
- 2.5 mm crochet hook
- Scissors
- Keyring
- (Optional) Small water bottle cap for structure
- Glue (to secure bow ends)
Instructions:

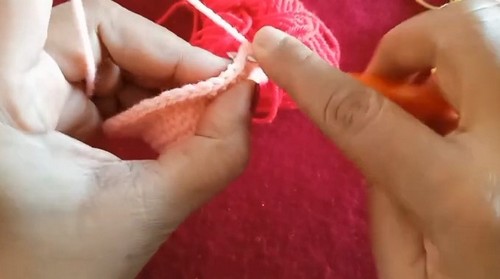
Start with the Magic Ring
- Create a magic ring.
- Chain 3 (counts as first double crochet).
- Work 23 double crochets into the ring (total 24 stitches).
- Join with a slip stitch to the top of the starting chain.
Build the Hat Body
- Work 5 rounds of single crochet:
- 1 single crochet in each stitch (24 stitches total per round).
- Do not increase or decrease.
- Join each round with a slip stitch.
Create the Brim
- Chain 2 (counts as first double crochet).
- Work 2 double crochets in each stitch around (48 stitches total).
- Join with a slip stitch to close the round.
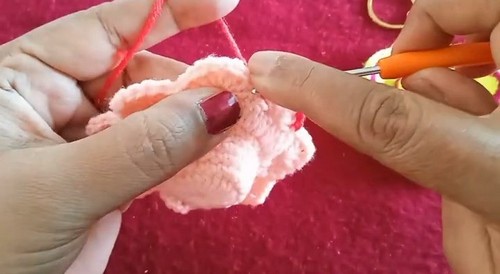
Form Triangle Extensions
- Repeat the following steps 8 times around the brim:
- Skip 2 stitches.
- In the 3rd stitch, work: 3 double crochets, chain 2, 3 double crochets (all in the same stitch).
- Skip 2 stitches, slip stitch into the next stitch to secure the triangle.
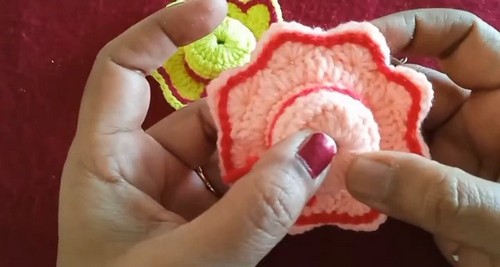
Add a Decorative Border
- Attach contrast color yarn.
- Work slip stitches around the entire edge of the hat, including triangle points, for a polished look.
Make and Attach the Bow
- Chain 80 using the contrast color.
- Tie the chain into a neat bow.
- Trim the ends and secure them with glue to prevent fraying.
- Attach the bow to the front of the hat.
Final Assembly
- (Optional) Insert a bottle cap inside the hat to help it maintain shape.
- Attach the keyring to the top center of the hat.
- Secure everything neatly.
This fun little project is perfect for gifting, customizing, or even transforming into a unique hair accessory.


Leave a Reply