
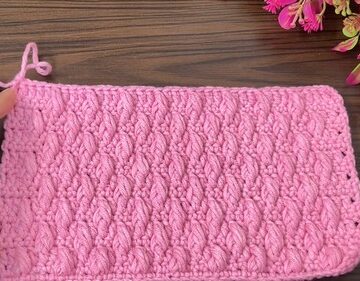
The Whistler Stitch in crochet is a captivating pattern that brings texture and warmth to any handmade creation. It’s easy enough for beginners yet satisfying for those more experienced in the yarn arts. This stitch lends an inviting touch to accessories and home decor, making everything from scarves to afghans feel like cozy, crafted treasures.
Crochet Whistler Stitch

Materials Needed:
- yarn
- hook
Pattern Steps:

Start with a Foundation Row:
- Begin with a foundation row of half double crochets (hdc). In the example, Pam uses 30 hdc's, but you can adjust this to the length you require for your project.
End of Row Transition:
- At the end of every row, you will start by chaining one. To do this, yarn over and pull through the loop on your hook.

Turn Your Work:
- After chaining one, turn your work to start the next row.
Begin the Whistler Stitch Row:
- Yarn over to start as you would with a normal half double crochet.

Insert Hook Under the Special Loop:
- Looking at a stitch from the top, locate the front and back loops. There is an additional loop diagonally behind the stitch which will be targeted.
- Insert your hook under this back diagonal loop, yarn over, and pull the yarn through. You should have three loops on your hook now.
Work with the Front Loop:
- Yarn over again and insert your hook under the front loop only.
- Yarn over and draw through this front loop only; you will have five loops on your hook.

Complete the Whistler Stitch:
- Yarn over and pull through all five loops on your hook.
- Repeat steps 4-7 across the entire row to complete a row of the Whistler Stitch.
Transition to the Next Row:
- Chain one and turn your work.
- Follow this with a row of half double crochet.

Alternate Rows:
- Continue alternating a row of half double crochets with a row of the Whistler Stitch to create the textured pattern.


Leave a Reply