
This versatile, customizable crochet lace top is the perfect addition to your wardrobe. Whether you're crafting for yourself or gifting it to someone else, this top is designed to fit any body type. With a few simple adjustments to the shoulder width and body length, you can create a piece that fits you perfectly.
Crochet Lace Top

The Crochet Lace Top tutorial guides you through each step, from the initial creation of straps to the intricate stitch patterns that make this top so unique. You'll learn how to combine different crochet techniques, including shells, front and back post double crochets, and increases and decreases, to shape the top to your ideal fit. This project is a perfect way to show off your crochet skills while creating a stunning and comfortable garment.
Materials and Customization:
- The creator used weight 3 cotton yarn with a 3 ½ mm hook, but a weight 4 cotton yarn with a 4 ½ mm hook is used in the tutorial.
- The top is designed to be 100% customizable to your perfect fit, using your own measurements.
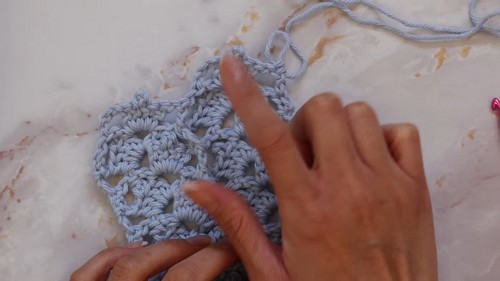
Creating the Straps:
- Start with multiples of 16 for the shoulder width.
- Chain up four, skip three chains, and place a double crochet in the fourth chain.
- Chain three, then create a shell in the same chain: two double crochets, a pico (chain two and slip stitch), and two more double crochets.
- Chain one, skip three chains, and place a double crochet in the fourth chain.
- Repeat the pattern of chain one, skip three, and create a shell.
- Chain one and finish the row with a double crochet in the final chain.
Body of the Top:
- Begin the next row with a double crochet.
- Chain one, and place a double crochet in the chain space after the shell.
- Chain three, and create a shell in the same chain space.
- Chain one, and do a front post double crochet around the middle double crochet.
- Chain one, and complete the design in the next chain space.
- Chain one, and double crochet into the edge.
- Alternate front and back post double crochets in subsequent rows to keep the design consistent.
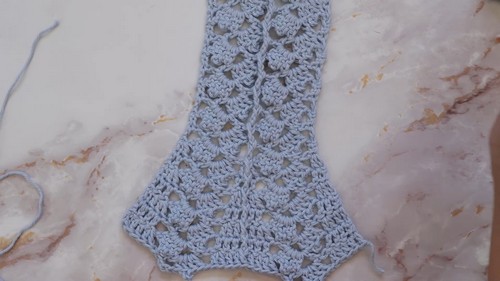
Increasing for Coverage:
- After reaching the desired length for the straps (e.g., 6 inches), begin increasing to start the coverage for the top.
- In the increase row, place an additional double crochet at the beginning and around the middle double crochet.
- Alternate increasing rows with no increase rows.
- Determine when to stop increasing based on your bust size (¼ of your bust measurement).

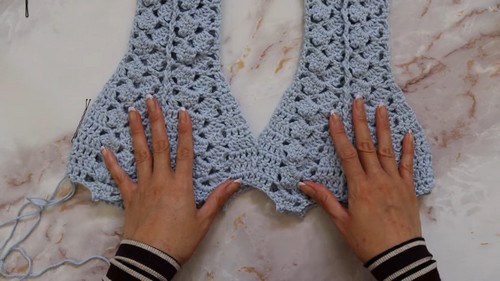
Creating the Back Panel:
- Once the front piece is complete, create a symmetrical back panel by working off the front piece.
- Attach yarn at the beginning of the front piece and repeat the pattern.
- Follow the same row counts and increase/decrease patterns as the front piece.
Joining the Panels:
- With both panels complete, join them at the shoulder straps and sides.
- Use markers to align the edges and ensure symmetry.
- Connect the pieces using double crochets, treating the edges as one piece.
- Continue the established pattern while joining, maintaining the front/back post double crochet alternation.
Decreasing for Fitted Shape:
- Once the top reaches the desired length (e.g., to the nipples), begin decreasing to create a fitted shape.
- Decrease by combining two double crochets into one, focusing on the double crochets closest to the design.
- Alternate decreasing rows with no decrease rows to control the fit.
- Continue until the top fits snugly around the bottom of the breast or rib cage.
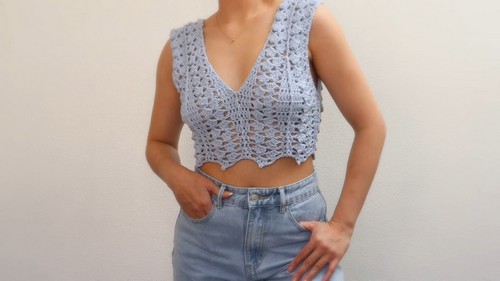
Finishing the Top:
- After achieving the desired fit, continue with rows of no decreases to reach the desired length of the top.
- Fasten off and weave in ends for a clean finish.


Leave a Reply