
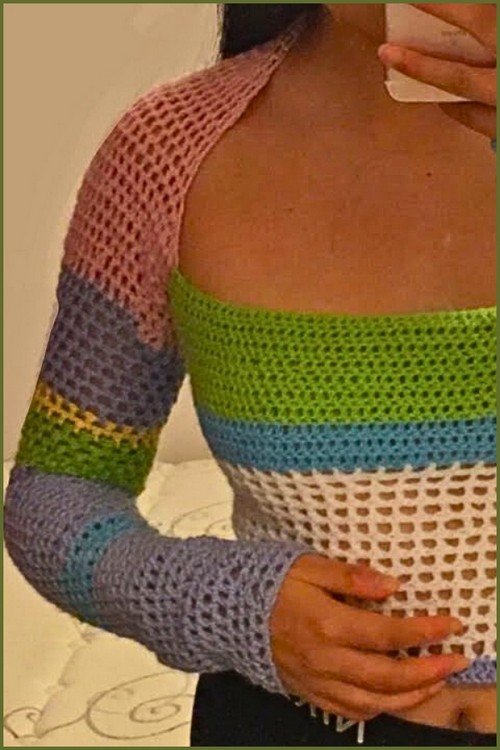
The Scarlett and Sam crochet top is a sleeves first design that makes fit and shaping feel much simpler than most beginner garments. You build two spiral sleeves, shape the shoulder opening with a gentle curve, then connect the sleeves across the chest and work the body downward in wide rows.
Crochet Top
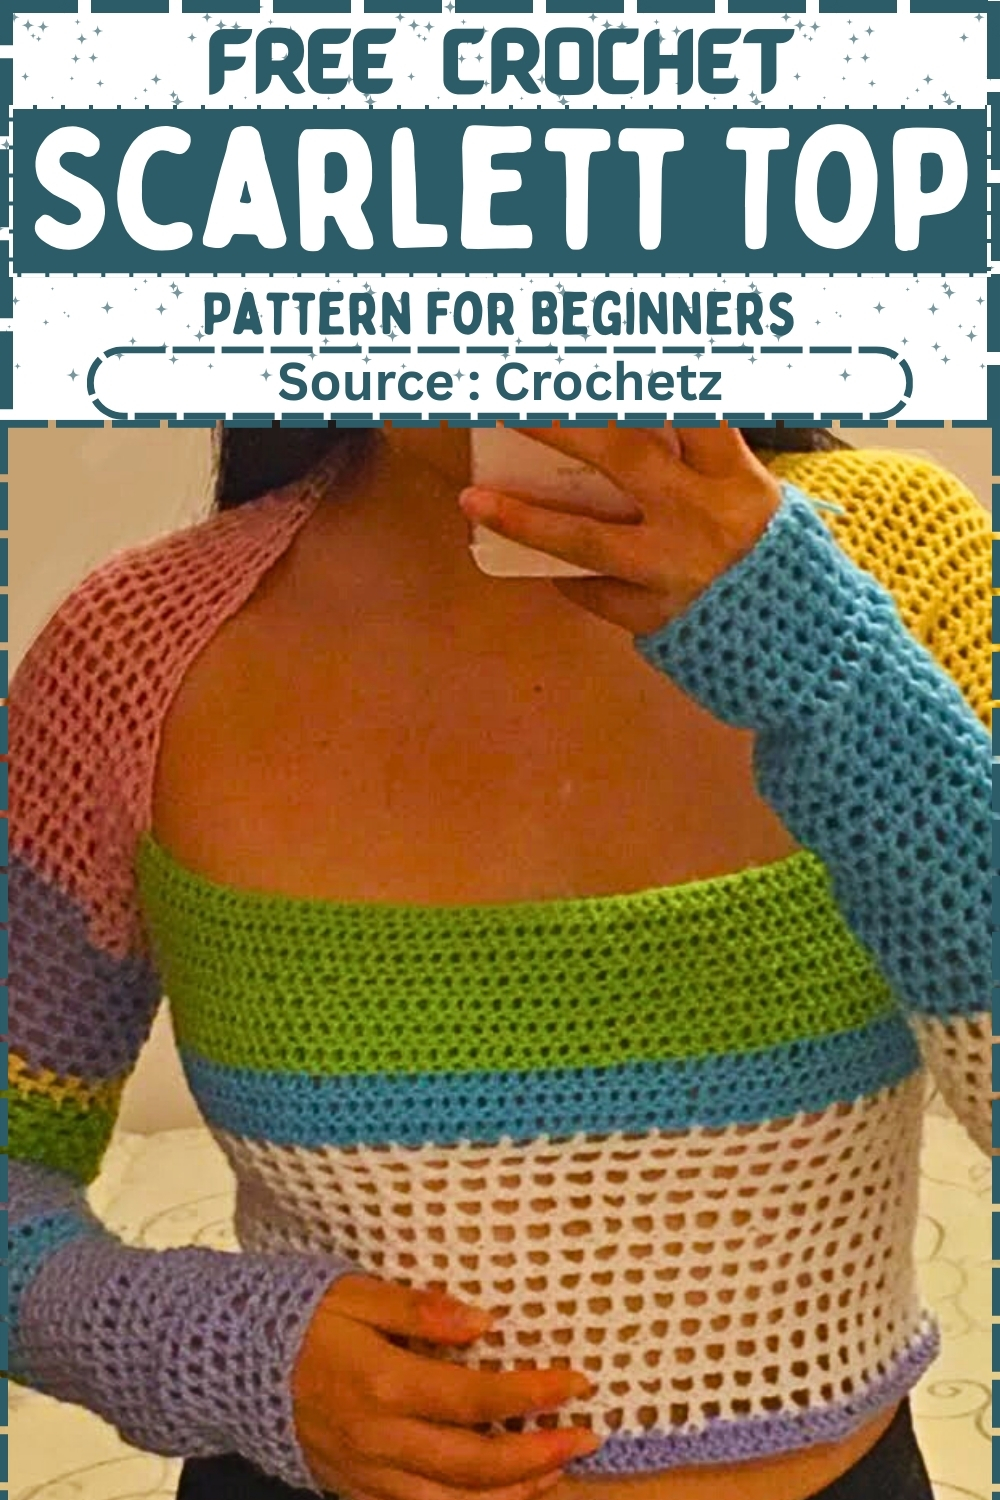
Because the chest connection is made with a chain, you can easily adjust width and coverage without complicated math. You can keep it cropped, lengthen it into a tunic, or play with color blocks for a bold look. This Scarlett and Sam crochet top pattern uses basic stitches and clear construction steps while still giving you a polished handmade finish.
Materials
- Yarn in your chosen weight and colors
- Crochet hook that gives you a fabric you like for tops
- Stitch markers or scrap yarn pieces
- Scissors
- Yarn needle
- Measuring tape
Abbreviations and Stitches
- ch chain
- sl st slip stitch
- sc single crochet
- hdc half double crochet
- dc double crochet
- inc increase by working two stitches in one stitch
- dec decrease by working two stitches together or skipping one stitch depending on your preferred method
- RS right side
- WS wrong side
Notes Before You Start
- This top is made in three big parts: Sleeve 1, Sleeve 2, then the body panel worked across both sleeves plus the chest chain.
- Sleeves are worked in a spiral at first, so you will not join with a slip stitch unless you choose to.
- Use stitch markers to mark the first stitch of the round when working spirals.
- The chest chain is the key sizing control. A longer chain gives more width and looser fit. A shorter chain gives more fitted coverage.
- If you want more coverage at the bust, add more rows to the body panel and consider adding extra width using increases at the side edges.
Sizing and Fit Guide
- Measure upper arm circumference where you want the sleeve to sit and use that for the sleeve foundation chain.
- Measure from your upper arm start point to your shoulder to know how many sleeve rounds you need.
- Measure across your chest from one sleeve join point to the other to estimate the chest chain length.
- Decide your finished length from underarm to hem before you begin the body section so you know how many rows you want.
Sleeve One
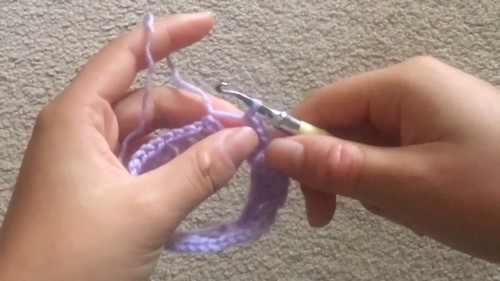
Sleeve One Foundation
- Make a slip knot
- Chain until the chain wraps comfortably around your upper arm without stretching tight
- Join the chain into a circle with a sl st, making sure the chain is not twisted
- Place a stitch marker in the join area to mark the start of your rounds
For Sleeve One Spiral Round Setup
- Ch 3 to count as your first dc
- Dc in each chain around
- When you reach the end of the round, do not join if you are working in a spiral
- Place a marker in the first stitch of the next round so you always know where the round begins
For Sleeve One Main Sleeve Rounds
- Dc in each stitch around for each round
- Keep working rounds until the sleeve length reaches your shoulder
- Try the sleeve on every few rounds so you stop at the right length for your body
Sleeve One Shoulder Shaping With Increases
- Choose two opposite points on the round to place increases so the shaping stays even
- Work dc around and at the first increase point work 2 dc in the same stitch
- Continue dc around and at the second increase point work 2 dc in the same stitch
- Repeat the increase placement for each shoulder shaping round as needed
- Stop increasing once the sleeve fits comfortably over the shoulder area without pulling
Sleeve One Creating the Shoulder Gap
- Decide where you want the opening for the shoulder gap to sit
- Stop working in the spiral and switch to rows
- Ch 1 and turn
- Dc across the stitches that form the top section of the sleeve, leaving an opening by not working across the full round
- Ch 1 and turn at the end of each row
For Sleeve One Curve Shaping With Decreases
- Work dc across the row
- At the start of the row reduce width by one stitch using your preferred decrease method or by skipping the first stitch
- Continue dc across
- Repeat for three rows to create a gentle curve
Sleeve One Curve Shaping With Increases
- Work dc across the row
- At the start of the next row increase width by one stitch by working 2 dc into the first stitch
- Continue dc across
- Repeat for three rows to mirror the curve and bring the width back up
For Sleeve One Leveling the Spiral Edge
- Work a final row across the sleeve opening edge
- Use a few hdc near the end to soften the height difference
- Use a few sc at the very end to level the edge even more
- Fasten off and leave a long tail for weaving
Sleeve Two
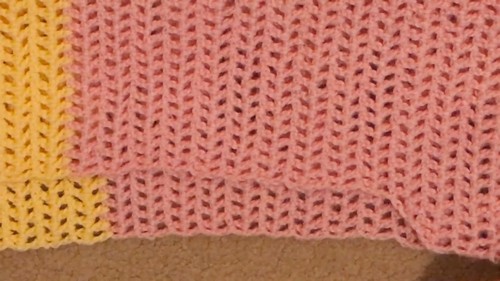
Sleeve Two Foundation
- Repeat the same foundation steps as Sleeve One
- Chain to fit your other arm and join into a circle
- Mark the start of the round
For Sleeve Two Spiral Rounds
- Repeat the same spiral rounds in dc until the sleeve reaches the shoulder
- Repeat the same increase placement so Sleeve Two matches Sleeve One
Sleeve Two Shoulder Gap and Shaping
- Repeat the same switch to rows to create the shoulder gap
- Repeat three decrease rows for the curve
- Repeat three increase rows to mirror the curve
- Repeat the leveling row using hdc and sc to smooth the edge
- Fasten off and weave in ends later
Connecting the Sleeves Across the Chest
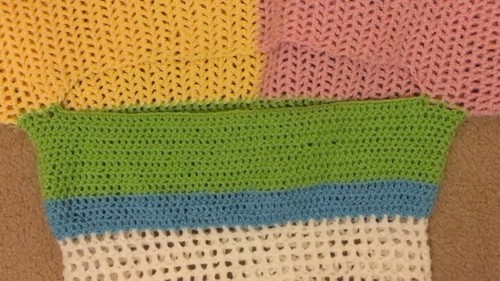
Positioning the Sleeves
- Lay both sleeves flat with the front sides facing up
- Identify the curved shoulder corners where you will connect the chest chain
- Make sure both sleeves are mirrored so the openings face the same direction
Creating the Chest Chain
- Attach yarn to the shoulder corner of Sleeve One
- Ch until the chain reaches the shoulder corner of Sleeve Two across your chest
- Adjust the chain length by holding the sleeves up to your body or measuring across your chest
- Attach the chain to Sleeve Two shoulder corner with a sl st or sc
- Check that the sleeves sit evenly and the chain is not twisting
Securing the Connection
- Work one stabilizing pass along the chain connection if you want more strength
- Sc across the chain and into the sleeve corner stitches to lock everything in place
- Fasten off only if you want to start the body with fresh yarn, otherwise continue
Body Panel Setup
Attaching for the First Body Row
- Attach yarn at the bottom edge of the sleeve and chest chain assembly
- Ch 3 to count as the first dc of the row
- Dc across Sleeve One bottom edge stitches
- Dc across the chest chain by placing one dc in each chain stitch
- Dc across Sleeve Two bottom edge stitches
- Ch 3 and turn
Phase 2 Body Panel Main Rows
- Dc in each stitch across the entire width
- Ch 3 and turn at the end of every row
- Keep tension consistent so the body does not flare unless you want it to
Color Block Option
- Work your first color block for a set number of rows such as 7 rows
- Change color at the end of the last stitch of the row by pulling the new color through the final loop
- Ch 3 with the new color and continue
Adjusting Fit Through the Body
Adding Width for a Looser Fit
- At the start of a row work 2 dc into the first stitch
- Dc across as normal
- At the end of the row work 2 dc into the last stitch
- Repeat for a few rows if you want a gentle A line shape
Keeping the Body Straight
- Dc in each stitch across with no increases
- Try on the top every few rows to check the fit through the bust and waist
Adding Shaping for the Waist
- Work a few decrease rows by skipping one stitch near each side edge
- Return to normal dc rows after you reach the fit you like
Length and Hem
Cropped Length
- Continue body rows until the hem reaches your desired cropped point
- Finish with an optional border row in sc for structure
Longer Length
- Continue body rows until the hem reaches your preferred length
- Add an optional decorative border such as sc rows or a simple hdc row for weight
Optional Bottom Border
- Work one round or row of sc evenly along the hem
- Work a second row of sc if you want a firmer edge
- Fasten off and weave in ends
Optional Sleeve Edging
- Attach yarn at the sleeve edge
- Work sc evenly around the sleeve opening
- Add a second round of sc if you want a tighter sleeve finish
- Fasten off
Finishing
- Weave in all ends securely
- Block lightly if your yarn benefits from it
- Try on and adjust by adding more rows, a firmer border, or extra width at the sides if needed


Leave a Reply