
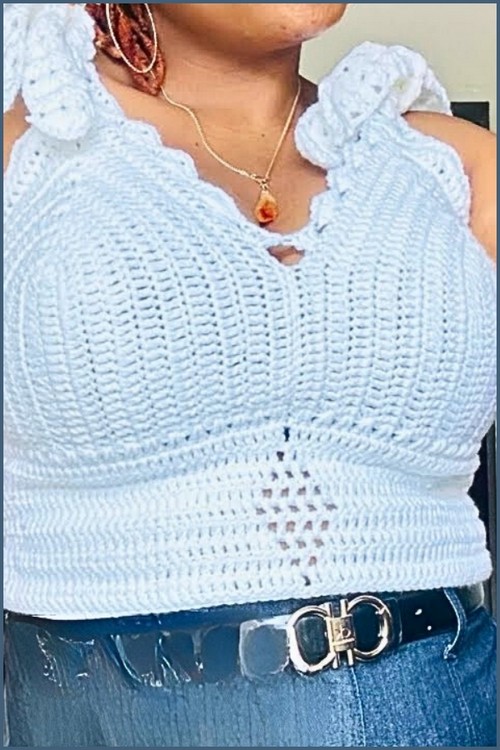
This plus size crochet bralette pattern is built for a more secure fit by combining structured cups, extra side coverage, and an adjustable back lace up closure. You’ll crochet two cups first, then add side extensions that help the bralette sit flatter and feel more supportive around the body.
Crochet Bralette
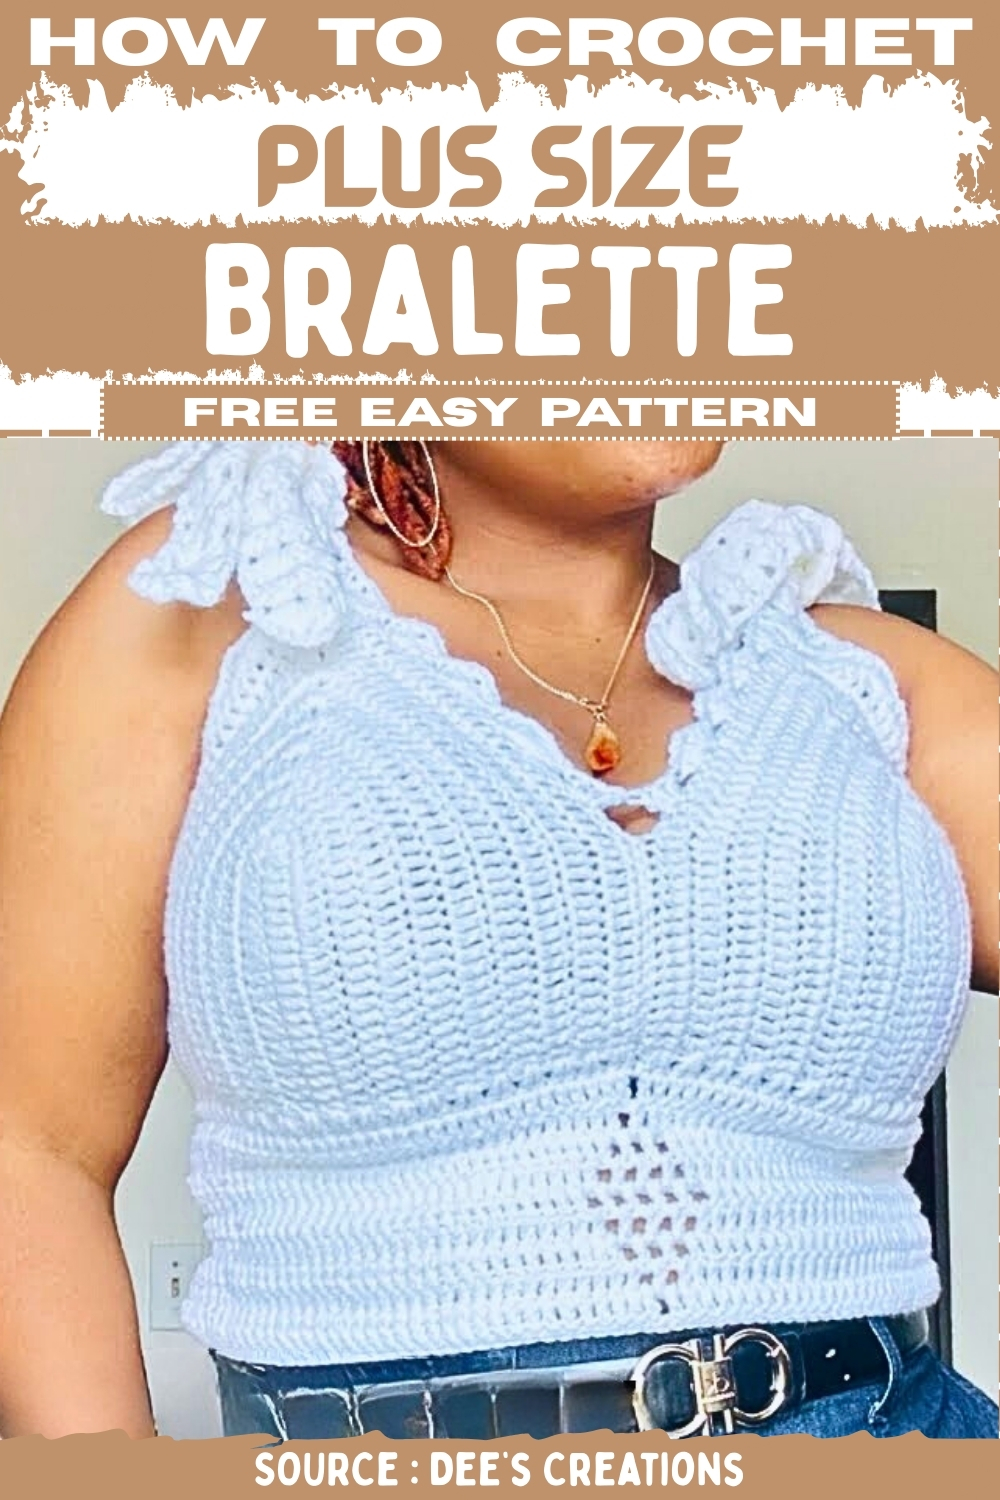
After joining the cups, the bottom band is worked in a diamond style mesh that looks detailed but is made from a simple “chain 1, skip 1” box technique that expands and then closes back down. A shell border finishes the edges and becomes the foundation for shell style straps you can lengthen to your preference, making the whole piece easy to customize for coverage, length, and comfort.
Materials
- Yarn in your preferred weight that matches your desired drape and support
- Crochet hook size that gives you a firm fabric you like
- Scissors
- Yarn needle
- Stitch markers
- Measuring tape
Stitch Guide
- ch means chain
- sl st means slip stitch
- sc means single crochet
- dc means double crochet
- shell means 3 dc, ch 2, 3 dc worked in the same space
Sizing Notes For A Plus Size Fit
- The cup is started with a chain of 20 in the original instructions, and you can increase or decrease this starting chain to change cup height
- The cup grows by adding the peak increase every row, so more rows means wider coverage
- The side extensions determine how far the bralette wraps around your sides, so keep adding rows until you reach the width you want
- The back ties allow adjustability, so you can make the extension slightly snug and rely on the lace up tie for comfort
Construction Overview
- Crochet two cups
- Add side extensions to each cup on opposite sides so they mirror
- Join cups at the center
- Build a bottom foundation row across the entire lower edge
- Work the diamond pattern band, increasing then decreasing the boxes
- Finish the bottom with a single crochet edging
- Add shell border around the top and sides
- Crochet shell stitch straps for shoulders and back
- Add long chain ties for the back lace up closure
Bra Cups Make Two
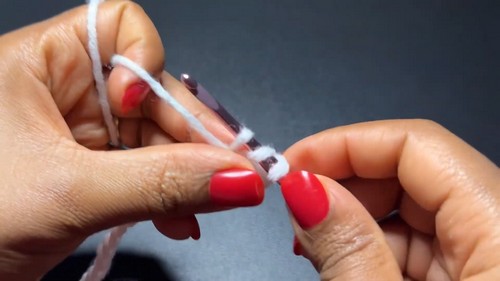
- Make a slip knot and chain 20
- Skip 3 chains and work dc into the 4th chain from the hook
- Work 1 dc in each chain across to the last chain
- In the last chain work 2 dc, ch 1, 2 dc all in the same stitch to form the peak
- Rotate to work along the underside of the foundation chain
- Work 1 dc in each chain down the opposite side back toward the start
- Confirm you have the same number of dc on both sides of the peak with the ch 1 space centered at the top
- Ch 3 and turn to begin the next row
- Work 1 dc in each stitch up to the peak ch 1 space
- In the peak ch 1 space work 2 dc, ch 1, 2 dc
- Work 1 dc in each stitch to the end of the row
- Repeat the previous row until you have 10 total rows for the cup
- Fasten off for the first cup
- Repeat all cup steps for the second cup
Side Extensions
- Identify the top edge of the cup and the outer side where you want extra coverage
- For Cup 1, attach yarn at the outer top side edge where the extension should begin
- Ch 3 and turn and work dc into the next 18 stitches only so you create a partial row
- Stop after 18 stitches and leave the remaining stitches unworked
- Ch 3 and turn and work 1 dc in each of the 18 stitches
- Repeat these short rows until the extension reaches your desired width
- Measure the extension width and aim for about 7.5 inches or your preferred plus size coverage
- Fasten off Cup 1 extension
- For Cup 2, attach yarn on the opposite outer side so the two cups mirror and face each other correctly
- Repeat the same extension rows on Cup 2 until it matches Cup 1
Joining The Cups
- Place the cups side by side with wrong sides facing up
- Align the inner edges of the cups so the peaks are level
- Attach yarn at the bottom center where the cups meet
- Work 15 sc through both layers to join the cups together at the center
- Check that the cups open outward evenly and that the extensions sit on the outside edges
- Do not twist the cups when joining
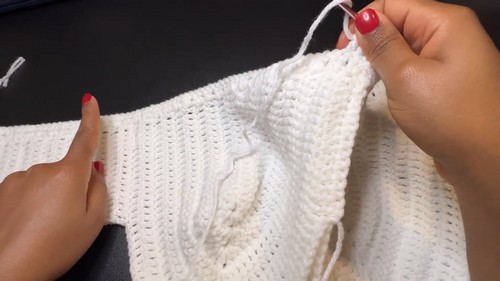
Bottom Foundation Across The Lower Edge
- Attach yarn at one bottom corner of the bralette
- Work along the lower edge using the side of rows as your stitch placement
- Work 2 dc into the side of each row across the cup bottom and across the center join section
- Continue 2 dc into the side of each row across the second cup bottom
- Continue across the bottom of the side extensions using consistent spacing so the edge stays flat
- At the end, turn your work to start the diamond band
Diamond Pattern Bottom Band Setup
- Decide where you want the diamond motifs to sit on the front
- Work a base row in dc across the bottom edge if you need to stabilize spacing before starting boxes
- Start the diamond boxes by working dc across until you reach the first diamond position
- Ch 1 and skip 1 stitch to create the first box opening
- Continue in dc across until you reach the next diamond position
- Ch 1 and skip 1 stitch to create the next box opening
- Continue in dc to the end of the row
- Ch 3 and turn to begin the next row of the band

For Diamond Pattern Increase Rows
- Work dc across until you reach the first box area
- Work 1 dc into the previous row ch 1 space to anchor the box section
- Ch 1 and skip 1 stitch to create the next box segment
- Work 1 dc into the next ch 1 space or the next appropriate anchor point so the box line grows
- Repeat the box growth so each new row adds boxes and widens the diamond
- Keep the rest of the row in dc between diamonds so the band stays structured
- Continue increasing until the widest part of the diamond reaches 5 boxes across
Diamond Pattern Decrease Rows
- Work dc across until you reach the diamond section
- Close the outer edge boxes by working dc into the edge anchors instead of chaining over them
- Keep the center boxes going so the diamond narrows evenly on both sides
- Continue decreasing each row until only 1 box remains at the center of the diamond
- After the diamond closes, continue dc across to maintain a straight band edge
Finishing The Bottom Edge
- After you reach your desired band length and the diamonds are complete, do one full row of sc along the very bottom edge
- Keep sc stitches evenly spaced so the edge is firm and not wavy
- Fasten off and weave in ends
Shell Border Around Top And Sides
- Attach yarn at one side edge near the top border
- Work shell stitches around the top and side edges to create a decorative finish
- For each shell, work 3 dc, ch 2, 3 dc in the same space
- Skip a consistent amount between shells so the edge lays flat
- Continue around the cup tops and along the side edges and around the extension edges
- Join neatly and fasten off
Shoulder Straps In Shell Stitch
- Attach yarn to the top shell of the cup where you want the strap to start
- Ch 3 to begin the strap row
- Work a shell into the ch 2 space of the previous round’s shell
- End the row with a dc to anchor the strap edge
- Ch 3 and turn and repeat the same shell placement so the strap builds as a narrow shell column
- Repeat strap rows until the strap reaches your desired length
- Fasten off and repeat for the second shoulder strap
Back Straps On The Extensions
- Attach yarn on the back side of one extension where you want a back strap column
- Work the same shell strap method using shells into the ch 2 spaces
- Repeat rows until the back strap matches the look and length you want
- Fasten off and repeat on the other extension
Back Lace Up Ties
- Attach yarn at one back corner
- Crochet a long chain long enough to criss cross through the back shell spaces and tie in a bow
- Fasten off and weave in the ends securely
- Lace the chain through shell ch 2 spaces in a criss cross pattern
- Tie to adjust fit and support
Finishing
- Weave in all ends with a yarn needle
- Try on and adjust the back lacing and strap length if needed
- If you want more coverage, add more cup rows before the extensions
- If you want more wrap around support, add more extension rows before joining and edging


Leave a Reply