
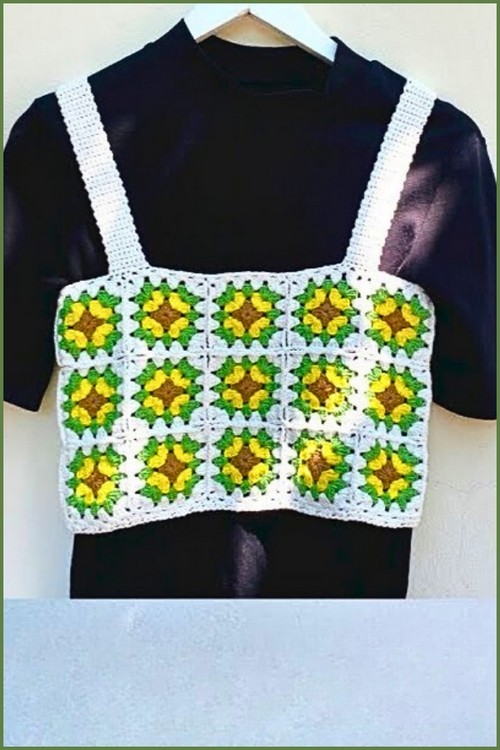
This crochet granny square crop top pattern is a modular, buildable project that lets you create a perfectly fitted top by combining classic granny squares into a front and back panel. Because each square is made the same way, you can easily adjust sizing by changing the number of rounds per square, adding or removing squares, or slightly modifying the panel layout.
Crochet Granny Square Crop Top

It is a great warm weather make using cotton or acrylic yarn, and it also works beautifully with variegated yarn for the squares plus a solid joining color for crisp definition. You can keep it short and cropped, add length at the hem, make wider straps for more support, or finish with neat edging around the neckline and armholes for a clean professional look.
Materials
- Cotton or acrylic yarn for squares and joining
- 3.5 mm or 4.0 mm crochet hook
- Scissors
- Yarn needle
- Measuring tape
- Stitch markers or safety pins optional
Abbreviations
- ch chain
- sl st slip stitch
- sc single crochet
- dc double crochet
- sp space
- rep repeat
- sk skip
Notes Before You Start
- This top is made from granny squares joined into a front panel and a back panel
- Adjust size in two ways by changing square size or changing the number of squares
- For a snugger fit, use fewer rounds per square or fewer squares across the width
- For a looser fit, add rounds or add squares
- Variegated yarn makes each square look unique while a solid color join gives clean structure
- Always keep corners consistent with 3 dc, ch 2, 3 dc
- Side spaces are worked with 3 dc in each ch 1 space from the previous round
Sizing and Planning
- Measure bust around the fullest part
- Decide if you want a fitted or relaxed crop top
- Decide your layout based on square size
- Use these common layout ideas as a starting point
- 2 squares across by 3 squares tall per panel for a narrow crop fit
- 3 squares across by 3 squares tall per panel for a more standard fit
- 3 squares across by 4 squares tall per panel for more length
- Make one square first, measure it, and use that to plan total width and length
- If your square is 4 inches wide, 3 squares across gives about 12 inches panel width before joining and edging
- If your square is 5 inches wide, 3 squares across gives about 15 inches panel width before joining and edging
- Remember you have a front panel and a back panel, and the side seams connect them into a tube
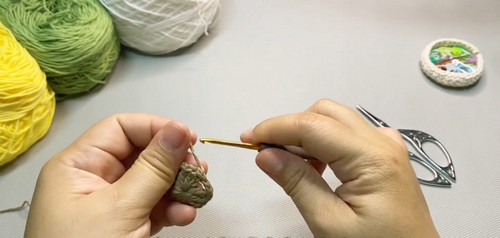
Granny Square Instructions
Square Setup
- Make a magic ring or chain 4 and join with a sl st to form a ring
- Ch 3 to count as the first dc
Round 1
- Work 2 dc into the ring
- Ch 2
- Work 3 dc into the ring
- Ch 2
- Work 3 dc into the ring
- Ch 2
- Work 3 dc into the ring
- Ch 2
- Join with a sl st to the top of the starting ch 3
Round 2
- Sl st into the nearest corner ch 2 sp
- Ch 3
- Work 2 dc into the same corner sp
- Ch 2
- Work 3 dc into the same corner sp
- Ch 1
- In the next corner ch 2 sp work 3 dc
- Ch 2
- Work 3 dc in the same corner sp
- Ch 1
- Repeat the corner sequence in each corner around
- Join with a sl st to the top of the starting ch 3
For Round 3
- Sl st into the nearest corner ch 2 sp
- Ch 3
- Work 2 dc into the same corner sp
- Ch 2
- Work 3 dc into the same corner sp
- Ch 1
- In the next side ch 1 sp work 3 dc
- Ch 1
- In the next corner ch 2 sp work 3 dc
- Ch 2
- Work 3 dc in the same corner sp
- Ch 1
- Repeat around, working 3 dc into each side ch 1 sp and corners as usual
- Join with a sl st to the top of the starting ch 3
Rounds 4 to Desired Size
- Sl st into the nearest corner ch 2 sp
- Ch 3
- Work 2 dc into the same corner sp
- Ch 2
- Work 3 dc into the same corner sp
- Ch 1
- Work 3 dc into each side ch 1 sp across to the next corner
- Ch 1 between each 3 dc cluster
- In each corner sp work 3 dc, ch 2, 3 dc
- Repeat around until your square reaches the size you want
- Join each round with a sl st to the top of the starting ch 3
- Fasten off for a clean square edge or continue if you are making all squares in the same color
Make the Required Number of Squares
- Make enough squares for your chosen layout
- Block or gently steam the squares if they curl so joining is easier
- Weave in ends now or weave in after joining, but do not leave long tails loose
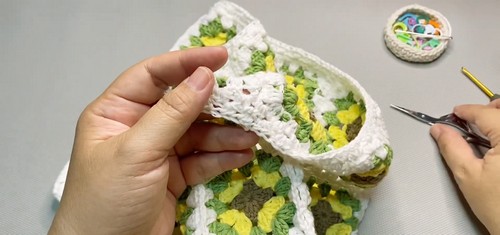
Layout and Panel Building
Arrange Your Squares
- Lay squares flat and decide which ones go where for the front panel
- Lay squares flat and decide which ones go where for the back panel
- Keep the top edges aligned so the neckline sits evenly
- Use stitch markers to label top corners if helpful
Joining Method Option 1 Single Crochet Join
- Place two squares with wrong sides together for a raised ridge join or right sides together for a flatter look
- Insert hook through both squares along the edge stitches or spaces
- Pull up a loop and sc to join
- Continue sc evenly along the edge, matching stitches to stitches
- At corners, work one sc in the corner sp to keep corners neat
- Repeat until the seam is complete
- Join squares row by row to create one front panel and one back panel
Joining Method Option 2 Join As You Go
- Work the final round of a square and join it to a neighboring square as you reach an edge that touches
- Replace ch 1 spaces along a joining edge with a sl st into the matching space on the adjacent square
- Continue the round and maintain corners normally
- Use this method if you like joining while crocheting instead of sewing later
Side Seams and Body Shaping
Join the Panels Into a Tube
- Place front and back panels right sides together
- Match the side edges from the bottom up
- Decide how deep you want the armholes
- Mark the armhole opening from the top down using stitch markers
- Seam the sides from the bottom hem up to the armhole marker using sc join or whip stitch
- Leave the marked top section unjoined for armholes
- Repeat on the other side seam
Adjusting the Crop Top Fit
- If the body feels too loose, add a round of edging that slightly tightens the openings using sc evenly
- If the body feels too tight, consider adding an extra column of squares on each panel next time
- If you want more length without adding squares, add hem rounds at the bottom
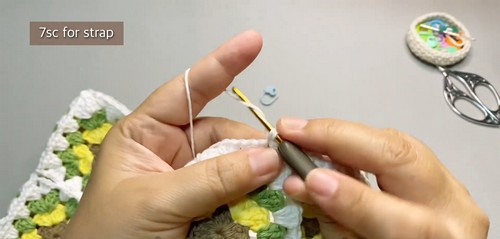
Straps
Strap Planning
- Decide if you want thin straps or wider straps
- Thin straps are quicker and more delicate
- Wide straps add comfort and support
For Strap Option 1 Simple Chain Strap
- Attach yarn to the top corner of the front panel
- Ch to the length needed to reach the back panel comfortably
- Sl st into the matching top corner of the back panel
- Turn and work sc into each chain back toward the front to strengthen the strap
- Sl st to secure on the front panel
- Fasten off
- Repeat for the second strap
Strap Option 2 Wide Strap With Rows
- Attach yarn to the top corner of the front panel
- Ch to the length needed to reach the back panel
- Sc in the second ch from hook and sc across to form the base strap row
- Sl st into the back panel corner to attach
- Turn and work sc back across the strap stitches to the front panel
- Ch 1 and turn, then work another row of sc to widen
- Repeat rows until strap is the width you want
- Attach securely to both panels and fasten off
- Repeat for the second strap
Strap Placement Tips
- Try the top on and pin strap positions before final sewing
- Move straps slightly inward for more neckline coverage
- Move straps outward for a wider neckline
Neckline and Armhole Edging
Stabilizing Edging
- Attach yarn at one neckline edge
- Work sc evenly around the neckline
- Work one sc in each dc stitch area and one sc in each ch space as needed to keep it smooth
- At corners or strap joins, work an extra sc if the edge pulls
- Join with a sl st and fasten off
- Repeat sc edging around each armhole
Bottom Hem Finishing Options
For Hem Option 1 Simple Double Crochet Border
- Attach yarn at the bottom edge seam
- Ch 3 to count as dc
- Dc evenly around the entire bottom edge
- Join with a sl st to the top of the starting ch 3
- Repeat for 1 to 3 rounds depending on the length you want
- Fasten off
Hem Option 2 Clean Single Crochet Border
- Attach yarn at the bottom edge seam
- Ch 1
- Sc evenly around the entire bottom edge
- Join with a sl st to the first sc
- Repeat for 1 to 2 rounds for a firmer edge
- Fasten off
Hem Option 3 Ribbed Hem Band
- Attach yarn at the bottom edge
- Ch a small number for ribbing height, such as ch 7 to ch 11 depending on your preference
- Work sc in the second ch from hook and sc across
- Sl st into the next stitch on the bottom edge of the top
- Sl st into the next stitch again
- Turn, sk the sl sts, and sc back across in back loops only for ribbing texture
- Repeat around the entire bottom edge
- Seam the ribbing ends together and fasten off
Finishing
- Weave in all ends securely with a yarn needle
- Try the top on and check strap length and neckline comfort
- Reinforce strap joins with extra stitches if needed
- Lightly block the top so the squares lay flat and the seams relax
Customization Ideas
- Add more rounds to each square for a bolder oversized motif look
- Add extra squares for a longer top or a looser fit
- Use solid squares for a classic look or variegated squares for a playful effect
- Add a decorative edging such as picots around the neckline or hem using sc, ch 3, sl st in the first ch repeated evenly
- Add a tie back by leaving the back panel open and working lace loops and chains for lacing


Leave a Reply