
Get ready to add a fun twist to your crochet projects with this easy-to-follow Loop Stitch tutorial! Perfect for beginners or anyone looking to jazz up their work with some funky textures, this video guide walks you through each part of the process.
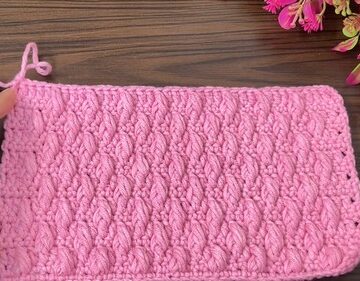
Crochet Loop Stitch

Material:
- Yarn: Big Twist Value, 4-weight yarn, in the color Jack-O-Lantern (from the Halloween collection)
- Crochet Hook: Size K (use a hook size that feels comfortable; bigger hooks can make the process easier for tutorials)
Instructions:
Starting Your Project:
- Begin with a slip knot on your crochet hook.
- Chain 10 stitches for your base, then chain 1 more for a turning chain.

Creating the First Row (Half Double Crochets):
- Starting from the second chain from the hook (use the yarn's movement to identify loops if needed), yarn over.
- Insert your hook into the second chain.
- Yarn over again and pull through, ensuring you have three loops on your hook.
- Then, yarn over one more time and pull through all three loops. This completes your half double crochet.
- Continue the process across the chain. You should end up with 10 half double crochets.

Starting the Loop Stitch Row:
- Chain 1 (this counts as your turning chain) and turn your work.
- Start as if you're creating another half double crochet: yarn over and insert your hook into the first stitch.
- Here's where the Loop Stitch variation begins: Position the yarn so you designate one side as the 'front' and the other as the 'back'.
- When you insert your hook for each stitch, aim to go to the right of the front yarn and to the left of the back yarn, pulling it around and through the stitch.
- Yarn over and pull through all loops to complete the stitch.
- Adjust the size of your loop before finalizing it with your stitch. This is crucial for creating even loops or preparing them for cutting.
- Repeat these steps for each stitch across the row.

Continuing Your Piece:
- Alternate between rows of half double crochets and loop stitches to create your desired fabric. Feel free to adjust the spacing between loop rows with different stitches based on your design preferences.
Finalizing the Loop Stitches:

- For projects like grass or fringe, after completing your piece, you can cut through the loops creating a textured effect.
Additional Tips:
- Practice adjusting loop sizes and keep the tension consistent for a neat appearance.
- You can play around with the widths and heights of your loops to create varied textures.
- Experiment with different rows and stitches in between the loop rows for interesting designs.
Closing Remarks:
- Lastly, remember that there are many ways to do the loop stitch, and the one described is tailored to comfort and ease for beginners or those looking to try a new variant. Always choose the method and materials that work best for you and your project needs.


Leave a Reply