
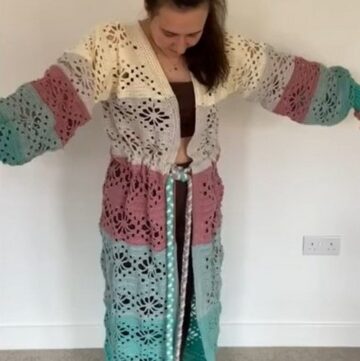
The Honeycomb Cardigan crochet pattern is a beginner friendly yet stylish project that creates a beautifully textured and cozy garment using simple stitches. Designed with comfort and versatility in mind, this cardigan is worked in flat panels and assembled with easy seaming, making it perfect for confident beginners and relaxing for experienced crocheters.
Crochet Honeycomb Cardigan

The honeycomb stitch pattern adds visual interest without being complicated, while the customizable measurements allow you to adjust the width, length, and sleeves for the perfect fit. This cardigan works well as a lightweight layering piece for everyday wear and can be easily adapted for different seasons by changing yarn weight or length.
Preparation and Measurements
- Measure A for the width of one front panel from neck to shoulder edge
- Measure B for the desired cardigan length from shoulder to waist or hip
- Measure C by doubling Measurement A and adding space for the neck opening
- Measure D by dividing the arm circumference by two for armhole depth
Materials
- Size 2 yarn
- 3.75 mm crochet hook for body
- 3 mm crochet hook for ribbing
- Yarn needle
- Stitch markers
- Scissors
Front Panels Make 2
- Chain a number divisible by 4 and add 2 until it reaches Measurement A
- Add 2 extra chains for the turning chain
- Work Row 1 by making double crochet stitches into the back bumps of the chain with a repeat of three double crochet, chain one, skip one
- Work Row 2 by chaining two, turning, and repeating the honeycomb stitch pattern across the row
- Repeat Row 2 until the panel reaches Measurement B
- Fasten off and make a second identical front panel

Back Panel
- Chain the number required to match Measurement C
- Work the same honeycomb stitch pattern used for the front panels
- Continue until the back panel matches the length of the front panels
Assembly
- Place front panels on top of the back panel with right sides facing
- Sew shoulder seams through back loops only for a clean finish
- Measure armhole depth using Measurement D and mark with stitch markers
- Sew side seams from the stitch marker down to the bottom edge
Sleeves
- Turn the cardigan right side out
- Attach yarn at the bottom of the armhole opening
- Work in rounds using the honeycomb stitch pattern
- Turn the work after each round to maintain texture
- Continue until sleeve reaches desired length

Sleeve Cuff
- Switch to the 3 mm hook
- Work double crochet decreases across the round to shape the cuff
- Crochet alternating front post double crochet and back post double crochet rounds
- Continue ribbing until cuff measures 1.5 to 2 inches
Bottom Ribbing
- Attach yarn to the bottom corner of the cardigan
- Work one row of double crochet evenly across the bottom edge
- Continue with alternating front post and back post double crochet rows
- Stop when ribbing measures 1.5 to 2 inches

Center and Neck Ribbing
- Attach yarn at the bottom front corner
- Work double crochet evenly up the front edge, around the neckline, and down the other side
- Finish with alternating front post and back post double crochet ribbing
- Fasten off and weave in all ends


Leave a Reply