
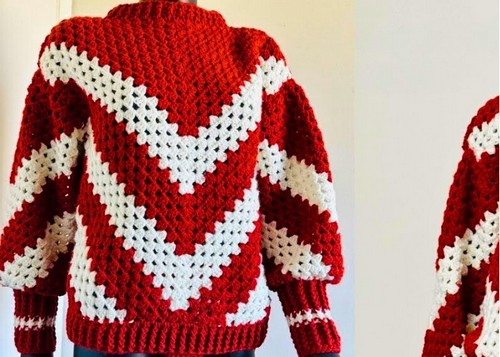
This crochet granny stitch sweater pattern is perfect for beginners who want to create a cozy, stylish garment with a simple construction. The design is built from granny-style triangle panels that are squared off and joined to form a comfortable, relaxed-fit sweater.
Crochet Granny Stitch Sweater
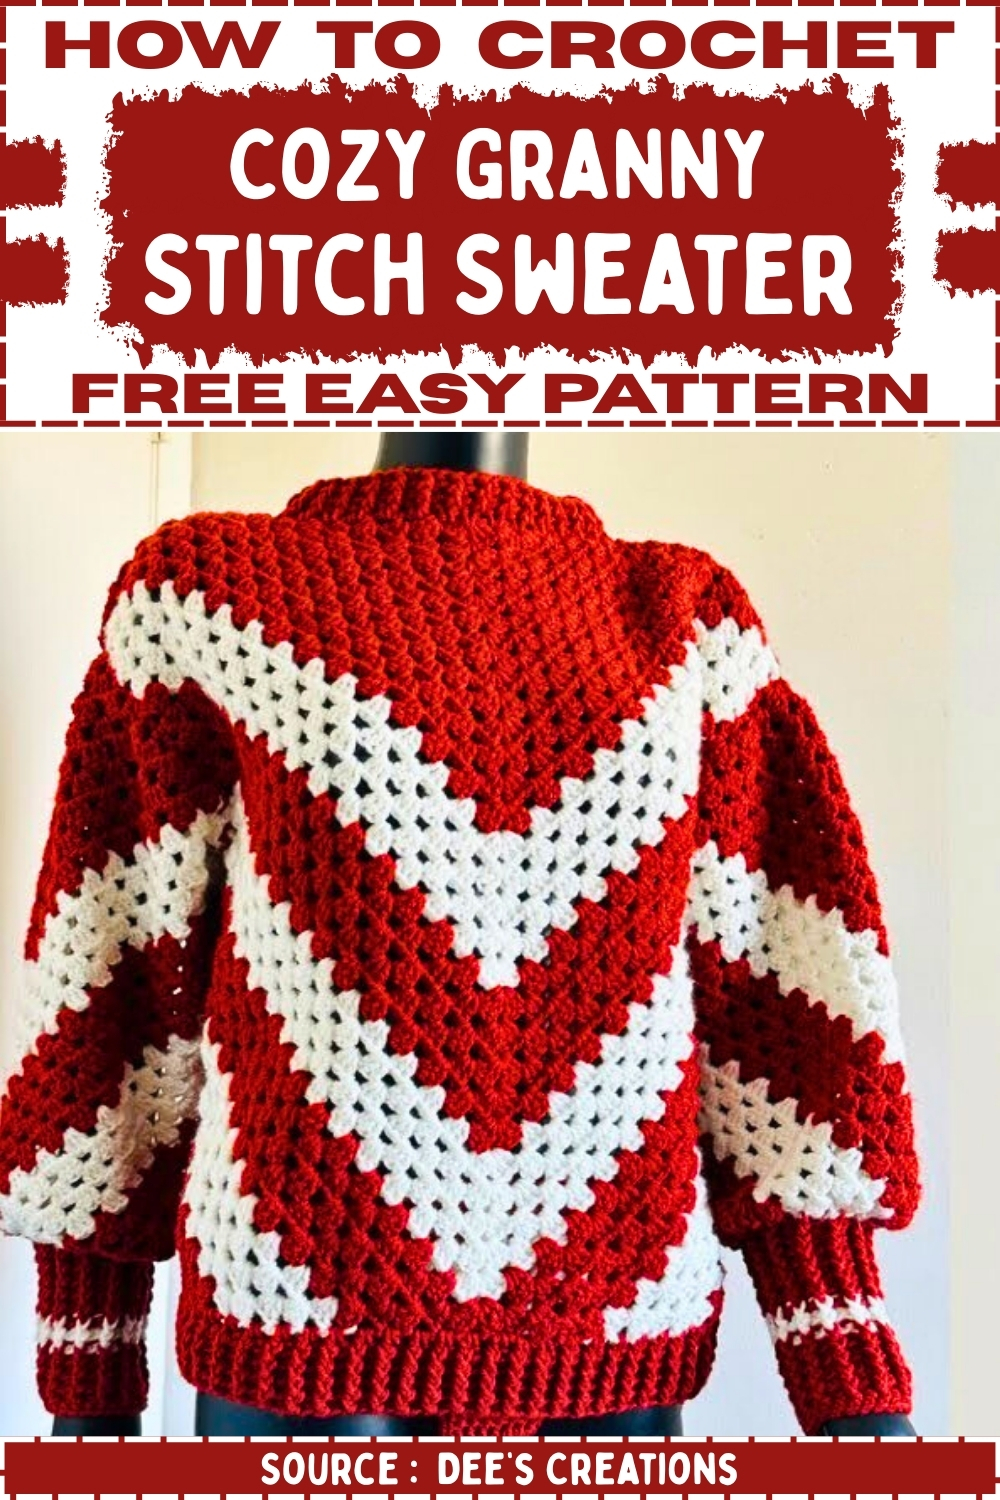
With adjustable sizing based on your measurements, this project offers flexibility in length, sleeve fit, and overall look. The textured ribbed edges add a neat finish, making it great for everyday wear and easy to customize with colors and stripes.
Materials
- 6 mm crochet hook
- Medium weight yarn (approx. 3.5 skeins total)
- Tape measure
- Scissors
- Stitch markers
Stitch Key
- Ch – Chain
- DC – Double Crochet
- Sl St – Slip Stitch
- Ch-1 Sp – Chain 1 Space
- Ch-2 Sp – Chain 2 Space
- FPDC – Front Post Double Crochet
- BPDC – Back Post Double Crochet
Constructing the Main Panels (Front and Back)
The front and back panels are identical. Begin with a triangle, increase to shoulder width, continue straight for length, then square off.
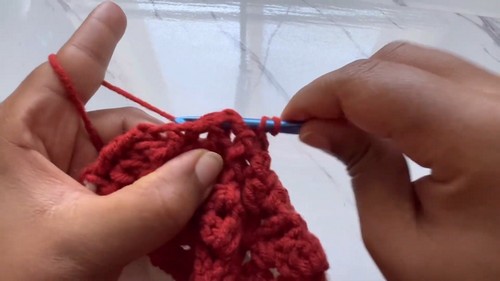
Increasing Triangle (Shoulders)
- Start with a Magic Ring
- Ch 4 counts as DC and Ch 1
- Work 3 DC into ring, Ch 2, 3 DC, Ch 1, 1 DC
- Pull tail to close ring
- Ch 4 turn
- 3 DC in first Ch-1 Sp
- Ch 1 skip 3 DC
- In center Ch-2 Sp work Shell (3 DC, Ch 2, 3 DC)
- Ch 1 skip next 3 DC
- In last Ch-1 Sp work 3 DC, Ch 1, DC
- Ch 4 turn
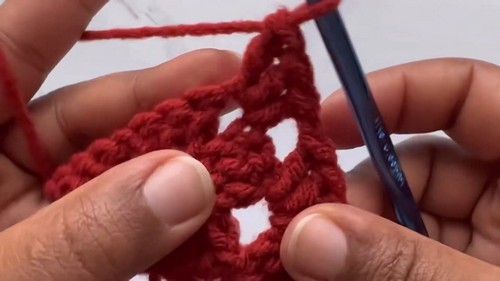
3 DC in first Ch-1 Sp
- Ch 1 skip 3 DC
- 3 DC in next Ch-1 Sp
- Ch 1 skip 3 DC
- Shell (3 DC, Ch 2, 3 DC) in center
- Work 3 DC in each Ch-1 Sp with Ch 1 between
- End with 3 DC, Ch 1, DC in last Sp
- Repeat the final row until the triangle width equals shoulder-to-shoulder measurement
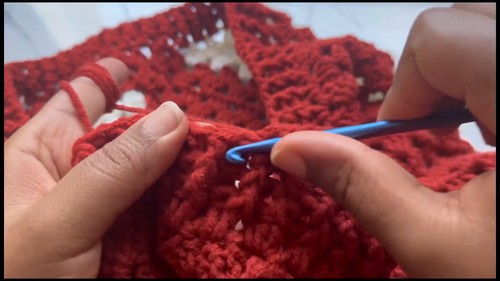
Working Straight (Body Length)
- Ch 2 turn
- Skip first 4 stitches
- 3 DC in next Ch-1 Sp
- Ch 1 then 3 DC in each Ch-1 Sp across
- Work Shell in center
- Skip last cluster, finish with DC in last Sp
- Ch 2 turn
- Skip first 4 stitches
- 3 DC in next Ch-1 Sp
- Continue pattern, Shell at center
- End with DC in last Sp
- Repeat these two rows until desired sweater length
Squaring Off Panel (Neckline)
Side 1
- Ch 2 turn
- 3 DC in next Ch-1 Sp and continue across
- In center Ch-2 Sp place 1 DC
- Ch 2 turn skip first stitches
- 3 DC in next Sp work to end, finish with DC
- Repeat decreasing rows until only one 3 DC cluster remains
- Work last cluster and DC to finish, Ch 1 cut yarn
Side 2
- Attach yarn in center Ch-2 Sp
- Ch 2 and 3 DC in next Ch-1 Sp
- Repeat same decrease method as Side 1 until one cluster remains
- Fasten off
Sleeves and Assembly
Sleeves
- Make two sleeve panels using same method as body panel
- Work fewer rows for smaller width (approx. 16.5 inches wide or 20 increase rows)
- Follow Working Straight and Squaring steps to form rectangles
Seaming
- Place front and back panels with wrong sides facing
- Mark shoulders, neckline and armhole placements
- Use SC to seam:
- Seam shoulders with SC
- Attach sleeve top edge to armhole with SC
- Seam sleeves and sides together with SC down to hem
Ribbing (Neckline, Sleeves, Bottom Hem)
Neckline Ribbing
- Attach yarn at back
- Ch 2 work 2 DC around neckline evenly Sl St to join
- Ch 2 alternate FPDC BPDC join
- Repeat ribbing rows to desired height
Sleeve Cuff Ribbing
- Attach yarn at cuff
- Ch 2 work 1 DC in each stitch around (skip cluster over seam) join
- Ch 2 alternate FPDC BPDC join
- Repeat to desired cuff length
- Ch 1 work 1 SC around and fasten off
Bottom Hem Ribbing
- Attach yarn to hem Ch 2 work 2 DC around hem join
- Ch 2 alternate FPDC BPDC join
- Repeat until preferred rib length
- Fasten off


Leave a Reply