
Bring your next amigurumi project to life with this irresistibly cute crochet guinea pig pattern! Designed as a seamless, no-sew plushie, it's an ideal choice for beginners or anyone looking for a fun and relaxing weekend craft. With its tiny legs, floppy ears, and charming embroidered features, this guinea pig makes the perfect handmade gift, desk buddy, or collectible for your crochet menagerie.
Crochet Guinea Pig

The pattern uses simple stitches and clear instructions, allowing you to customize colors and add personal touches with ease. Whether you're just picking up a hook or you've been crocheting for years, this little cutie is guaranteed to squeak its way into your heart.
Materials
- Worsted weight yarn in brown (main color) and pink (for embroidery)
- Polyester fiberfill stuffing
- 6mm black safety eyes
- 7/0 crochet hook
- Yarn needle, scissors, craft glue, awl, tweezers
General Instructions
- Work in joined rounds unless specified.
- Begin with the head, continue directly into the body, and finish with embroidery and eye attachment.
- No sewing required; parts are crocheted continuously.
Head
Round 1 (6 stitches)
- Make a magic ring.
- Work 6 single crochets (SC) into the ring.
- Slip stitch (SL) to the first SC.
Round 2 (12 stitches)
- Chain 1.
- Work 2 SC in each stitch around.
- SL to the first SC.
For Round 3 (16 stitches)
- Chain 1.
- (2 SC in next st, 1 SC in next) once
- (2 HDC in next, 1 HDC in next) once
- (2 SC in next, 1 SC in next) once
- (2 HDC in next, 1 HDC in next) once
- SC in next stitch.
- SL to the first SC.
Round 4 (16 stitches)
- Chain 1.
- Work: 3 SC, 4 HDC, 4 SC, 4 HDC, 1 SC.
- SL to the first SC.
Round 5 (18 stitches)
- Chain 1.
- Work: 7 SC, (2 HDC in next, 2 HDC, 2 HDC in next), 5 SC.
- SL to the first SC.
Body (Continues from head)
Round 6 (18 stitches)
- Chain 1.
- 2 SC.
Front Leg 1:
- Pick front loop, SL 1.
- Chain 2 tightly.
- SL 1 into same front loop.
- 4 SC.
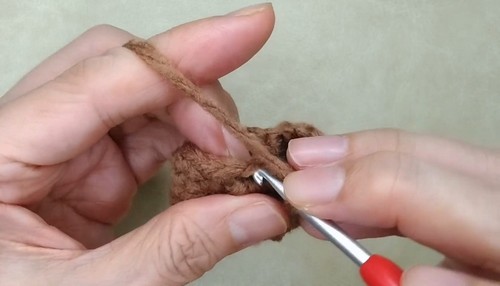
Ear 1:
- Pick front loop, SL 1.
- Chain 3 tightly.
- DC 1.
- Chain 3 tightly.
- SL 1 into same loop.
- 4 SC.
Ear 2: (repeat Ear 1 instructions)
- 4 SC.
Front Leg 2: (repeat Front Leg 1 instructions)
- SL to the first SC.
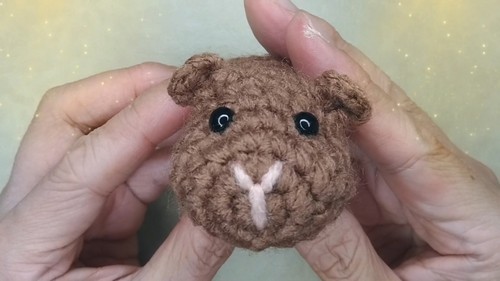
Nose Embroidery
- Use pink yarn and yarn needle.
- Embroider a "Y" shape at the front of the head.
- Weave in and secure yarn from inside the body.
Body Continued

Round 7 (18 stitches)
- Chain 1.
- 2 SC.
- SC into back loop of front leg.
- 15 SC (into back loops from ears and legs).
- SL to the first SC.
Round 8 (16 stitches)
- Chain 1.
- 8 SC.
- SC2TOG twice.
- 6 SC.
- SL to the first SC.
Front Foot Embroidery
- Use pink yarn.
- Wrap around chain leg 4 times.
- Secure inside body and repeat on other foot.
Round 9 (16 stitches)
- Chain 1.
- 16 SC.
- SL to the first SC.
For Round 10 (18 stitches)
- Chain 1.
- 8 SC.
- (2 SC in next) twice.
- 6 SC.
- SL to first SC.
Rounds 11–12 (18 stitches)
- Chain 1.
- 18 SC each round.
- SL to the first SC.
Back Legs

Round 13 (18 stitches)
- Chain 1.
- 2 SC.
Back Leg 1:
- Pick front loop, SL 1.
- Chain 2 tightly.
- SL 1 into same front loop.
- 14 SC.
Back Leg 2: (repeat above)
- SL to the first SC.
Round 14 (18 stitches)
- Chain 1.
- 18 SC (picking up remaining back loops).
- SL to the first SC.
Stuffing
- Begin partially stuffing the body.
Back Foot Embroidery
- Wrap pink yarn around chain 3 times per foot.
- Secure and repeat for the second back foot.
Final Rounds & Closing
Round 15 (12 stitches)
- Chain 1.
- (SC2TOG, 1 SC) x6.
- SL to first SC.
Round 16 (6 stitches)
- Chain 1.
- (SC2TOG) x6.
- SL to first SC.
- Cut yarn, leaving 20 cm tail.
Final Stuffing & Closure:
- Add more stuffing as needed.
- Thread tail through front loops of final round.
- Pull tight to close.
- Weave in the end.
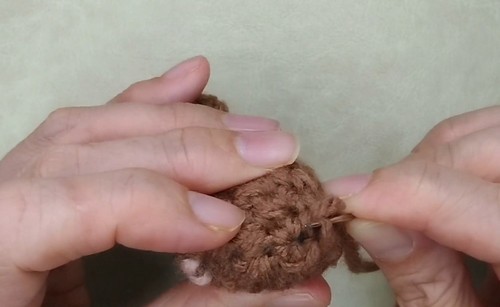
Attaching the Eyes
- Use 6mm safety eyes.
- Mark placement and poke holes with awl.
- Test placement and glue securely.
- Press firmly to create an indented look.


Leave a Reply