
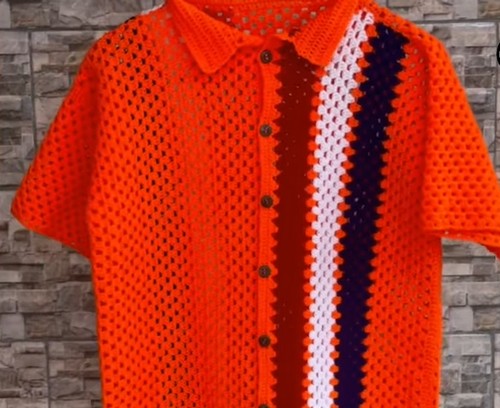
This Crochet Easy Granny Polo Shirt pattern is perfect for women looking for a cozy and stylish project. Using the classic granny stitch, the shirt is worked in simple, straightforward sections: body panels, sleeves, and collar. The easy-to-follow instructions guide you through creating a versatile wardrobe piece, ideal for casual wear or layering.
Crochet Polo Shirt Granny Square
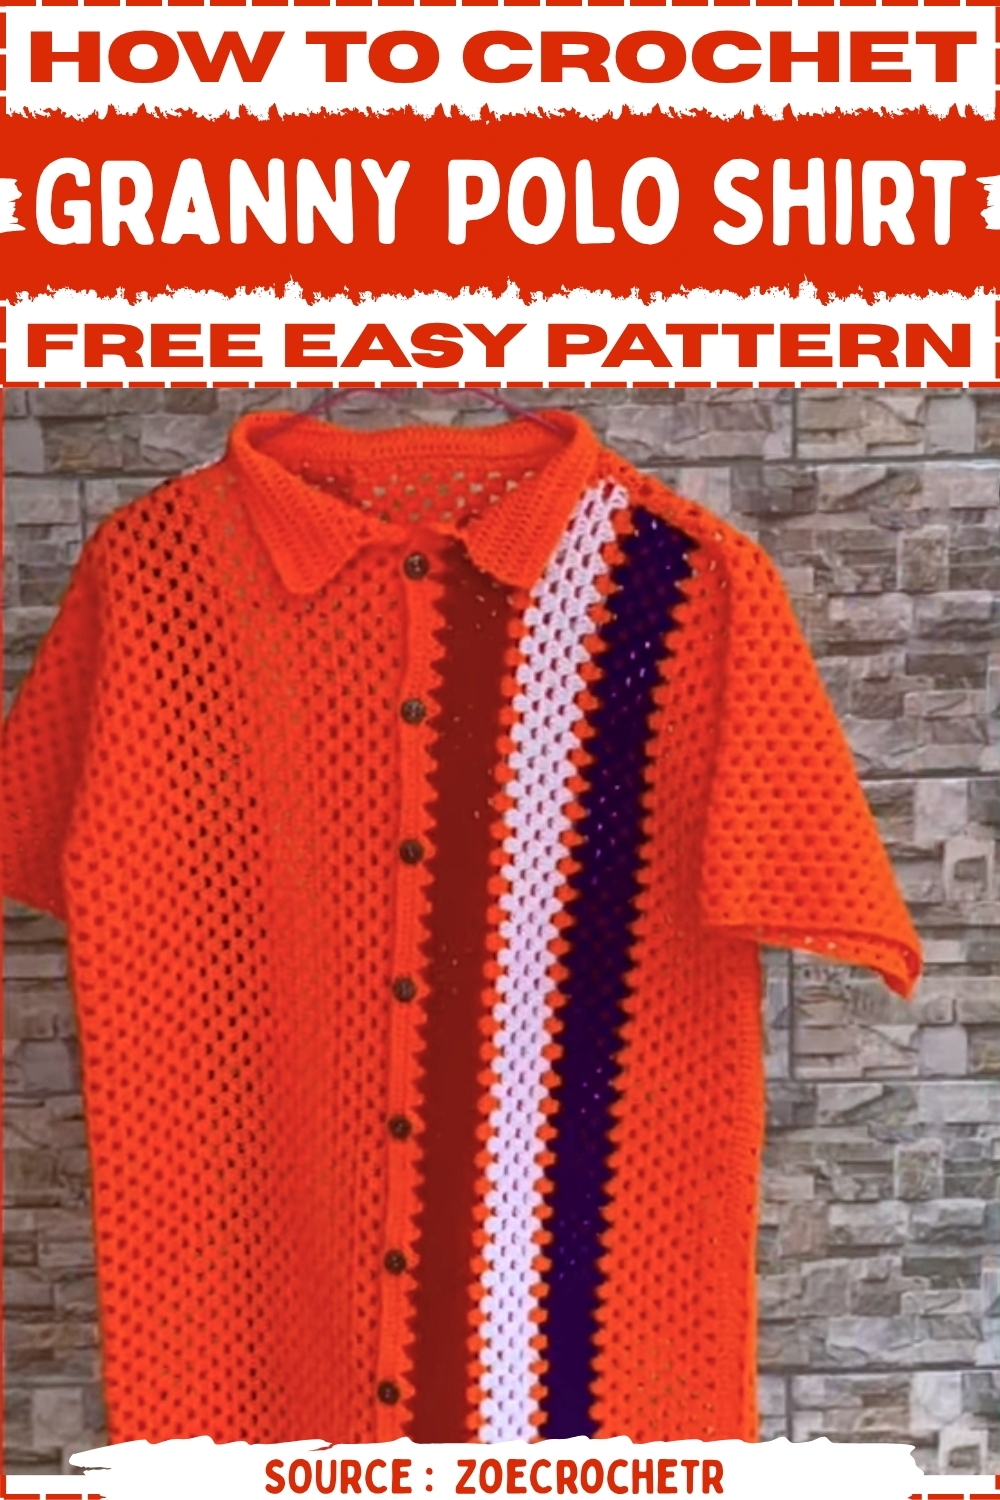
The polo shirt can be customized with different yarn colors or collar styles to match your personal taste. Whether you're a crochet novice or experienced, this pattern offers a fun and rewarding project to add to your collection.
Materials
- Hook: 3 mm size
- Yarn: Approximately 180 grams
- Other: Stitch markers, tapestry needle, measuring tape
Foundation Row (Length)
- Chain a length equal to the desired length of the shirt (e.g., 300 chains for the example).
- Row 1 (Double Crochet): Skip 3 chains, then work 1 Double Crochet (DC) in the 4th chain from the hook and in every chain across.
- Cut off any extra foundation chains at the end for a neat edge.
Granny Stitch Pattern (Width)
- The granny stitch is worked by alternating rows.
(Granny Row 1 - Creates spaces):
- Chain 1 and Turn.
*Skip 2 stitches, work 3 DC in the 3rd stitch, Chain 1*. Repeat from*across the row.- End of the row: Skip 2 stitches, work 1 DC on the top of the 3rd skipped chain from the foundation row.
Row 3 (Granny Row 2 - Fills spaces):
- Turn. Start the row with a standing stitch (or Chain 3) and make 2 more DC into the same first space (creating the first 3-DC cluster).
*Chain 1, work 3 DC into the next chain-1 space*. Repeat from*across the row.- End of the row: Chain 1, work 2 DC in the last chain-1 space, then work the last DC on the last stitch of the previous row.
Row 4 (Granny Row 1 Repeat):
- Turn. Start with a standing stitch (or Chain 3).
*Chain 1, work 3 DC into the next chain-1 space*. Repeat from*across the row.- End of the row: Chain 1, work 1 DC on the top of the last stitch of the previous row.
- Repeat alternating Rows 3 and 4 until the panel reaches the desired width.
- Create one back panel and two front panels (half the width of the back).
Assembly and Seaming
- Lay out panels: Place the Back panel flat. Lay the two Front panels on top, ensuring the flat (DC-row) edge of the front panels is in the center.
Mark Key Points:
- Armhole: Measure and mark 18 cm from the top for the armhole opening.
- Shoulder: Measure and mark 15 cm from the center line for the shoulder width.
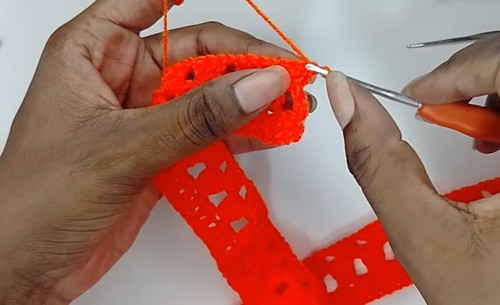
- Seam the Sides: Using a tapestry needle, sew the side seams (front to back) from the bottom up to the 18 cm armhole marker.
- Seam the Shoulders: Sew the shoulder seams from the outer edge to the 15 cm marker, leaving the remaining center space for the neck opening.

Sleeves (In the Round)
- Work the granny stitch pattern around the 18 cm armhole opening.
- Always turn the work at the end of each round to maintain the texture.
- Round 1: Join yarn at the bottom of the armhole seam.
- Chain 3 (counts as DC), 1 DC in the same space.
*Chain 1, Skip 2 stitches, 3 DC in the 3rd stitch*. - Repeat from
*around. Complete the first cluster by making 1 DC in the starting stitch area (total 3 DCs). - Slip Stitch (SS) to the top of the Chain 3.
- Round 2: Turn. SS into the first chain-1 space.
- Chain 3, 2 DC in the space (first 3-DC cluster).
*Chain 1, 3 DC in the next chain-1 space*.- Repeat around. SS to the top of the Chain 3.
- Continue: Repeat Round 2 until the sleeve reaches the desired length.
Polo Neck/Collar and Button Placket
Collar (DC Rows)
The collar is worked in rows, turning at the end of each. The rows alternate between increasing and non-increasing.
The instructor worked a total of six rows.
- Row 1 (Foundation): Attach yarn at the last stitch of the neck opening.
- Work 2 DC in that first stitch (increase).
- Work 2 DC in each row end around the neck opening and across the back of the neck.
- 2 DC in the last stitch.
- Row 2 (Increase): Turn. Start with an increase (2 DC in the first stitch).
- Work 1 DC in each stitch across. End with an increase (2 DC in the last stitch).
- Row 3 (No Increase): Turn. Work 1 DC in each stitch across.
- Row 4 (Increase): Turn. Repeat Row 2.
- Rows 5 & 6 (Optional): Continue the alternating pattern for desired collar width, or work two final rows of no increase (1 DC in each stitch).
Button Placket and Button Holes
The placket is worked in Single Crochet (SC) along the front opening edge.
- Row 1 (SC): Along the right front edge (where buttonholes will go), attach yarn at the base of the collar.
- Chain 1, then work a row of SC evenly down the entire edge.
Row 2 (Button Holes):
- Chain 1 and Turn.
- Work 18 SC.
- Create a button hole: Chain 2, Skip 2 stitches.
- Repeat the sequence of 18 SC, Chain 2, Skip 2 stitches until the end.
Row 3 (Finish Holes):
- Chain 1 and Turn.
- Work SC in each stitch.
- When you reach a Chain-2 space, work 2 SC into the space to cover the gap.
- Fasten off.
Opposite Placket: On the left front edge, work three rows of SC just like the first side, but do not create any button holes.
Finishing
- Sew buttons onto the left front placket to align with the button holes on the right placket.
- Weave in all loose ends.


Leave a Reply