
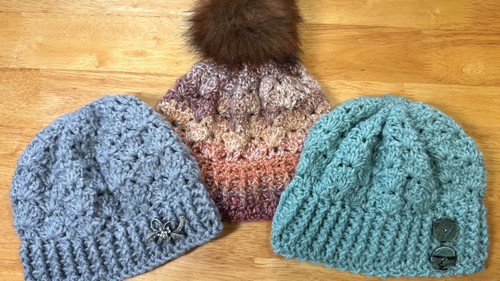
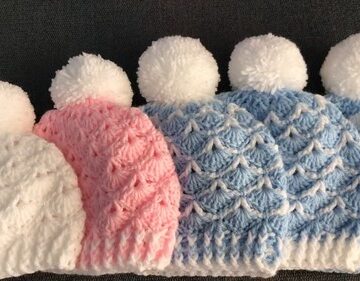
The Vista Point Crochet Hat pattern is a must-try for anyone who loves texture and a snug, cozy fit. This versatile design uses front and back post stitches to create a cushy, ribbed band that transitions beautifully into an eye-catching shell pattern. Ideal for chilly days, the hat is worked in the round and includes a gradual decrease section for a smooth, polished top.
Crochet Hat
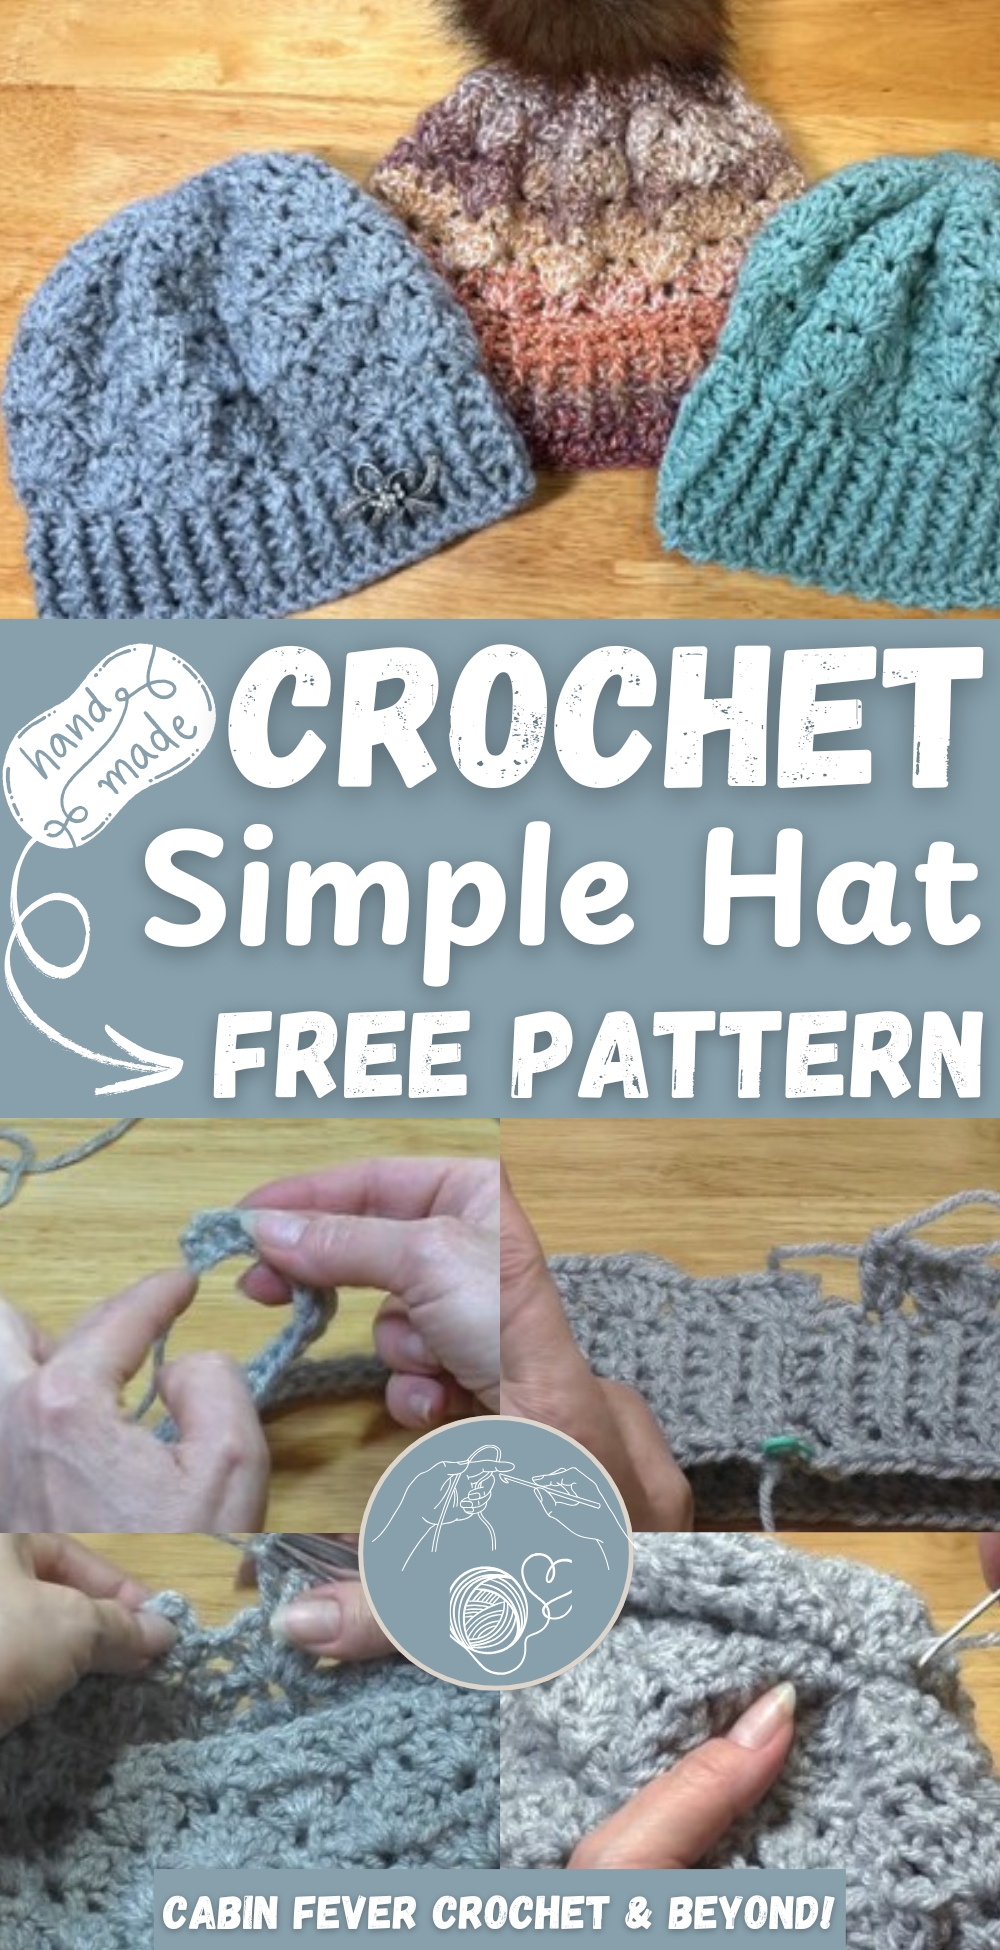
With easy customization options like adjusting the band or main body height, and a chance to finish it off with a pom-pom or button, this pattern is perfect for beginners and experienced crocheters alike. Whether you're making it for yourself, a gift, or to sell, the Vista Point Hat combines comfort, style, and function in one trendy design.
Materials
- One 100g ball of yarn (weight 3–4)
- Two crochet hooks: main size and one size larger
- Two stitch markers
- Measuring tape
- Yarn needle
- Optional: Pom-pom or decorative button
Band / Ribbing Section
Round 1:
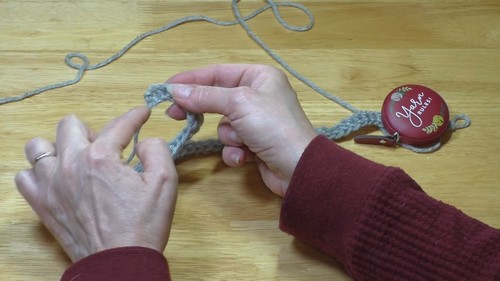
- Work a foundation single crochet or a chain in multiples of 6 + 1 to fit your head.
- Join ends into a circle, ensuring there are no twists.
Round 2:
- Chain 2 (does not count as a stitch).
- Double crochet in the same stitch and in each stitch around.
For Round 3:
- Chain 2.
- Front post double crochet around the first stitch.
- Back post double crochet around the next.
- Repeat FPDC and BPDC around.
Round 4:
- Chain 2.
- Repeat Round 3, maintaining the post stitch pattern.
- Repeat Round 4 until the band reaches your desired height.
Main Pattern

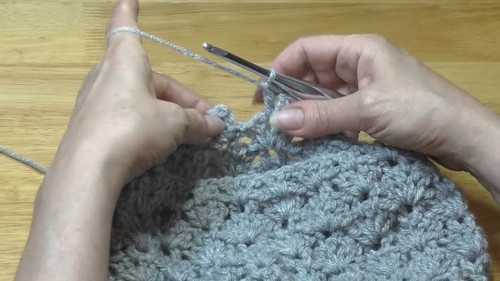
Round 1:
- Chain 3 (counts as 1st double crochet), add 4 more double crochets into the same stitch (5 total = 1 shell).
- Skip next 2 stitches.
- Place 2 double crochets in the next stitch.
- Repeat: shell in one stitch, skip 2, 2 DC in next stitch.
Round 2:
- Chain 1 and turn.
- Slip stitch between the 2 DC from previous round.
- Chain 3 (counts as first DC), place 4 more DC in the same space to form a shell.
- Continue working shells between stitches.
- Repeat Round 2 for 2–3 more rounds, alternating between right side and wrong side for texture.
Decrease Section
Round 1:
- Chain 1 and turn.
- Slip stitch between the 2 DC.
- Work 4 DC instead of 5 in each shell space (decreasing shell size).
Round 2:
- Chain 1 and turn.
- Slip stitch between the first 2 DC.
- Place 3 DC in each shell space.
- In the middle of each shell, place 2 DC directly in the center.
For Round 3:
- Chain 1 and turn.
- Slip stitch between the 2 DC.
- Place 2 DC between each set of stitches: one between stitch 1–2 and one between stitch 2–3 of the previous shell.
Round 4:
- Chain 1 and turn.
- Slip stitch between the 2 DC.
- Chain 1.
- Place 2 half double crochets in between each set of 2 DC.
Round 5 (Final Decrease):
- Make sure you're on the right side.
- Half double crochet two together (HDC2TOG) all the way around.
Finishing
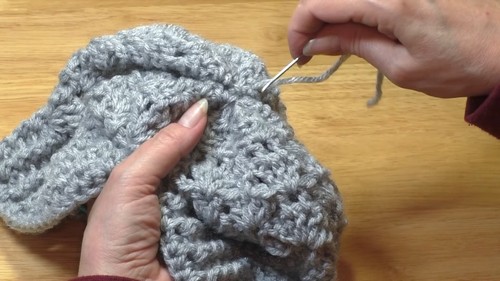
- Cut yarn, leaving a long tail.
- Use yarn needle to weave through remaining stitches and cinch the top closed.
- Weave in all ends securely.
Optional: Add a pom-pom or button to the top for a stylish finish.

Leave a Reply