
This quick and easy crochet side tie top pattern is perfect for beginners and experienced crocheters alike. Featuring a ribbed texture created by the half double crochet stitch in the back loop only, this top offers both comfort and style.
Crochet Side Tie Top
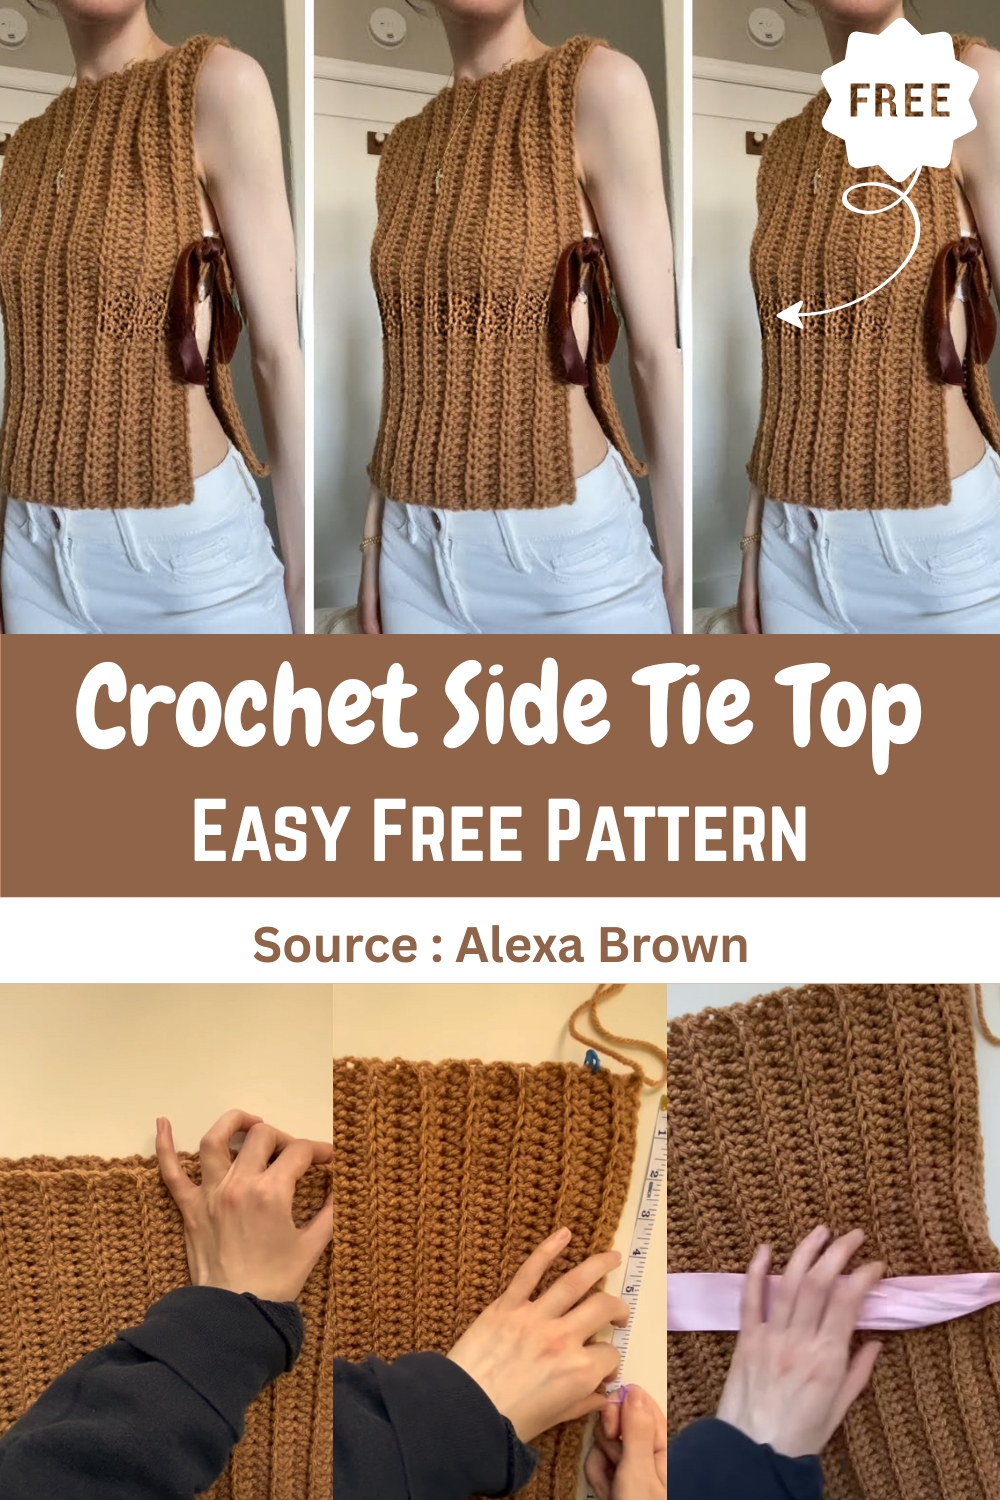
With just two simple rectangular panels and a charming side tie closure, this pattern is highly customizable to suit different body types and personal preferences. Whether you’re crafting for yourself or gifting it to a friend, this crochet side tie top is versatile and can be adjusted for a unique fit. Plus, it’s a fun project to whip up in a weekend, adding a casual yet chic piece to your wardrobe.
Materials
- Yarn: Four-weight acrylic yarn
- Hook: 8 mm crochet hook
- Other Supplies: Darning needle, scissors, stitch markers, ribbon (for the side ties), and measuring tape.
Pattern Instructions (Make 2 Panels)
Foundation Chain
- Make a slip knot.
- Chain 51. This chain length determines the final length of your top (from shoulder to hem).
- (Note: The pattern can be worked in any number of chains).
Row 1
- Work into the third chain from the hook.
- Work one half double crochet (HDC) into that chain and into every chain all the way across.
Stitch Count: You should have 49 stitches at the end of Row 1.
Repeating Rows (Row 2 until desired width)
- Chain 2 and turn your work.
- Work one half double crochet (HDC) into the back loop only of every stitch across.
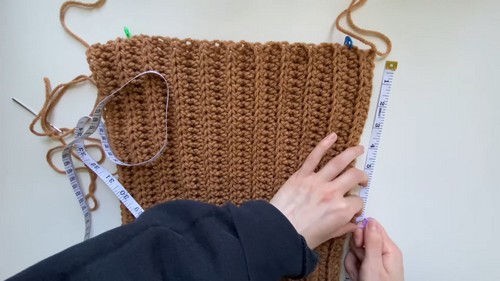
- Repeat: Repeat this one-row repeat until your panel reaches the desired width.
- The example top had a total of 21 rows for a 12-inch width.
Second Panel
- Repeat Steps 1-3 to create a second, identical rectangular panel.
Assembly
Sew the Top Edge (Shoulders)
- Align your two finished panels.
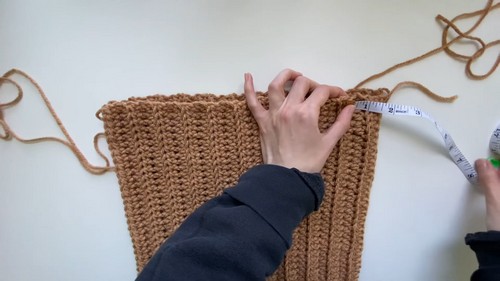
- Mark the spot 1 ½ inches from the top outside edge on both panels.
- This 1 ½ inches will be the part you sew, leaving the remaining space in the middle for the 10-inch neck hole.
- Thread a darning needle with yarn and sew the panels together along the top edge, connecting the stitches from the outside edge toward the center, stopping at your stitch marker.
- Knot and weave in the ends.
Side Ties/Armholes
- The side edges of the panels will form the sides of the top.
- The open space at the top of the side edge will be the armhole.
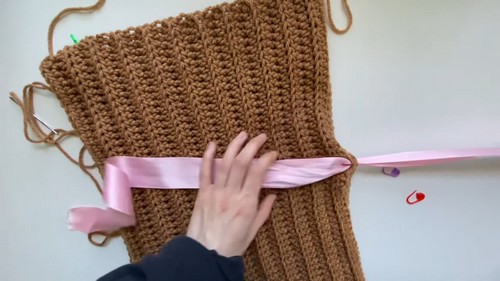
- Mark your preferred armhole opening.
The example used the 24th stitch from the bottom to define the top of the 8-inch armhole opening.
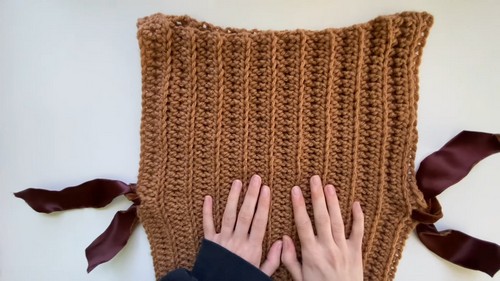
- Option 1: Sew the Sides - Sew the front and back panels together along the side edge, starting from the bottom hem and stopping at your armhole stitch marker.
- Option 2: Use Side Ties - Leave the side open and attach a ribbon to the panels at the stitch marker.
- Feed the ribbon through the side stitch on the front panel and the corresponding side stitch on the back panel, then tie into a bow.
- Repeat the preferred option on the opposite side of the top.


Leave a Reply