
Be ready for a foray into creativity with the Crochet Cute Lamp Pattern, a unique combination of yarn art and luminous charm that promises to elevate any room's ambiance. Picture transforming everyday materials into an extraordinary source of light, adding both functionality and a touch of whimsy to your décor.
Crochet Lamp
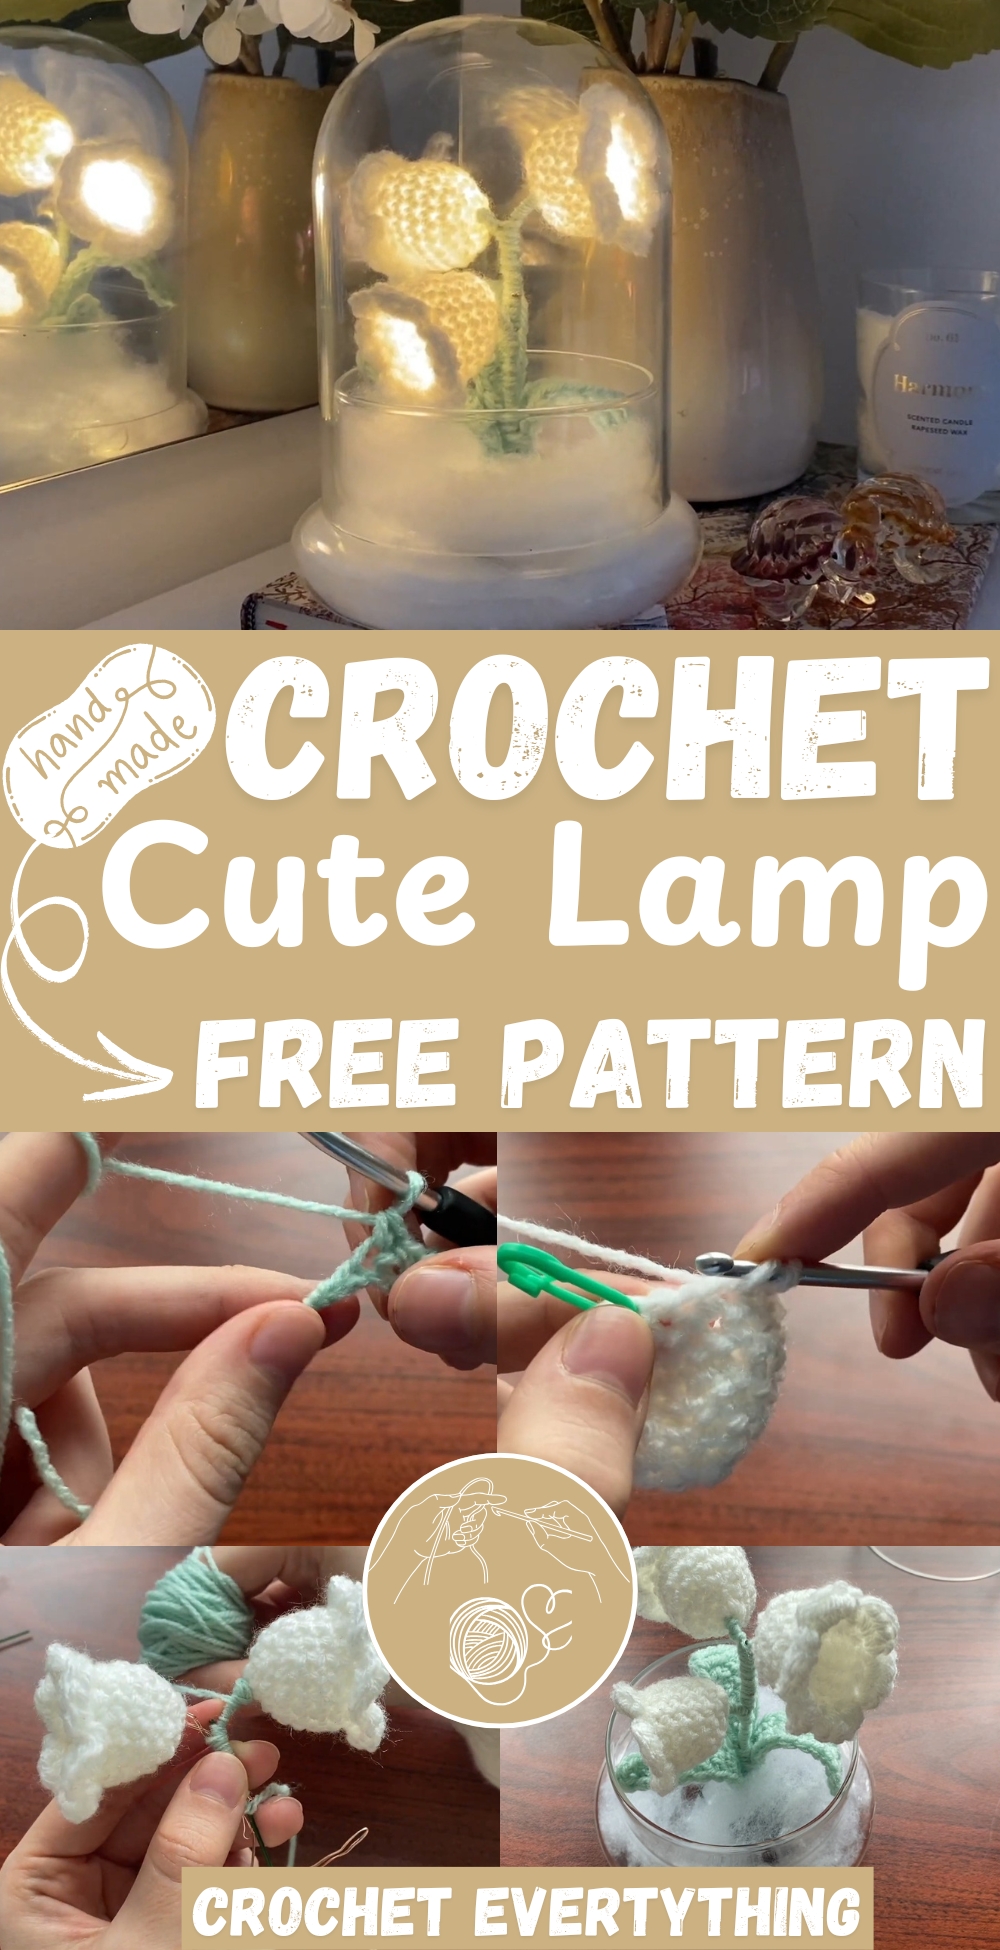
This pattern goes beyond simple illumination; it's about crafting a piece that adds warmth and character wherever it's placed. From quiet corners needing a glow to cozy reading spots craving a gentle light, these crocheted lamps offer a distinctive way to beautify your living spaces. Ideal for crafters at any skill level, this design leads you through a captivating process of creating more than just a lamp, but a personalized element of home decor. Challenge your skills and brighten your surroundings as you bring this delightful project to life.
Materials Needed:
- Hot glue gun
- Wire
- Green and white yarn
- 4mm crochet hook
- Bell jar
- Fairy lights with a compact on/off switch
- Wadding (stuffing material)
Making the Leaves:
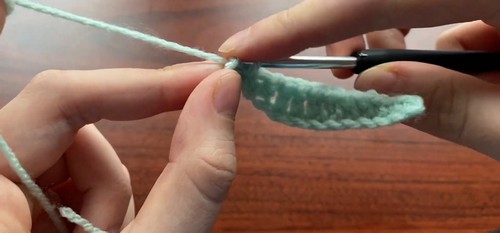
Start with a slip knot.
- Chain 15.
- Skip the first chain, single crochet in the second chain and in the next one.
- Half double crochet into the next two stitches.
- Double crochet into the following four stitches.

- Half double crochet into the next two stitches.
- Single crochet into the last three stitches.
- Single crochet into the last stitch again, turn the work, and start crocheting on the other side, mirroring the pattern.
- Continue with the mirrored pattern: single crochet, half double crochet, double crochet, half double crochet, and end with single crochets again.
- Slip stitch into the first stitch of the other side.
- Cut the yarn, leaving a tail, and pull through to secure.
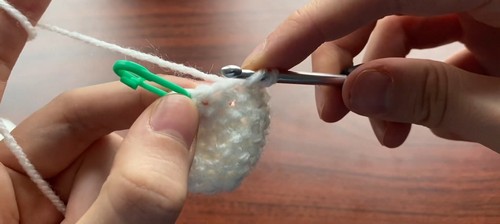
Making the Flower:
- Create a magic ring.
- Chain 1, then make six single crochets into the magic ring.
- Pull the starting tail to close the ring.
- Slip stitch into the first single crochet to close the row.
- For the second row, start with a chain, then make two single crochets in each stitch around for a total of 12 single crochets.
- Continue with a similar increase pattern for the third row: single crochet in one stitch, then two single crochets in the next, repeating around.
- Work even in single crochet (one stitch in each single crochet from the previous row) for rows four to six.
- For row seven, create shaping by alternating one single crochet and then a single crochet decrease across the row.
- For row eight, create the petals by a series of slip stitches, single crochets, and half double crochets within the same stitch to form the points of the petals.
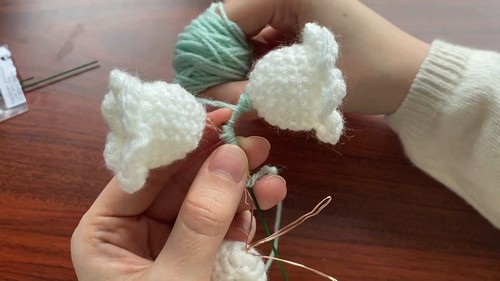
Assembling the Lamp:
- Begin by arranging the first two fairy lights and insert them into the center of a flower through the magic ring.
- Continue attaching flowers to groups of two lights each, securing by twisting the wires if needed.
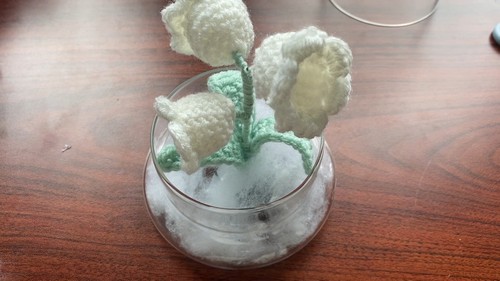
- Determine the desired arrangement within the bell jar.
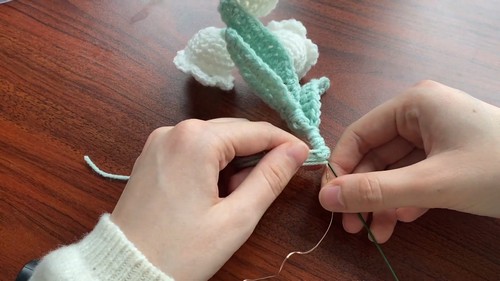
- Wrap the wire with green yarn until you reach the point where the leaves will be attached.
- Attach leaves by wrapping the leftover tail of the leaf around the wire and then continue with the green yarn down to the bottom.
- After attaching all leaves, cut the yarn and tie it off securely.
- Bend the wired structure into a spiral and glue it at several points onto the bottom of the bell jar.
- Insert the rest of the fairy lights and the on/off switch into the bell jar.
- Fill out the bottom with wadding for aesthetics.
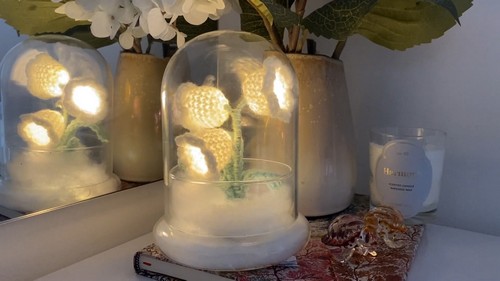
- Turn on the fairy light, close the bell jar, and your flower lamp is complete!


Leave a Reply