
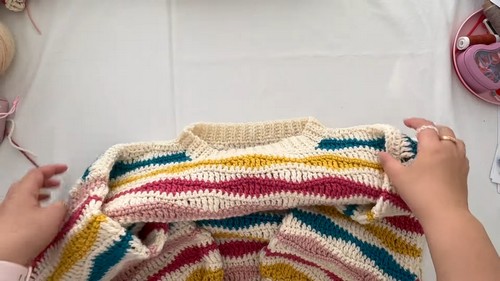
This crochet wave sweater pattern creates a beautifully textured fabric using an easy four row repeat, making it perfect for beginners and experienced makers alike. Designed as a made to measure project, it allows you full freedom to customize the fit, color palette, and length to suit your style.
Crochet Wave Sweater

The sweeping wave texture is created using a satisfying mix of basic stitches, and the color changes add a modern, eye catching finish. Whether you prefer a cozy winter sweater or a lightweight everyday top, this pattern offers versatility, comfort, and a polished handmade look.
Materials
- Medium weight yarn
- 5 mm hook
- Scissors
- Yarn needle
- Stitch markers
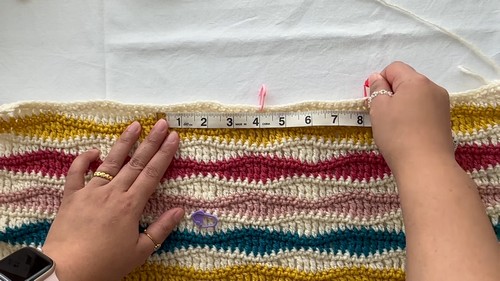
- Tape measure
- Made to measure pattern using a starting chain that is a multiple of 14 plus 1
Main Stitch Pattern 4 Row Repeat
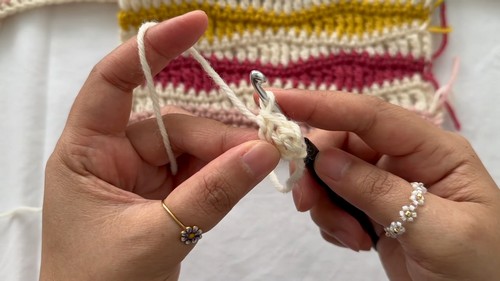
Foundation Row Setup
- Create a foundation chainless single crochet until reaching a width that is a multiple of 14 plus 1
- Switch to a new color before completing the last stitch if changing colors
Row 1 Right Side
- Chain 1 and turn
- Work 1 single crochet in each of the first 2 stitches
- Work 1 half double crochet in each of the next 2 stitches
- Work 1 double crochet in each of the next 2 stitches
- Work 1 triple crochet in each of the next 3 stitches
- Work 1 double crochet in each of the next 2 stitches
- Work 1 half double crochet in each of the next 2 stitches
- Work 1 single crochet in each of the next 3 stitches
- Repeat the sequence across ending with 3 single crochet
- Work 1 single crochet in each of the last 2 stitches
For Row 2 Wrong Side
- Chain 1 and turn
- Work 1 single crochet into every stitch across
- Switch colors before completing the last stitch if changing colors
Row 3 Right Side
- Chain 1 and turn
- Work 2 triple crochet to begin
- Work 1 double crochet in each of the next 2 stitches
- Work 1 half double crochet in each of the next 2 stitches
- Work 1 single crochet in each of the next 3 stitches
- Work 1 half double crochet in each of the next 2 stitches
- Work 1 double crochet in each of the next 2 stitches
- Work 1 triple crochet in each of the next 3 stitches
- Repeat the sequence across ending with 3 triple crochet
- Work 1 triple crochet in each of the last 2 stitches
For Row 4 Wrong Side
- Chain 1 and turn
- Work 1 single crochet into every stitch across
- Switch colors before completing the last stitch if changing colors
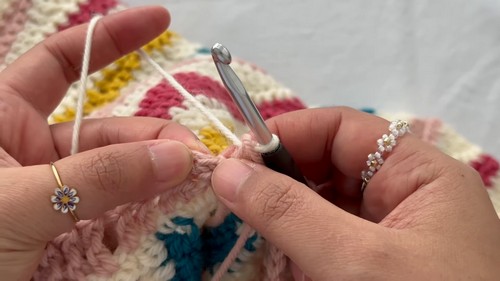
Repeat Section
- Repeat Rows 1 to 4 for the main fabric
Assembly and Finishing
Back and Front Panels
- Make the back panel by repeating Rows 1 to 4 until the piece is 2 inches shorter than the desired length
- Work a straightening row using single crochet half double crochet and double crochet to even the edge
- Make the front panel the same way and stop four rows before the end to prepare for neckline shaping
Neckline Shaping
- Mark the center stitch and measure the neck width
- Work the final four rows on the first shoulder using decreases at the neck edge
- Cut the yarn and repeat for the second shoulder
Assembly Seaming
- Sew the shoulders together
- Decide the sleeve circumference
- Sew the sides from the hem upward stopping at the sleeve opening
Sleeves
- Work the four row repeat in the round around the sleeve opening
- Slip stitch to join then chain 1 and turn each row
- Continue until 2 inches before the desired length then work decrease rows
Ribbing Cuffs Neckline and Hem
- Use half double crochet slip stitch worked in the back loop
- For cuffs chain 9
- For neckline chain 7
- For hem chain 9
- Work down the chain slip stitch to the edge and continue back and forth in the back loop
- Sew the short ends of the ribbing to finish


Leave a Reply