
Crocheting a bralette is a rewarding project that combines both art and skill, offering a personalized touch to your wardrobe. This tutorial is designed to guide beginners and seasoned crocheters alike through the process of creating a custom bralette pattern. By detailing step-by-step instructions from selecting the right materials to completing the final stitches, we aim to make the experience enjoyable and fruitful
How To Crochet A Bralette Pattern & Tutorial

Whether you're looking to fashion a unique piece for yourself or as a gift for someone special, this guide will provide you with all the necessary tools and techniques to craft a beautiful, hand-made bralette.
Gather Materials:
- Category 4 yarn, 120 g (265 yards)
- 5 mm crochet hook
- Scissors
- Stitch markers
- Tape measure
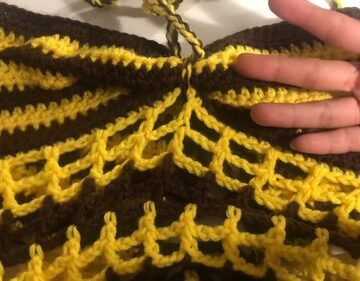
Front Panel:
- Start with a slip knot and chain an odd number, forming the bottom of the front panel.
- Chain one, then execute a Suzette stitch: single and double crochet into the second chain from the hook.
- Skip the next stitch, repeat the single and double crochet in the next chain, continue until two chains remain.
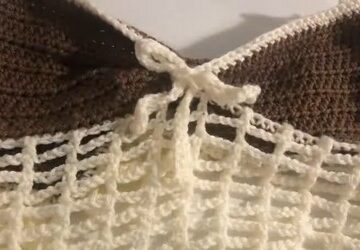
- End the row with an increase by skipping the next chain and performing a single, half double, and double crochet into the last chain.
- Chain one, turn your work, and place a stitch marker into the increased end.
- Repeat these steps (steps 2.2 to 2.4) until the front panel width matches the base of your neck.
- Continue creating Suzette stitch rows to achieve the desired neckline depth, placing the first row at your underbust.

Decrease and Shoulder Formation:
- Upon reaching the desired neckline depth, decrease by stitching three double crochets together.
- Alternate the previous step with a row of consistent stitches until only three stitches remain.
- Chain two, turn, perform a decrease of three half double crochets, chain one, and cut the yarn.
- For the opposite side, mirror these steps but start with a decrease of two half double crochets.
Back Panel and Shoulder Connections:

- Create a back loop slip stitch row without increases or decreases.
- Repeat until the piece stretches suitably from mid underarm to the side of the neck base.
- Chain up to the top of your shoulder, perform a slip stitch into each chain, followed by back loop half double and back loop slip stitches until reaching the width of the base of your neck.
- Ensure the rows match the other underarm portion of the back panel, chain one, and cut the yarn.
Seaming:
- Seam the sides of the front and back panels using an outside loop slip stitch seam.
- Seam the shoulders with a combination of slip stitch, half double crochet, and another slip stitch.

Finishing Touches:
- Create a bottom band by single crocheting along the side rows, omitting the side slip stitch row.
- Weave in all ends to finish your bralette.


Leave a Reply