
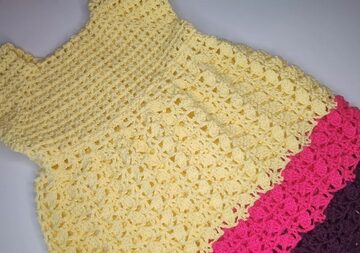
Slip into the magical realm of crochet as you set your sights on crafting an exquisite Winter Hat & Hood, a beacon of creativity and coziness in the chilly months. Visualize wearing this masterpiece, stitched by your own hands, showcasing your unique touch and sense of style. As your crochet hook intertwines with the yarn, intricate designs take shape, leading to a spectacular creation that's as warm as it is fashionable.
Crochet Winter Hat & Hood

Every stitch brings you closer to unveiling a stunning barrier against the cold, a fusion of fibers that not only catches the eye but also sparks intrigue. Wrap yourself in the fruits of your labor, and let this Crochet Winter Hat & Hood be a testament to your playful spirit as you navigate through the frosty wonder of winter.
Materials:
- Scissors
- Yarn needle (large enough for your yarn)
- Measuring tape in centimeters
- Medium weight (#4) yarn (Aran/Worsted)
- Crochet hook size 6mm (or size needed for desired softness)
- Optional: Different colors of yarn for stripes and braids
Hat Sizes:
- 2 years old: Start with a 23cm chain
- 6-7 years old: Adjust starting chain accordingly
- 10-11 years old: Adjust starting chain accordingly
- Additional sizes available in the measurements chart in the video
Pattern:

Starting Chain:
- Make a slip knot.
- Chain until you reach the required length for the size you're making (e.g., for 4-5 years old, start with a 23cm chain).
First Row:
- Chain one additional chain.
- Skip the first two chains and double crochet into the third chain from the hook.
- Continue with one double crochet into each subsequent chain.
- When you reach the last chain, make three double crochets into this final chain.

Turning the Row:
- Now, working on the other side of the starting chain, make the same number of double crochets as you did for the first half of the starting chain.
- Ensure to have an odd number of stitches total.
Next Row:
- Change yarn color if desired, chain one and cut the previous color yarn.
- Join new yarn with a slip knot.
- Chain two and turn your work.
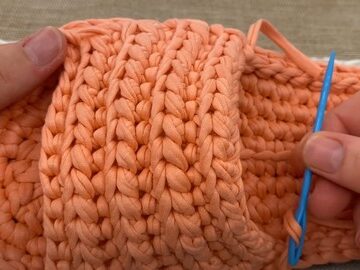
- Start with a front post double crochet around the second double crochet from the previous row.

- Alternate with a half double crochet into the next stitch.
- Continue the pattern of front post double crochet, half double crochet till the end of the row.
Repeat Rows:
- Alternate the following two rows for the main body of the hat:

For Repeat Row 1:
- Chain two for the first double crochet, make one increase in the second stitch, and double crochet in each stitch across, ending with an increase in the second-to-last stitch and a double crochet in the last stitch.
Repeat Row 2:
- Chain two, turn your work, and follow the pattern of front post and half double crochet, as established.
- Continue these repeats until you are about 5-6cm from the desired final width of the hat.

Ribbing:
- Finish on a double crochet row.
- Start the ribbing with chaining two and turning your work.
- Make increases at the beginning and end of each row as before, but now use front post and back post double crochets for the ribbing pattern.
Finishing:
- Once you've reached the desired width, break off yarn and weave in all ends.
- Create braids or any other type of tie for the ear flaps if desired. Attach them securely.

Cleaning Up:
- Weave in any loose ends with your yarn needle.
- Secure all knots and trim any excess yarn from your finishing touches.


Leave a Reply