
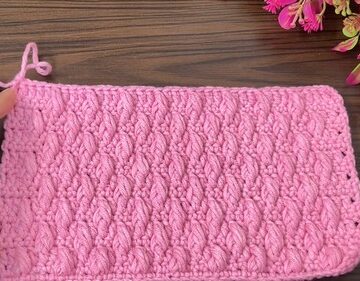
The Simple Daisy Stitch is a whimsical and textured crochet pattern that evokes the charm of a field of daisies. It is a beloved choice among crochet enthusiasts for its delightful and visually appealing motif that resembles a garden of flowers. Characterized by its puff-like clusters that form the 'petals' of the daisy and the 'eye' that creates the center, this stitch allows for a vibrant interplay of colors which can be customized to match any palette.
Crochet Simple Daisy Stitch Tutorial Step By Step

Suitable for a broad array of projects, the daisy stitch adds a playful and nostalgic touch to blankets, scarves, bags, and keychains, inviting a touch of springtime no matter the season.
Materials Needed
- 24/7 Cotton (a mercerized cotton recommended for its durability and stitch definition)
Starting the Project

- Create a Slip Knot and Chain 55
- Begin with making a slip knot.
- Chain 55 to start the foundation row.
- Single Crochet in the Back Bumps
- Turn your chain to the side.
- Start single crocheting into the back bump of the second chain from the hook.
- Continue to single crochet a total of 54 stitches along the back bumps of the chain.
Creating the Daisy Stitch
- Chain 3 and Turn Your Work
- This will start the row for making the daisy stitch.
- Single Crochet 5 Together (to form the first Daisy Stitch) and Chain 1
- Insert your hook into the first stitch, pull up a loop and do the same for the next four stitches.
- You will have 6 loops on your hook.
- Yarn over and pull through all 6 loops.
- Chain one to secure the stitch.
- Anatomy of the Daisy Stitch
- Identify the "eye" of the stitch and the space between the last two legs of the stitch you just worked into.
- Daisy Stitch Repeat
- Insert your hook into the eye, then pull up a loop.
- Insert the hook between the last two legs of the stitch, yarn over and pull up a loop.
- Insert your hook into the last worked stitch, yarn over and pull up a loop.
- Insert your hook into the next two stitches, pulling up a loop each time.
- Yarn over and pull through all six loops, then chain one.
Continuing the Pattern
- Single Crochet to the End of the Row
- End with a half double crochet in the same stitch you end on.
- Start the Next Row
- Chain 1 and turn your work.
- Single crochet into the top of the half double crochet from the previous row.
- Single crochet into the eye of the daisy stitch, skip a stitch, then place two single crochets into the next eye.
- Repeat this pattern across, for a total of 25 times.
- Single Crochet Across
- Chain one, turn your work, and single crochet all the way across the row.
Finishing the Edge
- Work the Side Edges
- Rotate your work and place four single crochets along the side.
- Rotate your work again, chain 1, and place slip stitches across the top edge. Make sure not to slip stitch too tightly to prevent the work from curving.
- Once you reach the end, rotate your work once more and place five single crochets along that edge.
Completing the Keychain

- Prepare for Finishing
- Leave a long tail for weaving in.
- Insert the keychain ring and fold the crochet piece over with the wrong sides facing each other, ensuring the daisy stitch pattern is on the outside.
- Stitch the Ends Together
- Using a darning needle, stitch across the two ends to bind them.
- Move the ring up to the seam and sew back and forth below the ring to secure it in place.
- Weave in Ends
- Once secure, weave in the ends and trim the tails.
Conclusion
- The video concludes with encouragement to like, share, subscribe, and follow their other social media accounts.
This tutorial provides a structured pattern to create a charming daisy stitch keychain with a detailed finish.


Leave a Reply