
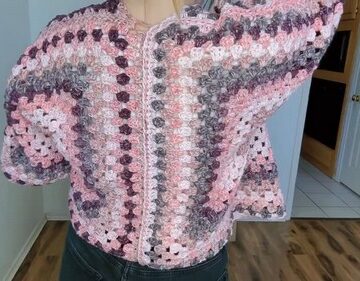
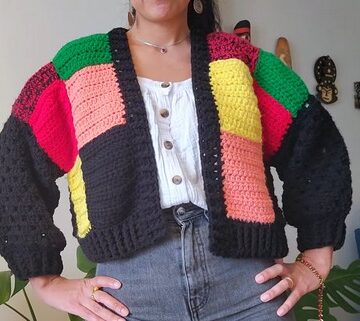
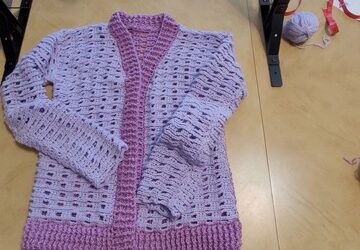
The Crochet Ribbon Tie-Front Cardigan is a stylish, cozy addition to your wardrobe, perfect for adding a touch of elegance to any outfit. This pattern is easy to follow, making it a great choice for both beginners and seasoned crocheters. The cardigan is created using a simple 3-row repeat pattern and is made up of five panels: a back panel, two front panels, and two sleeves.
Crochet Ribbon Tie-Front Cardigan

The unique ribbon tie closure adds a charming and functional detail, making it an excellent choice for layering over your favorite tops or dresses. Customize your cardigan with your choice of yarn, and enjoy the versatile design that can be worn year-round.
Materials
- Yarn: Four-weight yarn (100% acrylic recommended)
- Hooks: 6 mm crochet hook and 5.5 mm crochet hook
- Ribbon: Velvet ribbon, approximately 40 inches long
- Notions: Stitch markers, scissors, darning needle, measuring tape
Row Repeat Pattern
- Row 1: Double Crochet (DC)
- Row 2: Double Crochet (DC)
- Row 3: Mesh/Filet Stitch (DC, Chain 1, Skip 1)
Note on Stitching after Mesh Row:
When working a DC row after a mesh row (Row 3), work 1 DC into the stitch and 1 DC into the chain space to maintain the stitch count.
Panel Construction

Back Panel
- Hook: 6 mm
- Foundation: Chain 73
- Row 1 (DC): Skip 2 chains, 1 DC in the 3rd chain and in each chain across (71 stitches total).
- Row 2 (DC): Chain 2 (does not count as a stitch), turn. 1 DC in the first stitch and in each stitch across (71 stitches total).
- Row 3 (Mesh): Chain 2, turn. 1 DC in the first stitch, then repeat **Chain 1, skip 1 stitch, 1 DC* across (71 stitches total).
- Repeat: Continue repeating the 3-row sequence for a total of 38 rows.
- Finish: Fasten off and leave a long tail for sewing.

Front Panels (Make 2)
- Hook: 6 mm
- Foundation: Chain 35
- Rows 1-31: Work the same 3-row repeat pattern (DC, DC, Mesh). At the end of Row 1, you should have 33 stitches. Repeat until the end of Row 31.
- Row 32 (DC): Chain 2, turn. DC Decrease (DC Dec) over the first 2 stitches, then DC across.
- Row 33 (Mesh): Chain 2, turn. Work Mesh pattern, stopping with 4 stitches remaining. Chain 2, turn.
- Row 34 (DC): Chain 2, turn. DC Dec over the first stitch and the next chain space, then DC across.
- Row 35 (DC): Chain 2, turn. DC across until the last 2 stitches. DC Dec over the last 2 stitches.
- Row 36 (Mesh): Chain 2, turn. Work Mesh pattern across with no decrease.
- Row 37 (DC): Chain 2, turn. DC across until the last chain space/stitch. DC Dec over the last chain space and last stitch.
- Row 38 (DC): Chain 2, turn. DC Dec over the first 2 stitches, then DC across.
- Finish: Fasten off and leave a long tail for sewing. Repeat for the second front panel.

Sleeves (Make 2)
- Hook: 6 mm
- Foundation: Chain 53
- Row 1 (DC): Skip 2 chains, 1 DC in the 3rd chain and in each chain across (51 stitches total).
- Rows 2-35: Continue repeating the 3-row sequence for a total of 35 rows.
- Row 36 (Cuff): Chain 1, turn. Work Single Crochet Decrease (SC Dec) across the entire row, ending with 1 SC in the very last stitch.
- Row 37 (Cuff): Chain 1, turn. Work SC Dec across the entire row.
- Finish: Fasten off and leave a long tail for sewing.
Assembly and Finishing

Assembly
- Seam Sleeves: Fold each sleeve in half lengthwise and use the long tail and darning needle to sew the seam closed.
- Seam Shoulders/Sides: Place the panels with wrong sides facing out (right sides facing in).
- Shoulders: Sew the top edges of the two Front Panels to the top edge of the Back Panel.
- Side Seams: Sew the Front and Back Panels together from the bottom hem up, leaving a 7-inch opening at the top for the armhole.
- Attach Sleeves: Use stitch markers to clip the sleeve around the 7-inch armhole opening. Use the sleeve's tail to sew the sleeve to the body.
Trim (Edging)
- Hook: Switch to the 5.5 mm hook.
- Row 1 (SC): With the right side facing you, attach the yarn at one of the bottom front corners. Chain 1, and work 3 Single Crochets (SC) into that corner space.
- Continue to work SC evenly around the entire perimeter of the cardigan.
- Finish: Slip stitch to the first SC and fasten off.
Ribbon Tie
- Thread the velvet ribbon through the space closest to the top edge of the collar, making sure the ribbon is even on both sides.
- Tie a simple knot, followed by a decorative bow to finish the look.


Leave a Reply