
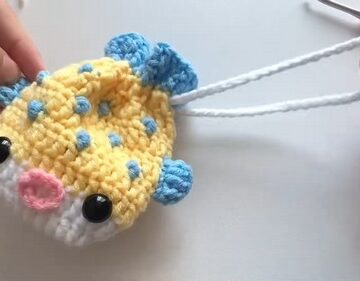
The amigurumi bee keychain pattern is a delightful and easy project that will add a touch of whimsy to your accessories. Whether you’re a beginner or an experienced crocheter, this pattern offers a simple way to create a cute bee keychain with minimal materials.
Crochet Bee Keychain

The final product can be used as a keychain, bag charm, or even a fun little gift for a friend. With its colorful yellow and pink body, sweet wings, and tiny eyes, it’s sure to catch everyone’s attention. Plus, the customizable nature of the design allows you to experiment with different yarn colors, making this pattern perfect for personalizing your creations.
Head Pattern
- Magic Ring: Start with a magic ring and make 8 single crochets (SC) inside it.
- Round 2: Increase in each stitch for a total of 16 SC.
- Round 3: Repeat the pattern of 1 SC followed by an increase, for a total of 24 SC.
- Round 4: Repeat the pattern of 2 SC followed by an increase, for a total of 32 SC.

- Rounds 5-10: Create six rounds of single crochet stitches around the piece.
- Round 11: Begin decreasing by repeating the pattern of 2 SC followed by a decrease, for a total of 24 SC.
- Round 12: Repeat the pattern of 1 SC followed by a decrease, for a total of 16 SC.
- Stuffing: Stuff the head with cotton or dakron.
- Closing: Close the head by doing eight decrease stitches in a row.
Body Pattern
- Magic Ring: Start with a magic ring and make 6 SC inside it.
- Yarn Change: Switch to yellow yarn on the last SC of the magic ring.
- Round 2: Increase in each stitch for a total of 12 SC, and change to pink yarn on the last stitch.
- Round 3: Make 12 SC all around, and change back to yellow yarn on the last stitch.
- Round 4: Make 12 SC all around, and change back to pink yarn on the last stitch.
- Round 5: Make 12 SC all around.

- Finishing: Finish the body by skipping a stitch and making a slip stitch to end.
Wing Pattern
- Starting Chain: Create a starting chain of 3 stitches, plus one more.
- First Row: In the third chain from the hook, make 4 SC. Make 1 SC in the next chain. In the last chain, make 4 SC.
- Second Row: Continue on the opposite side, making 1 SC.
- Closing: Finish by making a slip stitch to the first SC and cut the yarn.

Eye Pattern
- Large Eye: Start with a magic ring and make 8 SC inside it. Increase in each stitch for a total of 16 SC. Finish with a slip stitch.
- Small Eye: Start with a magic ring and make 8 SC inside it. Finish with a slip stitch.
Assembly
- Stitch the head and body together using pins.
- Attach the wings to the back with hot glue.
- Attach the small eye on top of the large eye with hot glue.

- Attach the plastic doll eyes and embroider a mouth with black thread.
Leave a Reply