
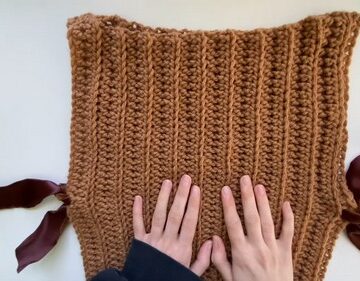
The Crochet Polo Shirt pattern is a timeless and stylish DIY project that brings a modern twist to a classic wardrobe staple. This pattern guides you through creating a perfectly fitted polo shirt with a striking six double crochet stitch design. Ideal for beginners and intermediate crocheters, the pattern is broken down into three easy steps: crochet the panels, assemble them, and add finishing touches like sleeves, a collar, and a pocket.
Crochet Polo Shirt

You can personalize this shirt with different color combinations, making it perfect for any season or occasion. Whether you're looking to create a cozy piece for yourself or a thoughtful handmade gift, this crochet polo shirt will undoubtedly be a favorite in your wardrobe.
Main Stitch Pattern (6-DC Group)
The core pattern consists of groups of six double crochet (DC) stitches separated by a chain-one (ch 1) space.
Row 1: Foundation Row
- Chain: Create a foundation chain that measures the total shoulder-to-shoulder width of the shirt.
- Starting Stitch: Chain 3 more (ch 3). This counts as your first double crochet (DC).
- First Group: Skip the first 3 chains from the hook, and make a DC into the 4th chain.
- Continue making DC stitches until you have a total of 6 stitches (counting the starting ch 3 as the first).
- Space: Chain 1 (ch 1).
- Skip: Skip 1 chain in the foundation row.
- Next Group: Make 6 DC stitches into the next 6 chains.
- Repeat: Continue the sequence of (Ch 1, skip 1 chain, 6 DC) across the entire row.

Rows 2, 3, 4, etc.: Pattern Rows
- Turn your work.
Start the Row:
- Option 1 (Standard): Chain 3 (ch 3), which counts as your first DC.
- Option 2 (Preferred in video): Make a Single Crochet (SC) in the same stitch, then make another SC into the second loop of the first SC.
- This acts as the first stitch.
- DC Group: Make DC stitches into the next stitches until you have a total of 6 stitches (including the starting stitch).
- Space: Chain 1 (ch 1).
- Skip: Skip the chain-one space from the previous row.
- Repeat: Make 6 DC stitches into the next 6 stitches.
- Continue: Repeat the sequence of (Ch 1, skip ch-1 space, 6 DC) across the row.
Color Change Row (Half Double Crochet Row)
This row is worked after a set number of the main pattern rows (the video example uses 4 rows of the main color).
- Change Color: After the last DC row, chain 1 and fasten off the first color.
- Turn your work.
- Attach New Color: Insert the new color (e.g., white) and chain 1 to secure it.
- HDC Row: In that same space, make a Half Double Crochet (HDC).
- Continue making one HDC in every stitch and one HDC into the chain-one spaces from the previous row.
- This row fills the gaps.
- Repeat: Once complete, change back to the main color and repeat the 4 rows of the main DC pattern, alternating colors to create stripes.
Assembly and Finishing

Joining the Panels
- Once all three panels (one back, two front) are the same length, lay them out.
- Mark Sleeve/Shoulder: Use stitch markers to define the armhole opening (13 cm from the edge) and the shoulder seam (9 cm from the collar opening).
- Sew: Join the side seams (from the bottom up to the armhole marker) and the shoulder seams using your preferred method (the video suggests sewing from the wrong side for the body and the right side for the shoulder for a neater look).
Sleeves
- Attach Yarn: Join the yarn at the bottom of the armhole opening.
- Foundation: Work a row of HDC around the armhole opening, placing one HDC in each available space.
- Slip stitch to join the round.
- Sleeve Pattern: Chain 3 (counts as first DC) and begin working the 6-DC Group Pattern in the round (6 DC, ch 1, skip 1 stitch, 6 DC, etc.).
- Repeat: Continue this pattern, joining with a slip stitch at the end of each round and turning your work, until the sleeve reaches the desired length.
Collar and Button Plackets

The video details the plackets (side openings for buttons) and the polo neck collar.
Button Plackets (Front Opening):
- Row 1 (SC): Work a row of Single Crochet (SC) up the front opening of the shirt (2 SC per double crochet row space).
- Buttonhole Side (Left for a boy): Work subsequent rows of SC, creating buttonholes by chaining 2 (ch 2), skipping 2 stitches, and continuing with SC.
- Button Side (Right): Work a simple three rows of SC.
Polo Collar:
- Start: Join yarn at the back neck/collar line.
- Increase Rows: Work rows of HDC around the collar line.
- You will increase at the front corners (making 2 HDC in the corner stitches) for the first few rows to shape the collar.
- Straight Rows: Continue working straight rows of HDC (no more increases) until the collar reaches the desired length to fold over.
The pocket is constructed separately and then sewn onto the front panel of the shirt.
The video shows how to sew it cleanly so that the contrasting yarn color does not show through the front of the work.

Leave a Reply