
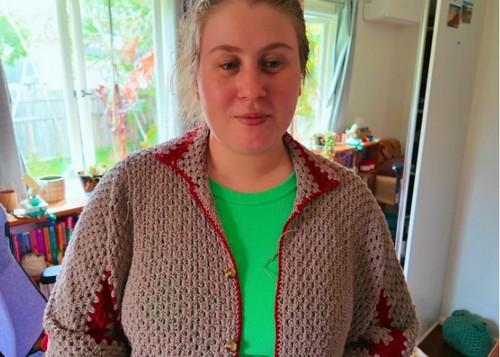
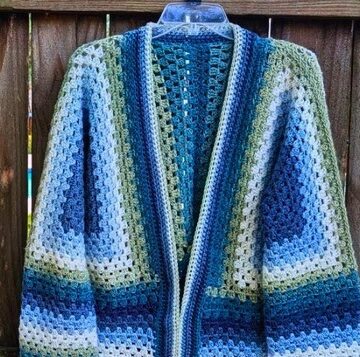
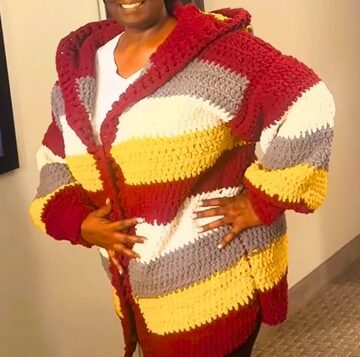
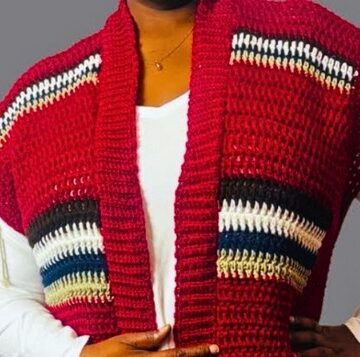
The Relaxagon Shirt crochet pattern is a stylish and modern take on classic granny stitch construction, designed to create an oversized, cardigan style shirt with a relaxed fit. Built from two large hexagon based panels, this pattern focuses on simple shaping, clean lines, and flexible sizing, making it ideal for crocheters who enjoy customizable garments.
Crochet Relaxagon Shirt

The design allows you to easily adjust length, width, and color placement to suit your personal style, whether you prefer a cropped look or a longer layering piece. Finished with button bands, a collar, and neat edging, the Relaxagon Shirt is perfect for everyday wear, transitional seasons, and creative color combinations that make the garment truly your own.
Construction Overview
- The Relaxagon Shirt is made using granny stitch fabric
- The garment is constructed from two large hexagon shaped panels
- Panels form the front and back of the shirt
- Final shaping is achieved during assembly and finishing
Materials
- Yarn in a main color and an accent color
- 3 mm crochet hook
- Stitch markers
- Buttons
- Tapestry needle
- Scissors
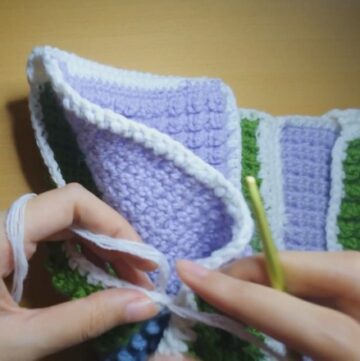
Starting the Relaxagon Panels
- Create two identical panels for the front and back
- Begin each panel with setup rounds to establish the hexagon shape
- Work increases evenly to maintain six distinct sides
- Use measurements to determine stitch count and panel size
- Crochet both panels at the same time to keep sizing consistent

Adding Color Stripes
- Introduce the accent color near the center of each panel
- Work two decorative stripes evenly across the rounds
- Return to the main color after completing the accent section
Building Length
- Continue working in full rounds until the panel reaches the desired underarm length
- Measure the piece while worn or laid flat to ensure proper fit
- Stop increasing once the main body size is achieved

Adding Side Length
- Work back and forth across selected sections of the panel
- Add extra rows only to the sides instead of the full circumference
- Use this method to increase body length without widening the garment
Joining the Panels
- Align the two finished panels with right sides facing
- Join along the shoulders and sides using slip stitch seams
- Leave openings for armholes

Button Bands
- Crochet button bands along both front edges
- Space stitches evenly to align with granny stitch gaps
- Ensure bands are firm enough to support buttons
Collar
- Work the collar around the neckline opening
- Incorporate both main and accent colors for visual detail
- Adjust collar width based on personal preference

Border
- Add a single crochet border around all outer edges
- Work evenly to create a clean and finished look
Finishing
- Sew buttons onto one side of the shirt
- Use granny stitch spaces as natural buttonholes
- Weave in all loose ends securely
- Block the finished shirt to set shape and drape
https://www.youtube.com/watch?v=8JrphH-er1Y
Leave a Reply