
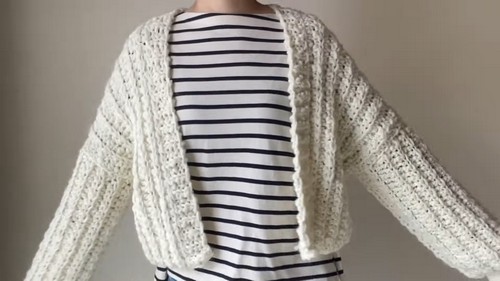
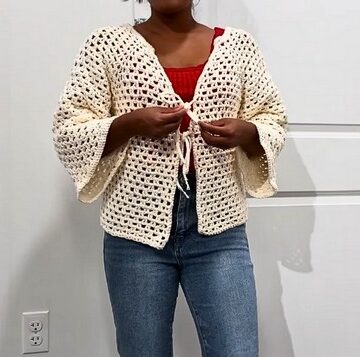
This oversized short crochet cardigan pattern is designed for anyone who loves cozy textures and modern silhouettes. Made with thick slub yarn and worked mostly in half double crochet through the back loop, the cardigan creates a beautiful knit-like ridge that feels warm and stylish.
Crochet Slub Yarn Cardigan
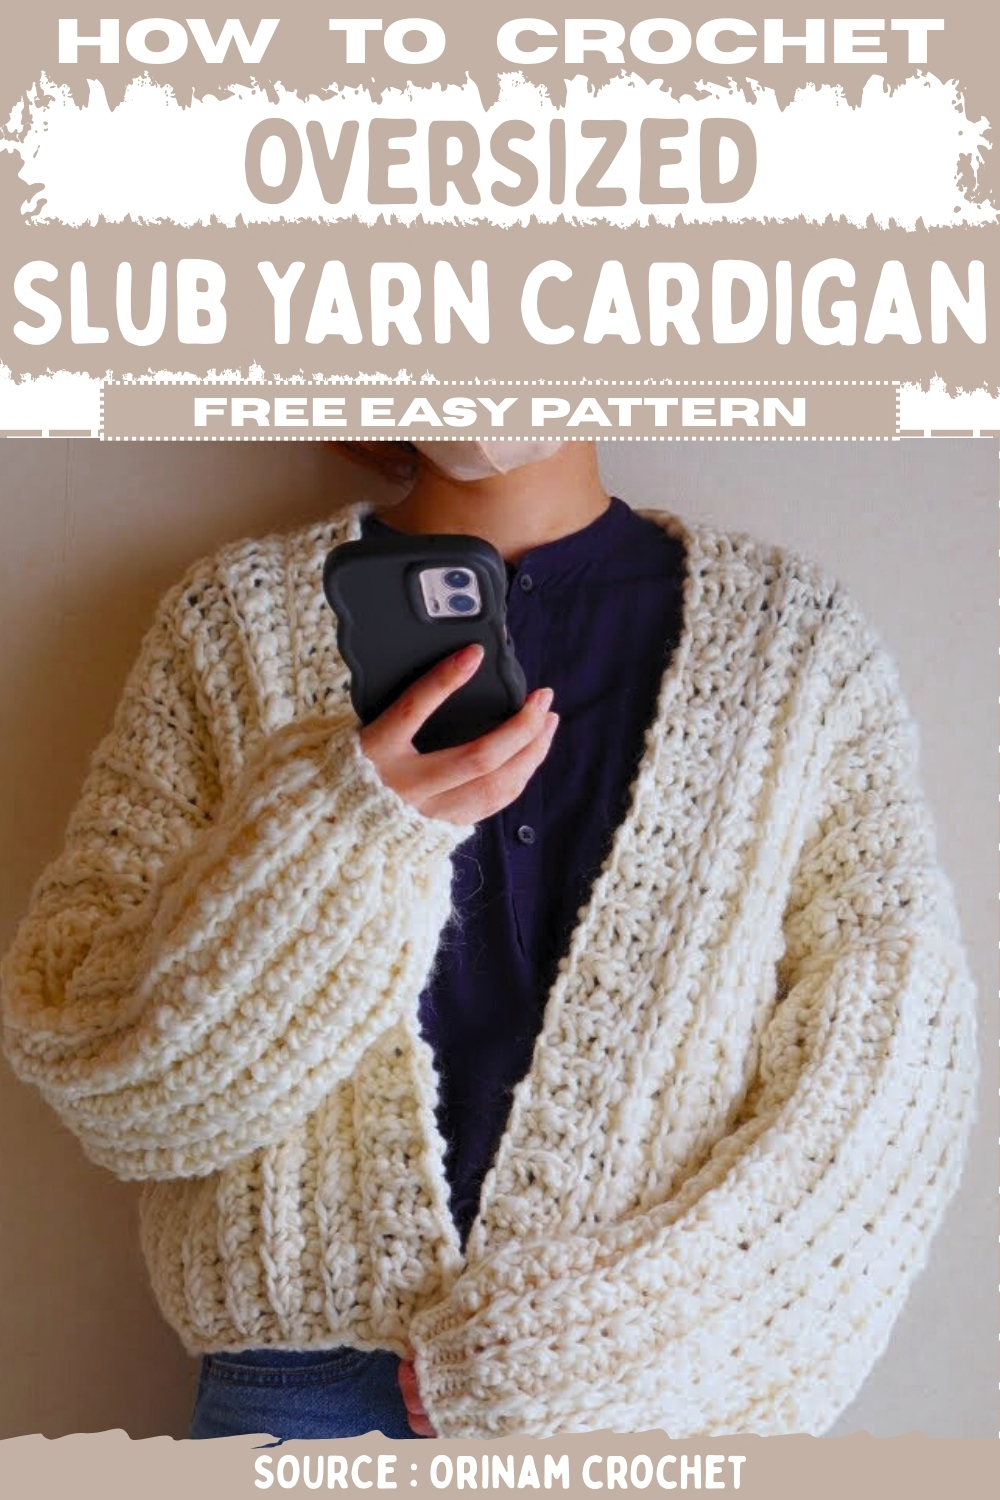
The relaxed fit makes it perfect for layering over everyday outfits, while the ribbed hem, cuffs, and front band add structure and polish. This pattern is versatile and beginner-friendly, with simple construction worked in flat panels, making it easy to customize the length, width, or sleeve size to suit your personal style.
Materials
- Yarn Yanagiya Milky Slub or similar bulky or super bulky slub yarn
- 10mm crochet hook
- 7mm crochet hook
- Tapestry needle
- Scissors
Stitch Notes
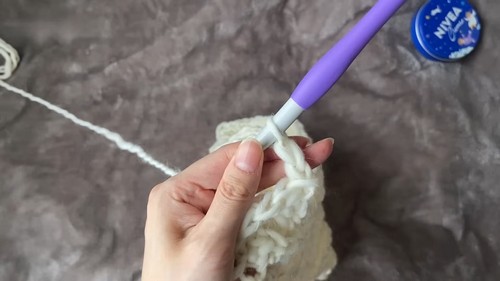
- Sl St w YO means slip stitch with yarn over
- BL Only means working in the back loop only
- All rows use BL Only unless stated otherwise
Part 1 The Body Front and Back Panel
Starting Chain
- Chain 77 stitches or adjust for desired length
Row 1 Foundation
- Chain 1
- Work into the back bump of the chain
- Sl St w YO in the second back bump from hook and next 2 stitches
- HDC in the next 71 stitches
- Sl St w YO in the last 3 stitches
Row 2
- Chain 1 and turn
- Sl St w YO in BL Only for first 3 stitches
- HDC in BL Only for next 71 stitches
- Sl St w YO in BL Only for next 2 stitches
- Sl St w YO into the full stitch head of the last stitch
Repeat
- Repeat Row 2 until you have 13 rows total
Shaping the Neck and Shoulder Right Side
Row 14 Partial Row
- Work in pattern and stop after 37 stitches
Rows 15 to 20 Shoulder Section
- Turn at the 37th stitch
- Single crochet in BL Only then chain 1
- Continue working the pattern over 37 stitches only
- Work a total of 7 rows for this section
Rejoining the Body Left Side
Row 21
- Chain 41 stitches
- Work into the back bump of the chain
- Sl St w YO in second back bump and next 2 chains
- HDC in back bump of remaining 37 chains
- Continue working across the remaining 37 stitches of the body
Rows 22 to 33
- Continue the full 77 stitch pattern for 13 more rows
Finish
- Fasten off and set body panel aside
Part 2 The Sleeves Make Two
Starting Chain
- Using 10mm hook chain 36 stitches
Row 1 Foundation
- Switch to 7mm hook
- Chain 1 and work into the back bump
- Slip stitch in second back bump and next 5 stitches
- Switch to 10mm hook
- HDC in remaining 30 stitches
Row 2
- Chain 2 and turn
- HDC in BL Only for 30 stitches
- Switch to 7mm hook
- Slip stitch in BL Only for next 5 stitches
- Slip stitch into full stitch head of last stitch
For Row 3
- Chain 1 and turn
- Slip stitch in BL Only for 6 stitches
- Switch to 10mm hook
- HDC in BL Only for 30 stitches
Repeat
- Repeat Rows 2 and 3 until sleeve measures 25 rows or desired length
Finish
- Fasten off leaving a long tail for seaming
Part 3 Assembly
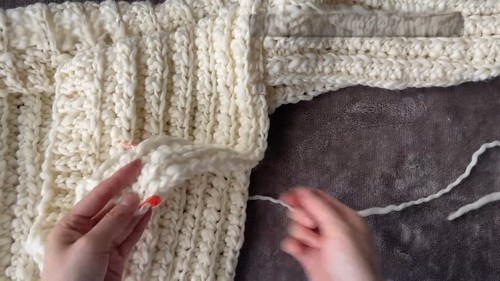
Attach Sleeves
- Fold the body panel in half at the shoulders
- Sew the top 36 stitches of each sleeve to the body
- Center sleeves with 18 stitches on front and 18 on back
Sew Seams
- Fold sleeves in half
- Sew sleeve seams and underarm seams down the body sides
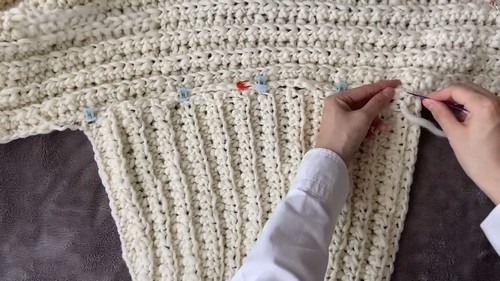
Part 4 Front Ribbing Button Band and Neckband

Starting Chain
- Attach yarn at bottom front corner
- Chain 5 stitches
Row 1
- Work into the back bump
- Sl St w YO in second back bump and next 3 stitches
Join to Body
- Slip stitch twice into the body edge
Row 2
- Turn and skip joining stitches
- Sl St w YO in BL Only for 3 stitches
- Sl St w YO into full stitch head of last stitch
Row 3
- Chain 1 and turn
- Sl St w YO in BL Only for all 4 stitches
- Slip stitch twice into next body edge stitch
Repeat
- Repeat Rows 2 and 3 along the front edge, around the back neck, and down the opposite side
- At V-neck corners work two slip stitches together to reduce bulk
Finish
- Fasten off and weave in all ends
Leave a Reply