
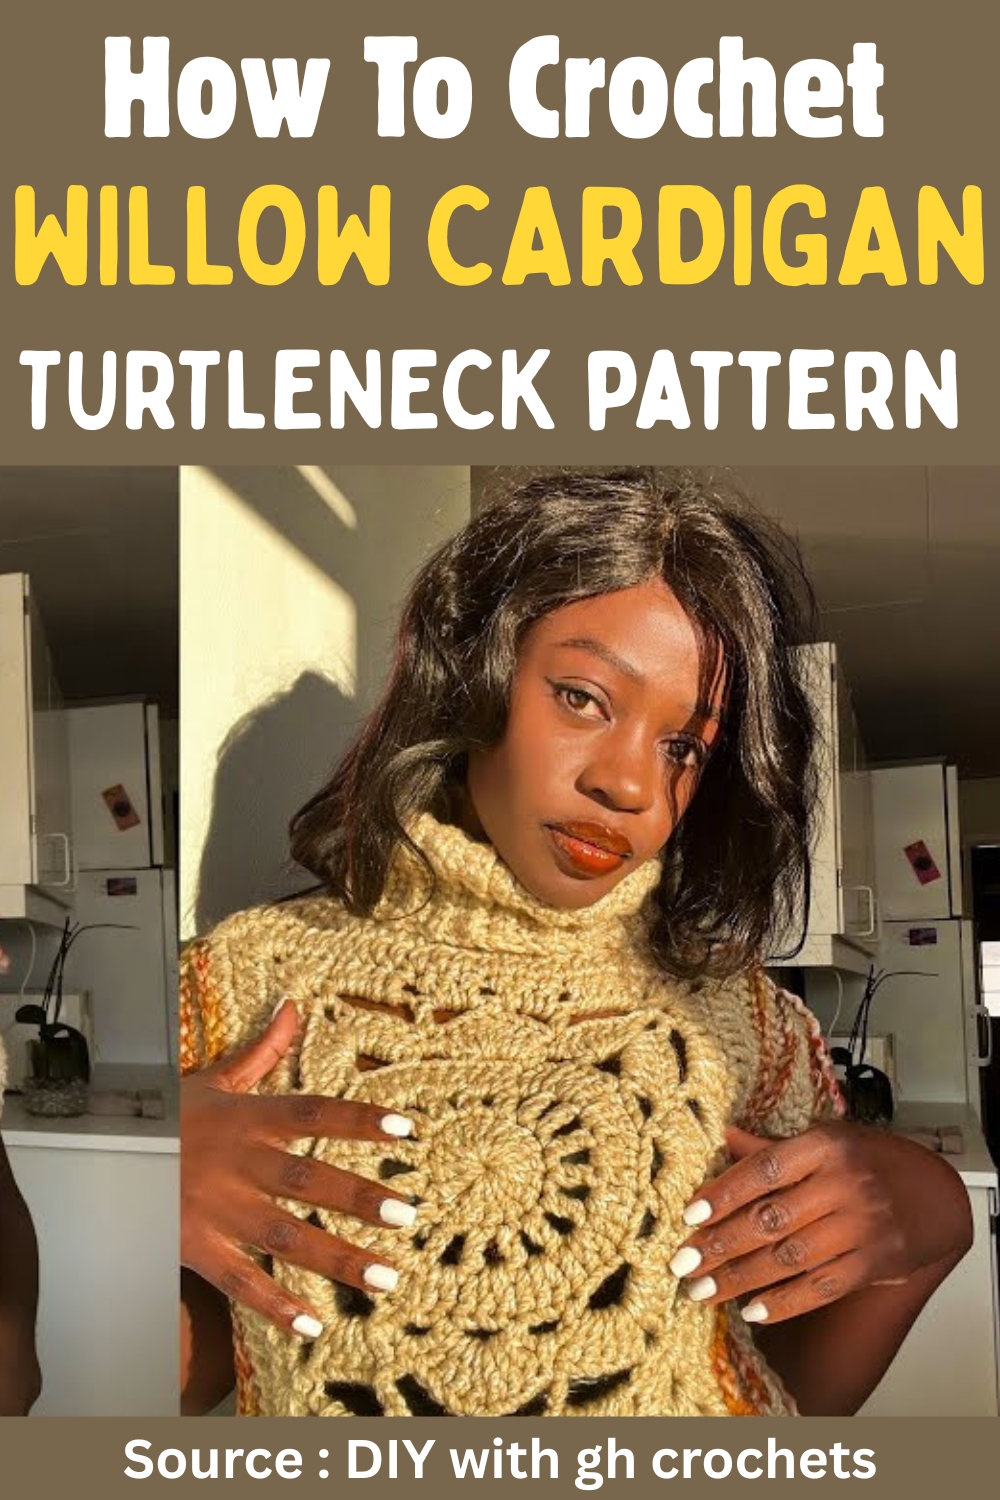
This Crochet Turtleneck Willow Granny Square Cardigan pattern celebrates the charming blend of classic craftsmanship and contemporary style. This delightful creation is more than just a piece of clothing—it's a warm hug of nostalgia and modern chic that you craft with your very own hands. With its elegant turtleneck and whimsical willow granny square motif, this cardigan is a fashion statement that speaks to the soul of those who appreciate the beauty of handmade treasures.
Crochet Turtleneck Willow Granny Square Cardigan

Materials Needed:
- Bea yarn, 100 grams, acrylic, 100 meters.
- Recommended hook size: 8-9 mm (but a 7 mm hook is used in the tutorial).
Starting the Granny Square:
- Make a loop and chain three. Slip stitch into the first loop to create a circle.

- Chain three (counts as your first double crochet).
- Work 15 more double crochets into the loop (total of 16 double crochets).
- Slip stitch to join at the top of the chain three.
Expanding the Granny Square:
- Chain four (where the first three chains count as a double crochet and the fourth chain as a chain one space).
- In each space around the circle, work one double crochet and one chain. Repeat until you have 16 double crochets and chain one space. Slip stitch to join.

Creating the Corners:
- Chain three as the first double crochet.
- In each chain-one space, work two double crochets, then a double crochet in the top of each previous double crochet from the last round.

To start forming corners:
- Chain one, then single crochet, chain five, skip two spaces, single crochet in the next to create your first corner.
- Repeat the pattern to create four corners.

Final Rounds of the Square:
- Continue following the pattern instructions to expand the square, creating more intricate corner designs with each round, until your square reaches the desired size.
- The final row instructions detail switching between single and double crochets in the corners and spaces to create a delicate edge around the square.

Making the Cardigan:
- Create two large granny squares for the front and back pieces.
- Stitch the squares together at the shoulders and sides, leaving openings for the arms and neck.
- For the armholes and the bottom of the cardigan, add rows of double crochets to create a ribbed look using front post and back post double crochets.
- For the neckline, work a chain that fits loosely around your head.
- Single crochet in each chain and then work single crochets in the back loops only for a stretchy ribbed neckpiece.
- Slip stitch the ends of the neckpiece together and attach it to the neckline of the cardigan.

Finishing Touches:
- The final touches include working on the waist and wrist ribbings by continuing the pattern of front post and back post double crochets.
- Optionally, additional rows of single crochets can be added for a more finished look.

Video Guide


Leave a Reply