
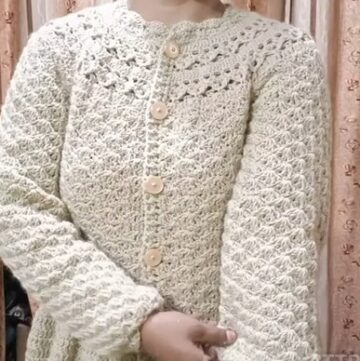
The Suzette Stitch Raglan Cardigan is a timeless piece that combines comfort, style, and the versatility of crochet. Whether you're a beginner or an experienced crocheter, this pattern offers an easy-to-follow guide for creating a cozy and chic cardigan. The use of the Suzette Stitch creates a textured, yet smooth fabric that's perfect for layering.
Crochet Suzette Stitch Cardigan
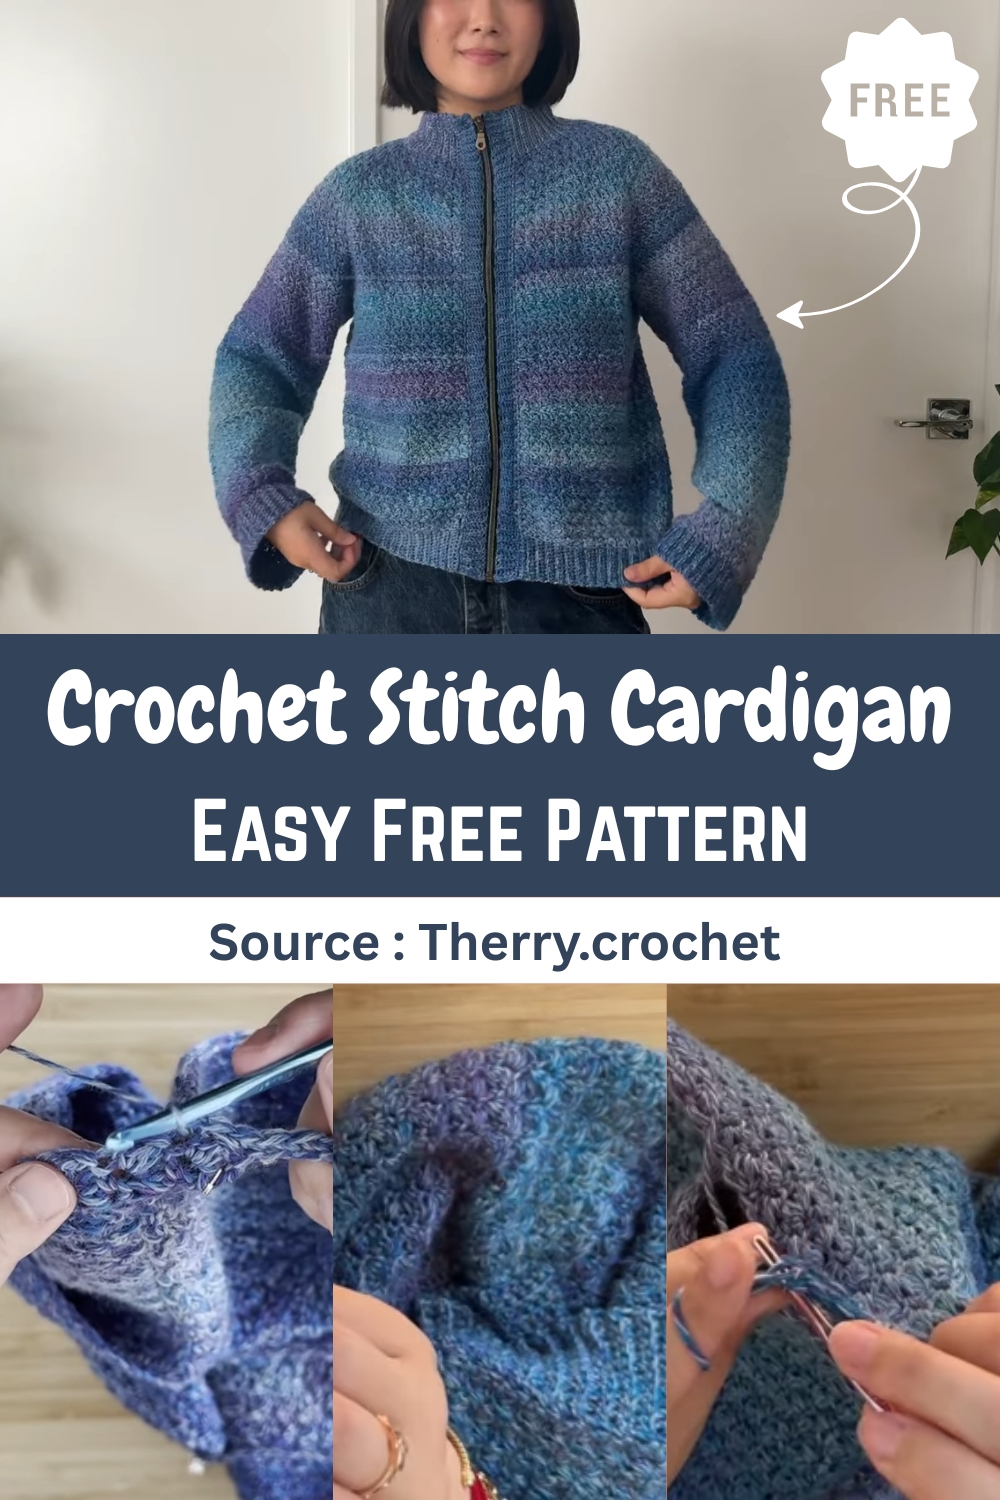
With clear instructions for both the yoke and body construction, you'll be able to craft a custom fit, making it ideal for any season. The raglan construction allows for freedom of movement and a flattering silhouette, while the ribbing details at the cuffs and collar add a polished touch. This pattern is customizable, allowing you to experiment with different yarns and colors to make it truly your own!
Yoke Setup and Row 1
- Materials: Weight 3 yarn, 5mm hook, stitch markers, measuring tape, darning needle, yarn snippers, pen and paper
- Foundation Chain: Chain an even number long enough to wrap comfortably around the base of your neck (e.g., 72 chains).
Calculations for Panels:
- Front Panels: 14 stitches each
- Back Panel: 28 stitches
- Sides: 8 stitches each
Row 1 (Single Crochet Row):
- Chain 1, single crochet into the second loop from the hook.
- Single crochet for Front Panel (14 stitches), Corner 1: Chain 1, single crochet into the next chain, mark the chain-1 space.
- Single crochet for the Side (8 stitches), Corner 2: Chain 1, single crochet into the next chain, mark the chain-1 space.
- Single crochet for the Back Panel (28 stitches), Corner 3: Chain 1, single crochet into the next chain, mark the chain-1 space.
- Single crochet for the Side (8 stitches), Corner 4: Chain 1, single crochet into the next chain, mark the chain-1 space.
- Single crochet for the last Front Panel (14 stitches).
Yoke Construction (Suzette Stitch)
- Suzette Stitch: (Single Crochet + Double Crochet) in the same stitch, skip the next stitch.
Rows 2-21 (or until ready to split):
- Chain 1, turn, start the row with (Single Crochet + Double Crochet) combo in the first stitch.
- Continue Suzette Stitch until you reach the chain-1 space marked by a stitch marker.
- Corner Increase: Work (Single Crochet, Chain 1, Double Crochet) into the chain-1 space.
- Continue Suzette Stitch until the next corner, repeating the Corner Increase process at all four corners.
- End the row with a Single Crochet in the last stitch.
- Repeat until the yoke fits comfortably from the base of your neck to just under your armpits.
Carving Out the Sleeves (Armholes)
Row to Carve Sleeves:
- Continue Suzette Stitch until you reach the first corner stitch marker.
- Work one single crochet into the first corner's chain-1 space.
- Chain the number of stitches for the armhole width (e.g., 14 chains), then work into the next stitch marker to connect the armhole.
- Continue Suzette Stitch across the Back Panel and repeat for the second armhole.
- Finish the row with Suzette Stitch across the Front Panel.
Body Construction
Row 1 of Body:
- Chain 1, turn, work Suzette Stitch until the stitch right before the chain section.
- Single crochet into the chain-1 space, then continue Suzette Stitch across the Back Panel and Front Panel.
- Finish the row with a single crochet in the last stitch.
Subsequent Rows:
- Chain 1, turn, continue Suzette Stitch across the row, skipping the first single crochet in the chain section.
- Repeat until the body reaches your desired length.
Sleeves
Sleeve Setup (Round 1):
- Join yarn at the bottom of the armhole, chain 1, and work (Single Crochet + Double Crochet) combo in the same stitch.
- Continue Suzette Stitch around the armhole, placing combos in the tops of the chains.
- End the round by joining with a slip stitch and chain 1.
Subsequent Sleeve Rounds:
- Repeat Round 1, joining and turning after each round.
- Continue until the sleeve reaches the desired length.
Ribbing
Ribbing (Sleeve/Bottom):
- Chain the height of the ribbing (e.g., 10 chains), and single crochet into each chain.
- Slip stitch into the next stitch of the base, turn, and single crochet back up the row in the back loop only.
- Repeat until the ribbing is complete, then seam the sides together.
Front Panel Ribbing (Button/Zipper):
- Work ribbing along the front edges and collar.
- For buttonholes, chain the number of stitches you want to skip when reaching the desired button placement.

Leave a Reply