
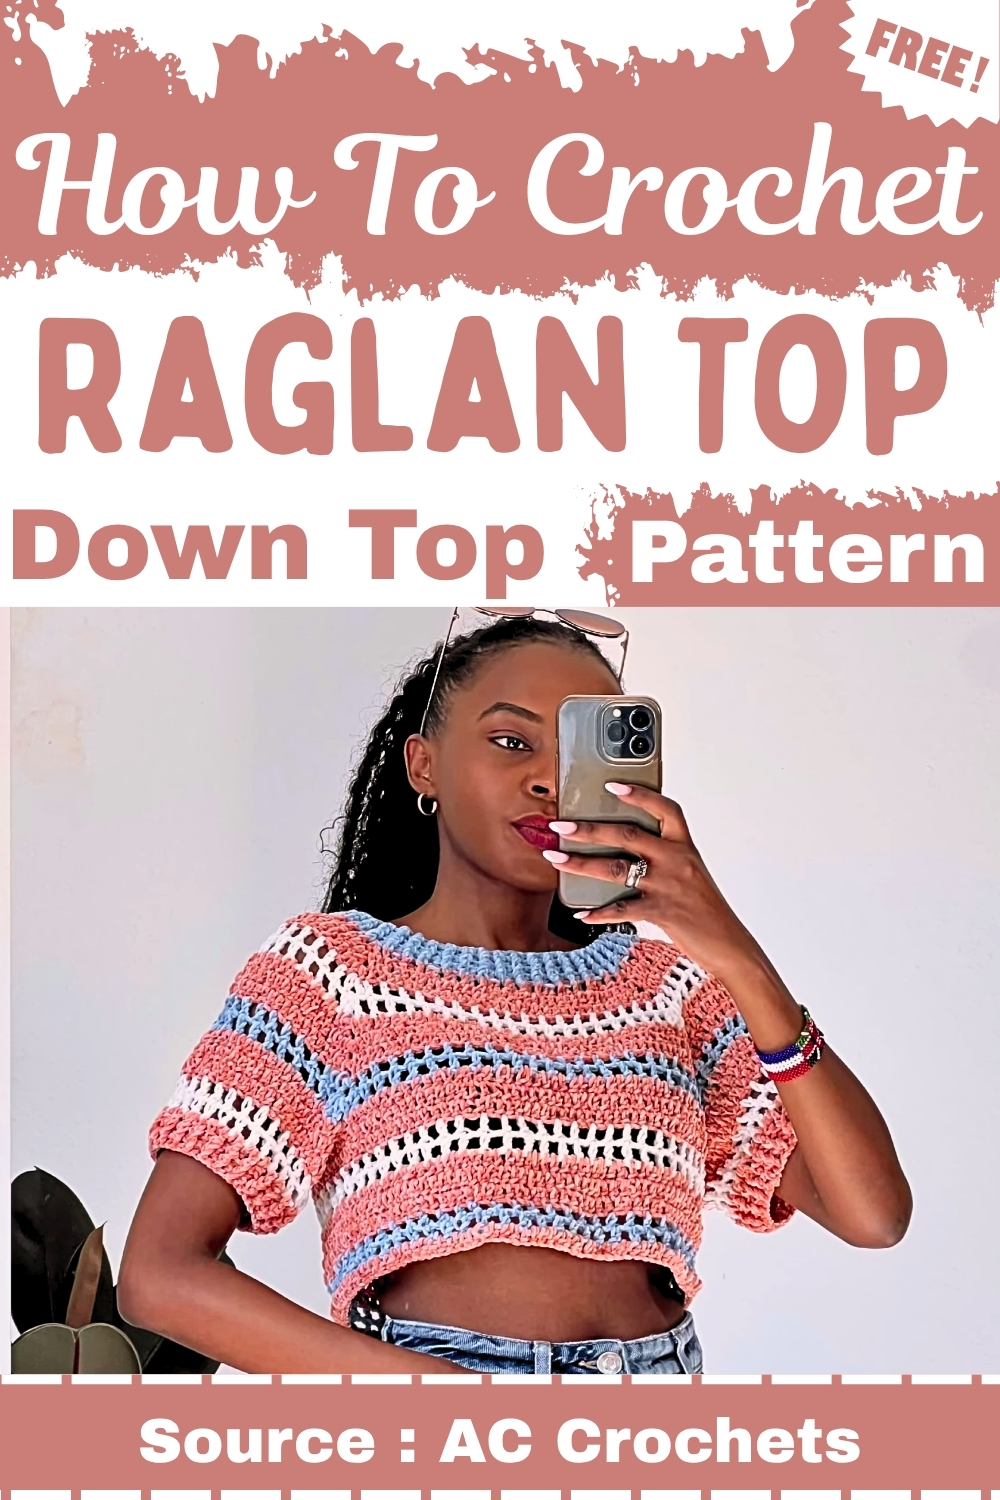
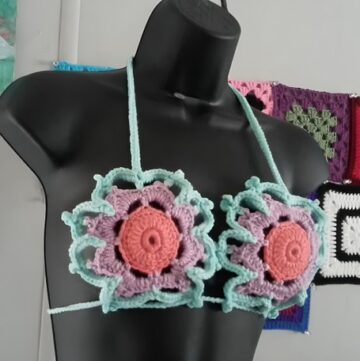
Crocheting a Raglan Top-Down Top is a rewarding project that allows crafters to create a seamless and comfortable garment that's perfect for any season. Starting from the neckline and working your way down, this method involves crocheting in rounds, gradually increasing to form the ‘raglan’ sleeve lines for a classic and versatile look.
How To Crochet A Raglan Top-Down
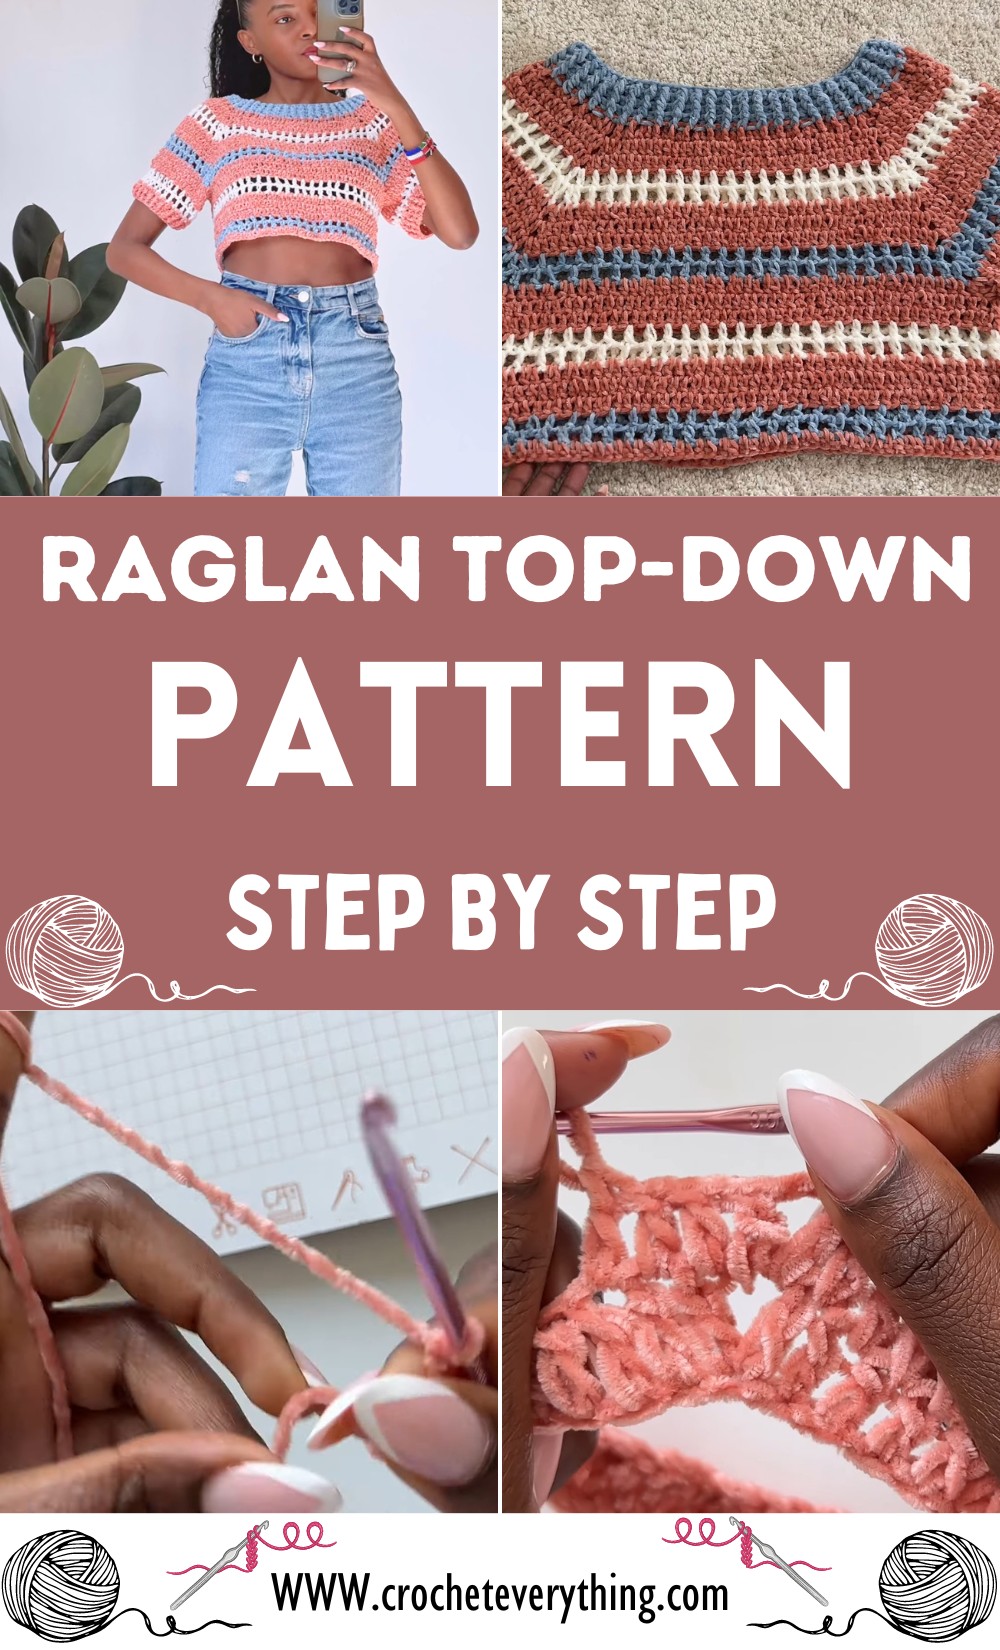
Whether you're a seasoned crocheter or just starting out, you'll find that making a top-down raglan is a satisfying endeavor that offers plenty of opportunities for customization. You'll need some essential tools like yarn, a crochet hook, and a few other accessories to get started. By following a series of straightforward steps, you can create a beautiful top that is both stylish and uniquely yours.
Materials
- Velvet yarn (50 grams, 174 yards per skein, recommend hook size 2.5 to 3 millimeter)
- Crochet hook (3.5 millimeters is used in the tutorial)
- Tape measure
- Yarn needle
- Scissors
- Notebook and pen for notes
Initial Preparation
Measure Your Size: Use your favorite t-shirt or sweater to determine the neckline size by laying it flat and measuring the back of the neckline.
Note Measurements: Write down the measurement; the tutorial example uses 7 inches for the neckline.
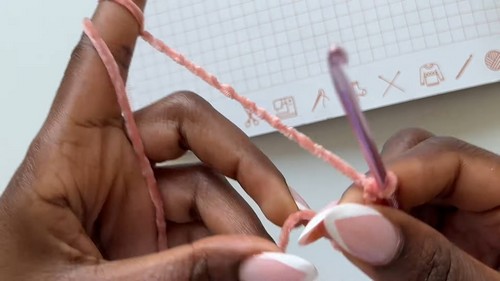
Create a Foundation Chain:
- Make a chain longer than your neckline measurement. Gauge the yarn to meet the desired width.
- Work in double crochets along this chain to reach the desired measurement. Count the stitches to reach your neckline measurement (e.g., 30 stitches for 7 inches).
Crochet Pattern
Starting the Top
Foundation Chain:
- Calculate the stitches needed for the entire neckline. Refer to your drawing diagram. Divide the back measurement into half for both starting and ending points at the back of the neckline.
- Create a stitch count pattern for the sleeves and the front part identical to the back. Make sure to include corner stitches.
- Example: 110 total stitches (30 back, 15 and 15 front, 23 for each sleeve side including corner stitches).
Join Chain:
- Make a chain of 110 stitches and join with a slip stitch to begin working in rounds.
Working the Rounds
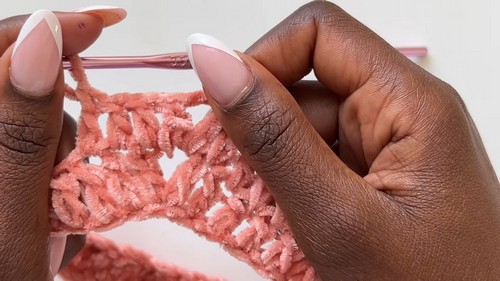
First Round:
- Chain 3 (counts as first DC), then DC in next stitch and across until first corner.
- Make corner stitch (DC, Chain 2, DC).
- Repeat DCs and corner stitches following your diagram until end of round. Join with slip stitch.
Subsequent Rounds:
- Repeat the pattern of double crochets and corners. Each round increases by one stitch post the corners, expanding the raglan lines.
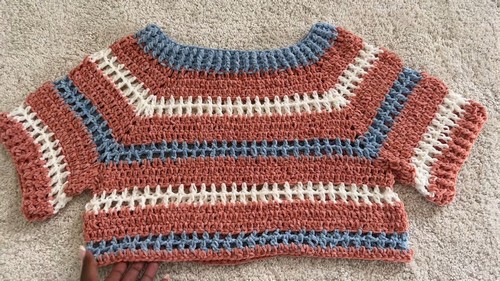
Body of the Top
Continue Working in Rounds:
- After achieving the desired yoke depth, stop increasing at the corners.
- Continue working straight rounds of DC till your top reaches the desired length.
Sleeves
Separating Sleeves:
- Chain across the underarm stitches where you want to split for the sleeves, generally a few stitches more than half the stitches on the sleeve sections.
- Continue body in rounds.
Sleeve Edges:
- Attach yarn at the underarm, chain up and work in rounds of DC around the sleeve opening.
- Decrease as necessary to shape the sleeve. Add ribbing or desired border.
Finishing
- Finish all loose ends with a yarn needle.
- Block your top if necessary to define the shape.
Additional Notes:
- Always count stitches in each round for consistent sizing.
- You can adjust the length of the body or sleeves by adding or reducing rounds.
- Customize the neckline, sleeve length, and finishing details as per your preference.

This step-by-step pattern is based on the instructions from the tutorial, simplified for clarity. Make sure to tailor the number of stitches and rounds according to your personal measurements and desired fit.
Leave a Reply