
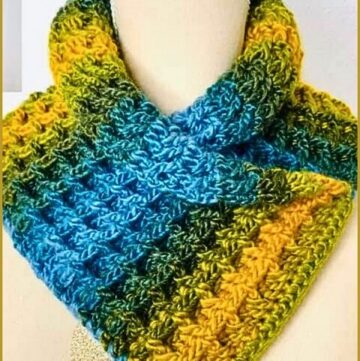
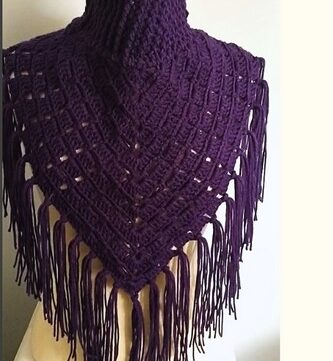
The Fairy Rings crochet rectangle shawl, also called the Wedding Ring shawl, is a lace style wrap built from a clean four row repeat. It creates open rings and boxed motifs connected by chain spaces, giving the fabric a light, flowing look that works beautifully as a scarf, shoulder wrap, or evening shawl. The stitch pattern is structured enough to look intricate, but it repeats predictably once you complete the setup row, making it a relaxing project for long rows.
Crochet Rectangle Shawl

This crochet Fairy Rings shawl is worked in a multiple of 9 plus 2, so it is easy to resize. You can make it narrow like a scarf, wide like a blanket style wrap, or anywhere in between. Length is also fully adjustable by repeating the four row sequence until you reach your preferred finish. The best part is the edges come out naturally decorative, especially when you end on the dc2tog and V stitch style row, so the shawl looks complete without needing heavy borders.
Materials
- Yarn of choice in a weight that matches your desired drape
- Crochet hook that matches your yarn
- Tapestry needle
- Scissors
- Measuring tape optional
Abbreviations
- ch = chain
- dc = double crochet
- sc = single crochet
- dc2tog = double crochet two together
- sp = space
- V st = V stitch which is 1 dc, ch 2, 1 dc in the same stitch or space
Pattern Notes
- This pattern is worked in rows.
- The foundation chain is a multiple of 9 plus 2.
- The setup row creates the first dc2tog and V stitch placements.
- After the setup row, the pattern repeats in four rows.
- Chain 5 spaces act as the large connecting loops between boxes.
- Boxes are formed by working dc, ch 2, dc into the two legs of a V stitch from the previous row.
- To keep the edges looking finished, it is recommended to end on a dc2tog and V stitch row rather than a chain 5 heavy row.
Special Stitch Instructions
How to Work the Partial dc2tog Used in This Pattern
- Yarn over and insert hook into the indicated stitch.
- Yarn over and pull up a loop.
- Yarn over and pull through two loops only.
- Leave the remaining loops on the hook so you can complete the dc2tog with the next stitch.
How to Complete the dc2tog
- Yarn over and insert hook into the next indicated stitch.
- Yarn over and pull up a loop.
- Yarn over and pull through two loops.
- Yarn over and pull through all loops on the hook to complete the dc2tog.
Foundation Chain
- Ch a multiple of 9 plus 2.
- The tutorial example uses 47 chains.
- Keep your chain relaxed so the edge does not tighten.

Setup Row
- Dc into the 7th ch from the hook, but only pull through two loops so you leave two loops on the hook.
- Skip 2 chains.
- In the next chain, complete the dc2tog by yarning over, inserting into that chain, pulling up a loop, pulling through two loops, then yarning over and pulling through all loops on the hook.
- Ch 2.
- Skip 2 chains.
- Work a V st in the next chain by placing 1 dc, ch 2, 1 dc in the same chain.
- Ch 2.
- Skip 2 chains.
- Start another dc2tog by working a dc into the next chain and stopping after pulling through two loops.
- Skip 2 chains.
- Complete the dc2tog in the next chain.
- Ch 2.
- Skip 2 chains.
- Work a V st in the next chain.
- Ch 2.
- Repeat the sequence across the row by alternating dc2tog sections and V stitches separated by ch 2 and skips.
- At the end of the row, ch 2.
- Work 1 dc in the last chain.
- Turn your work.
Four Row Repeat

Box Row With Chain 5 Connections
- Ch 8 and turn.
- Skip across to the first V st from the previous row.
- Work 1 dc in the first leg of the V st.
- Ch 2.
- Work 1 dc in the second leg of the V st to form a box.
- Ch 5.
- Jump to the next V st.
- Work 1 dc in the first leg of the V st.
- Ch 2.
- Work 1 dc in the second leg of the V st.
- Ch 5.
- Repeat box, ch 5 across the row.
- After the last box, ch 5.
- Dc into the 3rd chain of the turning chain.
- Turn your work.
V Stitch and dc2tog Row
- Ch 3 and turn.
- Locate the first ch 5 space.
- Work a V st into the middle of the ch 5 space by placing it into the 3rd chain of that space.
- Ch 2.
- Work a dc2tog over the two dc stitches of the next box by starting a dc in the first box dc and stopping after pulling through two loops, then finishing the dc2tog in the second box dc.
- Ch 2.

- Work a V st into the middle of the next ch 5 space.
- Ch 2.
- Work a dc2tog over the next box.
- Repeat the sequence across by alternating V st in the middle of each ch 5 space and dc2tog over each box.
- Near the end, work a V st in the turning chain space.
- Skip 2 chains.
- Work 1 dc in the next chain to finish the edge.
- Turn your work.
Box Row With Chain 5 Connections and Sc Finish
- Ch 3 and turn.
- Work 1 dc in the first leg of the first V st.
- Ch 2.
- Work 1 dc in the second leg of the V st to form a box.
- Ch 5.
- Jump to the next V st.
- Work 1 dc, ch 2, 1 dc across each V st to make boxes.
- Ch 5 between each box.
- At the end of the row, work 1 sc into the top of the turning chain to finish the edge neatly.
- Turn your work.
Dc2tog and V Stitch Row
- Ch 4 and turn.
- Work a dc2tog over the two dc stitches of the first box.
- Ch 2.
- Work a V st into the middle of the next ch 5 space by placing it into the 3rd chain of the space.
- Ch 2.
- Work a dc2tog over the next box.
- Ch 2.
- Work a V st into the middle of the next ch 5 space.
- Repeat across the row, alternating dc2tog over boxes and V st into the middle of ch 5 spaces.
- End with a dc2tog over the last box.
- Ch 2.
- Work 1 dc into the turning chain to finish the edge.

- Turn your work.
Continue the Shawl Length
- Repeat the four rows in order for the full pattern.
- Continue until the shawl reaches your desired length.
- For a cleaner finished look, stop after completing the dc2tog and V stitch style row instead of ending on a chain 5 heavy box row.
Finishing
- Fasten off.
- Weave in ends securely.
- Lightly block to open the lace and sharpen the ring shapes.
- Pin the edges straight while blocking so the rectangle shape sets neatly.


Leave a Reply